
In our recent post, How Malware Persists on macOS, we discussed the ways that threat actors can ensure that, once they’ve breached a macOS device, their malicious code will survive a logout or device restart. But persistence is only one element of the cyber kill chain, and some threat actors are known to shun persistence in favor of either one-time infections or a reusable vulnerability to remain stealthy. Then there’s the possibility of malware achieving its objectives and cleaning up after itself, effectively aiming to leave without a trace. Clearly, just looking for persistence items isn’t sufficient for threat hunting, so in this post we’ll take a deeper dive into how you can hunt for threats on a macOS device.
Gathering Information about the Mac
How you go about hunting down malware on a macOS endpoint depends a great deal on what access you have to the device and what kind of software is currently running on it. Of course, if you have a SentinelOne-protected Mac, for example, you can do a lot of your hunting right there in the management console or by using the remote shell capability, but for the purposes of this post, we’re going to take an unprotected device and see how we can detect any hidden malware on it. The principles remain the same if you have a protected device, and understanding what and where to look will help you use any threat hunting software you may already have more effectively.
The other thing to consider is whether you have access to the device directly, or only via a command line, or only via logs. For the purposes of this exercise, we’re going to assume that you have access to the command line and to any logs that can be pulled from it.
Step 1: Get a List of Users
The first thing you need to know is what user accounts exist on the Mac. There’s a couple of different ways of doing that, but the most effective is look at the output from dscl, which can show up user accounts that might be hidden from display in the System Preferences app and the login screen.
A command like
$ dscl . list /Users UniqueID
will show you a lot more than just listing the contents of the /Users folder with something like ls, which won’t show you hidden users or those whose home folder is located elsewhere, so be sure to use dscl to get a complete picture.
A downside of the dscl list command is that it will flood you with perhaps a 100 or more accounts, most of which are used by the system rather than used by console (i.e., login) users. We can narrow the list down by filtering out all the system accounts by ignoring those that begin with an underscore:
$ dscl . list /Users UniqueID | grep -v ^_

However, there’s nothing to stop a malicious actor from creating an account name that begins with an underscore, too:
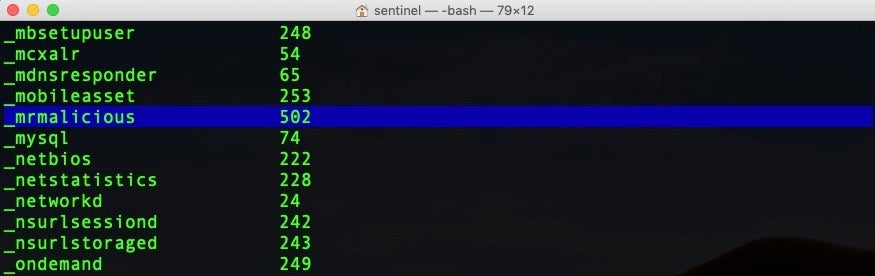
So you should both check through the full list and supplement the user search with other info about user activity. A great command to use here is w, which tells you every user that is logged in and what they are currently doing.
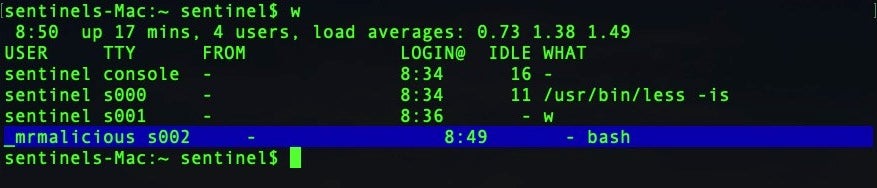
Here we see that user _mrmalicious, which wouldn’t have appeared if we filtered the dscl list by grepping out underscores, is using bash.
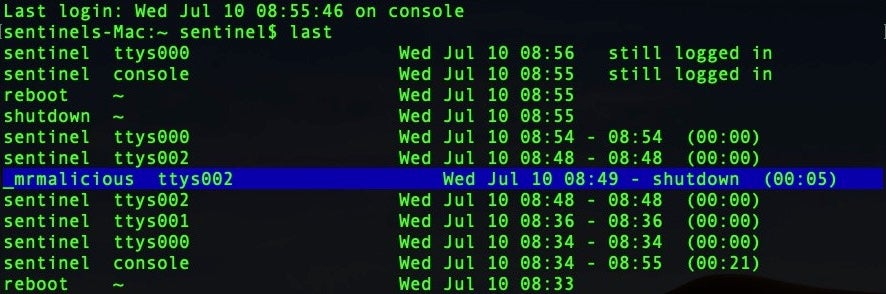
While the w utility is a great way to check out who is currently active, it won’t show up a user that has been and gone, so let’s supplement our hunt for users with the last command, which indicates previous logins.
$ last
Here’s a partial output, which suggests our user briefly logged in and then shutdown the system.
Step 2: Check for Persistence
We’ve already covered this in a previous post, so please head there first and check out some of the obvious and not-so obvious ways we describe that bad actors can use to persist across sessions on a Mac.
Remember also that when looking for LaunchAgents and other processes, you have to consider all users on the Mac, including the root user, which if present should be found at /var/root.
Here’s one piece of Mac malware that likes to run from there. A system-level LaunchDaemon that runs on every boot for all users calls a python script hidden inside an invisible folder in the root user’s Library folder.

We also need to consider persistence methods that take advantage of open ports and an internet connection, so we’ll start looking into those next.
Step 3: Check Open Ports and Connections
Malware authors interested in backdoors will often try to set up a server on an unused port to listen out for connections. A good example of this is the recent Zoom vulnerability, which forced the company to push out an emergency patch in an attempt to address a zero-day vulnerability for Mac users. Zoom have been running a hidden server on port 19421 that could potentially expose a live webcam feed to an attacker and allow remote code execution. This is a good example of just how easy it is for one privileged process to set up a persistent server that could act as a backdoor to easily evade detection by ordinary users, as well as macOS’s built-in security mechanisms.
To detect this kind of issue, we can use netstat and lsof to help check for this.
First, we use
$ netstat -na | egrep 'LISTEN|ESTABLISH'
to list services that are either listening for connections or already connected.
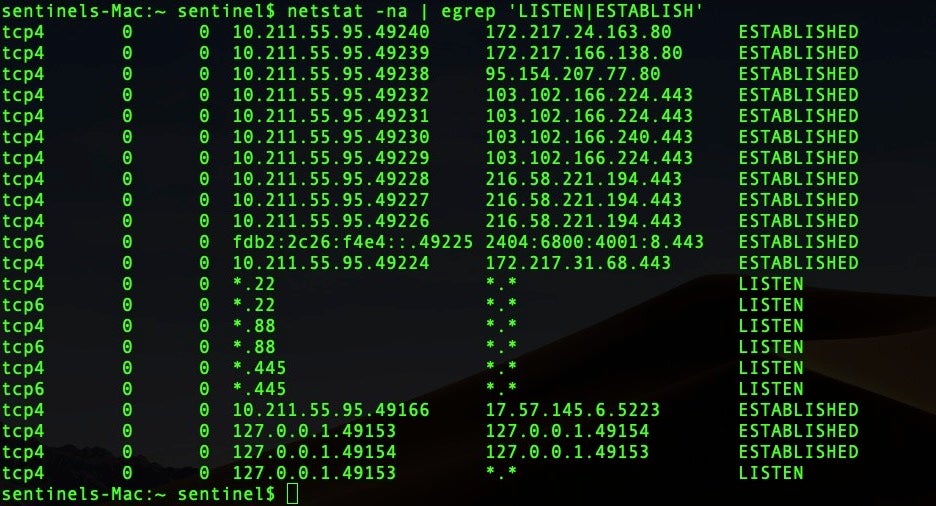
We can see that there are servers listening in on ports 22, 88, and 445. These indicate that the Mac’s Sharing preferences are enabled for remote login and remote file sharing. A full list of ports used by Apple’s services can be found here.
Next, let’s use
$ lsof -i
to list all files with an open IPv4, IPv6 or HP-UX X25 connection.
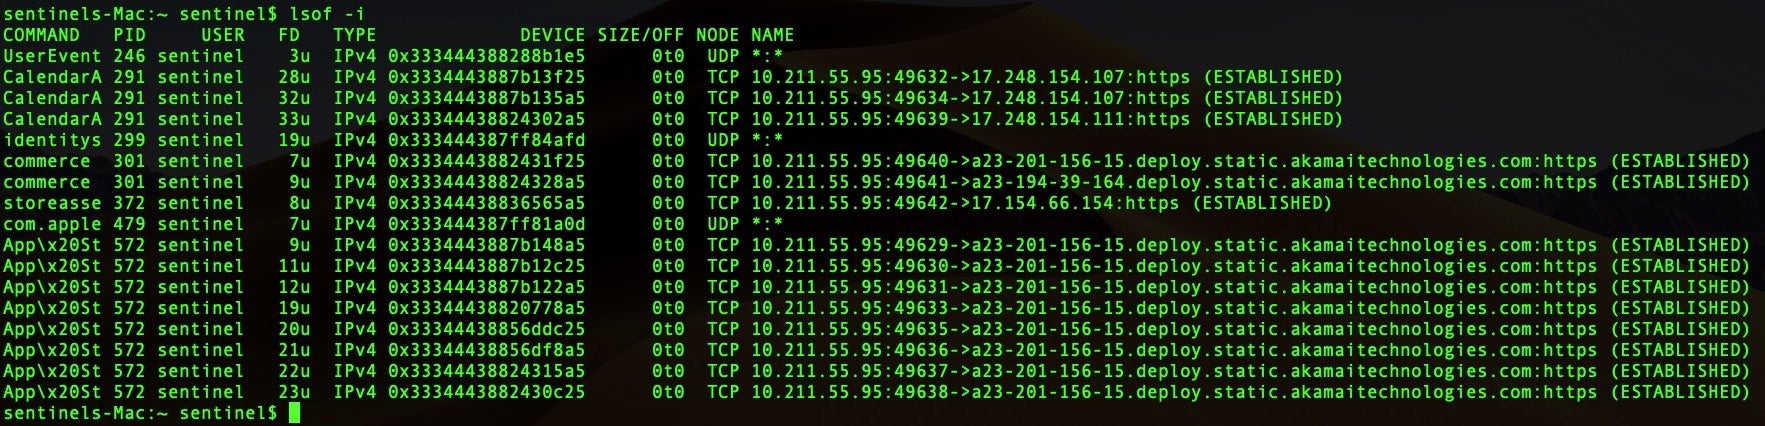
This output gives us quite a bit of useful information, including the IP address, command and PID. We can query the ps utility for more information on each process.
$ ps -p <pid>

Step 4: Investigate Running Processes
The ps command has a lot of useful options and is one of a number of tools you can use to see what’s running on a Mac at the time of collection.
One of the first things I’ll do is get a full list of all processes by running this as the superuser
$ ps -axo user,pid,ppid,%cpu,%mem,start,time,command
I will normally dump that out to a text file and pay particular interest to commands where the PPID, the parent process identifier, is something other than 1, indicating a user process that’s also spawning child processes.
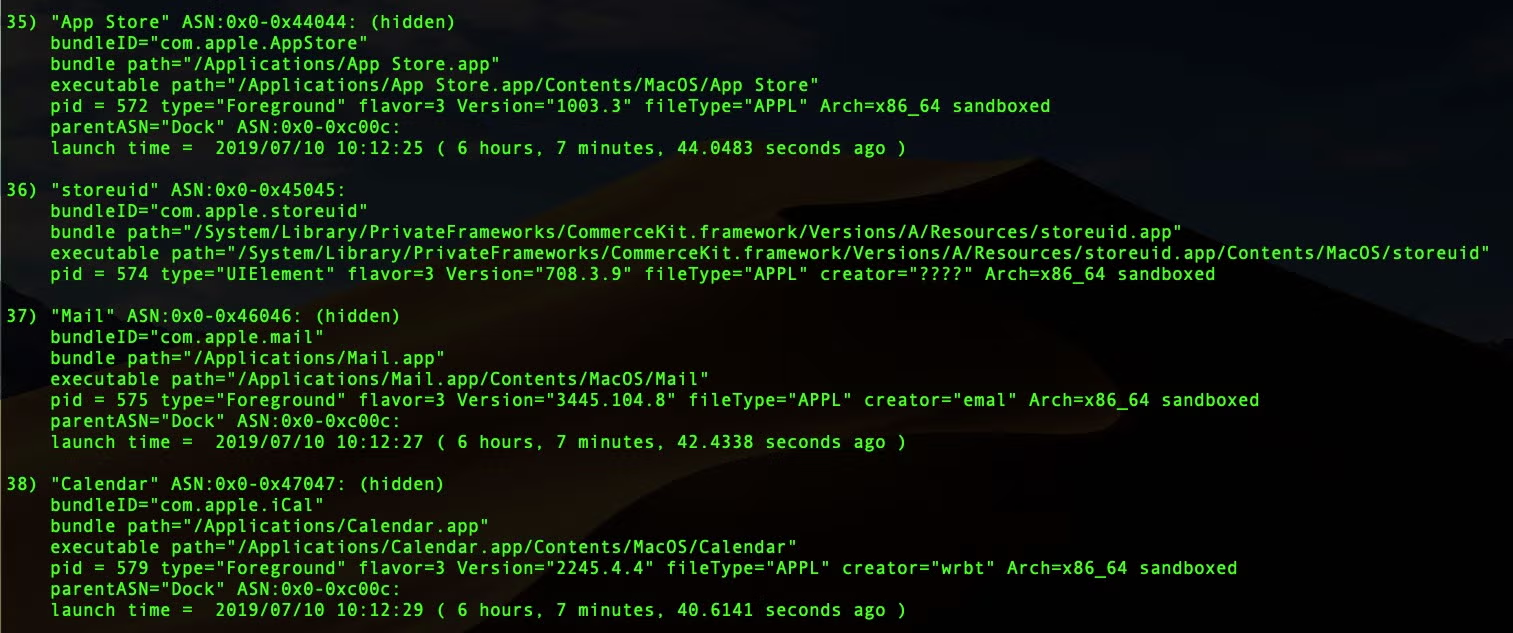
I also like to dump the output from
$ lsappinfo list
as that gives a lot of useful information about applications including the executable path, pid, bundle identifier (useful for detection purposes) and launch time.
You should also examine running daemons, agents and XPC services through the launchctl utility. I find the older, deprecated (but still functional) syntax somewhat easier to parse than the newer syntax, but that may be just my preference from habit, so experiment with either.
In the old syntax, you can simply run
$ launchtl list
to get a lot of useful information on what’s running in that particular user’s domain. The same command prepended with sudo will produce a list of services running in the system-wide domain.
For the newer syntax, use something like
$ launchctl print user/501
Replacing ‘501’ for the UID of any user you’re interested in. Use
$ launchctl print system
to target the system-wide domain.
The output between the old and the new syntax is quite different, and which you find more useful may depend on what kind of information you want. I often use the old syntax and grep out anything with a com.apple label so that I can focus on (mostly) non-system processes. However, some macOS malware does deliberately use the name “apple” in their labels precisely in an attempt to hide in the weeds, so if you do follow that suggestion be sure that you’re parsing items with “apple” labels somewhere else, too (e.g., such as from the data you received from examining the Launch folders or from using the ps utility).
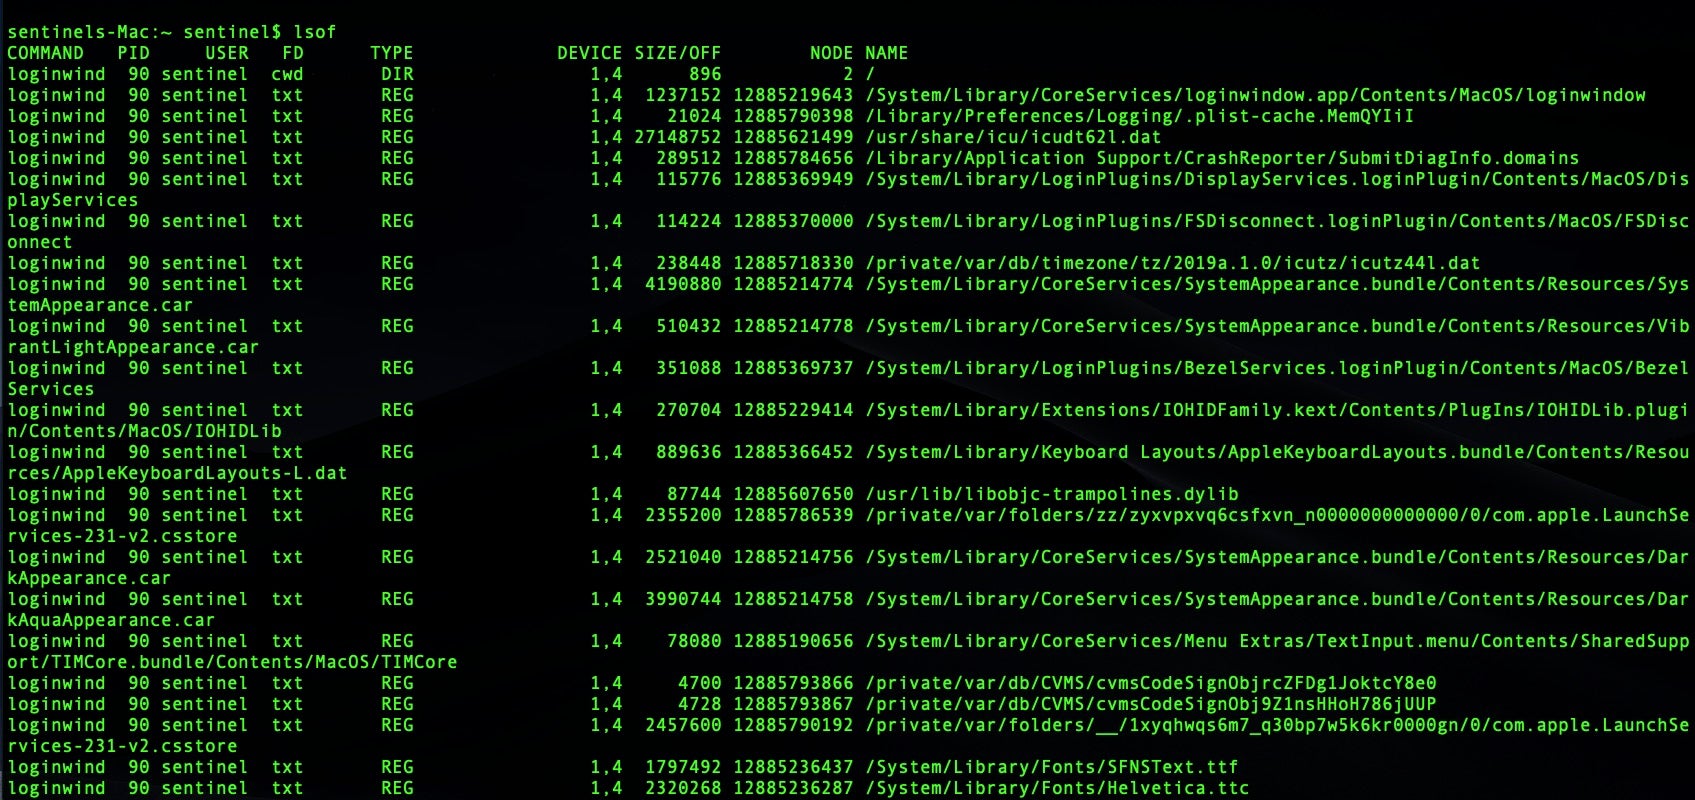
Step 5: Investigate Open Files
Earlier we used lsof with the -i option to list open ports, but we can also list all open files by just running lsof without any flags at all. That produces quite a mountain of information and you’ll want to quickly narrow it down to make it manageable.
If the system is running with System Integrity Protection turned on (tip: you can determine that with the command csrutil status), I will normally parse the output of lsof in something like BBEdit and remove all lines that contain references to the System folder. Bear in mind that doing so could cause you to miss something – not all System folders are protected by SIP, but in the early stages of an investigation I will leave that kind of possibility for later in the event that I don’t find any other IOCs (Indicators of Compromise).
For similar reasons, I’ll tend to focus first on open files that don’t belong to regular apps. Again, keep in mind the caveat that malware authors can sometimes use regular apps to live off the land, exploit browser zero days or sneak in via supply chain attacks, so be judicious in what you filter out and remember to go back over anything you skimmed or ignored later on if necessary.
Step 6: Examine the File System
If I haven’t found any suspicious processes at this point, that could well be because the malware has already finished its execution, so next it’s time to start making an initial investigation into the file system. At this point, we’re just trying to establish that a threat exists, rather than do a deep forensic dive on the entire system (we’ll cover that in a future post), so let’s look at some of the resources you can quickly access and parse to look for evidence of malicious behaviour.
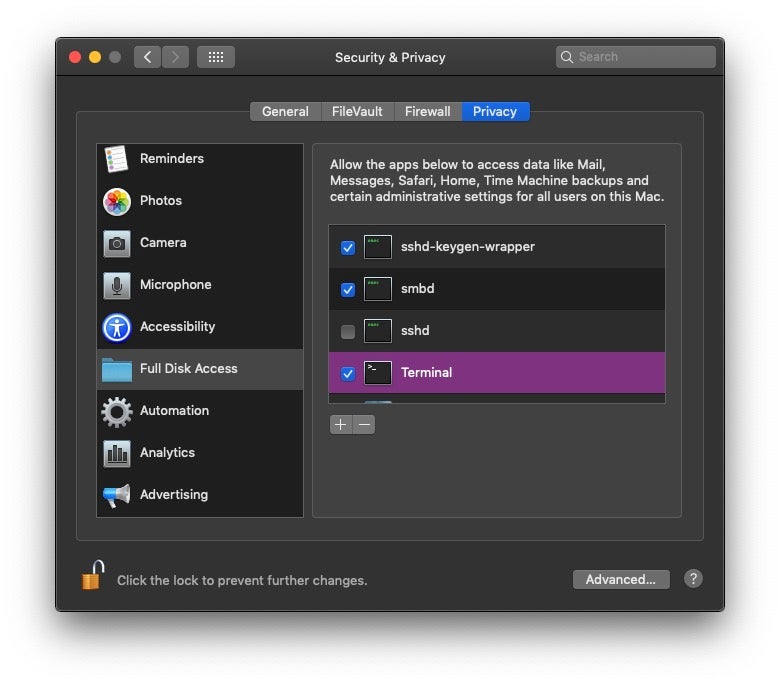
A word of warning, though, before we start. If you’re dealing with a macOS system from 10.14 Mojave onwards, you may find command line investigations hampered by macOS’s recent user protections. In order to avoid those, ensure that Terminal has been added to the Full Disk Access panel in the Privacy pane.
I tend to start by making an initial audit of files in certain locations that are often populated by malware. These include hidden files and folders in the User’s home folder, unusual folders added to the /Library and ~/Library folders, and the Application Support folders within all of those (remember there’s a separate Library folder for every user as well as the one at the computer domain level).
You can get those for the current user and the computer domain with a one-liner:
$ ls -al ~/.* ~/Library /Library ~/Library/Application Support /Library/Application Support/
You’ll need to drop down to sudo and iterate over users with a bash script if there’s more than one user account on the Mac.
Next, check the /Users/Shared folder, and the temp directories at /private/tmp and the user’s Temporary Directory (these are not the same), which you can get to using the $TMPDIR environment variable.
$ ls -al /Users/Shared
$ ls -al /private/tmp
$ ls -al $TMPDIR
Also, don’t forget that you should already have a list of items present in the Launch folders and any Cron jobs from your investigation into persistence mechanisms. More often than not the program arguments of these will have already led you to other locations of interest.
In the majority of cases, if a Mac has been infected the above steps will have turned up something and directed my searches further, but if not, there’s still a few other things to look for. If the time since the suspected infection is still relatively recent (within a few days or less), you may try a find search to look for any files created since or between a certain time or date. For example, this will find any files modified in the current working directory in the last 30 minutes. You can substitute the m for h to specify hours, or leave off a specifier and it will default to days.
$ find . -mtime +0m -a -mtime -30m -print
Depending on how much regular activity there has been on the device since then, and how long the timespan you search for, that could result in an overwhelming amount of data or just enough to be manageable, so adjust your search parameters to suit.
We can also query the LSQuarantine database to see what items have been downloaded by email clients and browsers.
$ sqlite3 ~/Library/Preferences/com.apple.LaunchServices.QuarantineEventsV* 'select LSQuarantineEventIdentifier, LSQuarantineAgentName, LSQuarantineAgentBundleIdentifier, LSQuarantineDataURLString, LSQuarantineSenderName, LSQuarantineSenderAddress, LSQuarantineOriginURLString, LSQuarantineTypeNumber, date(LSQuarantineTimeStamp + 978307200, "unixepoch") as downloadedDate from LSQuarantineEvent order by LSQuarantineTimeStamp' | sort | grep '|' --color
Again, you could get a lot of data to sift through here, but filter on the dates to find recent items. The good side of LSQuarantine is it will give you the exact URL from where the file was downloaded, and you can use this to check against reputation on VT or other sources. The downside of LSQuarantine is that the database is easily purged by normal actions the user (or malicious actor) can take in the UI, so not finding something there doesn’t rule out that a file didn’t actually come through the quarantine process.
Another useful trick here is to see what turns up just by doing an mdfind query on the quarantine bit:
$ mdfind com.apple.quarantine
That should find documents – which are also tagged with the quarantine bit – that have been downloaded, including malicious pdf, Word .docx and others. Again, there’ll be a lot of innocent stuff in the results, so careful filtering will be required.
Step 7: Examine the Mac’s Network Configuration
Malware authors on macOS have in some cases manipulated the DNS and AutoProxy network configurations, so it’s always worth checking on these settings. You can get all these from the command line, so first let’s get the details of the network interface configuration with this command:
$ ifconfig
That will output information regarding the wireless, ethernet, bluetooth and other interfaces. You’ll also want to gather the SystemConfiguration property list to look out for malware that tries to hijack the Mac’s DNS server settings, as OSX.MaMi was seen to do in 2018.
$ plutil -p /Library/Preferences/SystemConfiguration/preferences.plist
Use this command
$ scutil --proxy
to inspect the Mac’s auto proxy settings. Spyware like OnionSpy has been seen to configure these settings to redirect user traffic to a server of the attacker’s choosing.
Dive Into macOS’s Hidden Databases
Depending on what access and authorization you have, it’s also possible to dive a lot deeper and recover very fine-detailed information about file system events, user’s browsing and email history, application usage, connected devices and more. In a future post on macOS Digital Forensics and Incident Response, we’ll cover things like Apple’s built-in system_profiler and sysdiagnose utilities, unified logging, fsevents and a plethora of sqlite caches that hold almost every detail you could ever wish to know. In the majority of cases, the steps outlined above will be sufficient to find evidence of even the most stealthy of macOS malware, but digging down into the hidden depths of macOS may provide you with more evidence that can help in detection, remediation, and attribution.
Conclusion
If you are interested in learning how to hunt malware infections on macOS, whether it’s cryptominers, adware, backdoors or nation state actors, the steps outlined above should give you a good start on where to look and what to look for. Don’t forget also to review our post on macOS persistence mechanisms as these are often the easiest indicators to detect, and if you’re interested in reversing macOS malware, check out our series on how to do that safely, too. And before you go, don’t forget to follow the blog and we’ll let you know when our next post is out.

