
This is yet another post in which we’ll show you how to get started with logging in a programming language or framework. Throughout the series, we’ve covered a lot of different languages and platforms: C#, Java, Ruby, Ruby On Rails, Python, and C++, just to name a few. Today’s post will help you get started with Dart logging.
The post will loosely follow the same structure of the older posts in the series, but there might be some differences. Instead of starting the post with the initial logging example, we’ll begin with a quick overview of Dart. This makes sense if you consider that, despite being around for almost a decade and being created by a tech giant, Dart is certainly not as known and used as C# or Java.
After that, we get back on the “template” we’ve been following for most posts in the series:
- We give you an example of a simple yet functional approach to logging
- Then we go on to explain what logging is and why it’s so important
- We then come back to the example and rewrite it, using a more sophisticated approach
After all of that, we’ll part ways with some final tips. Let’s begin.

A Quick Overview on Dart
As promised, let’s start out with a quick overview of the Dart programming language. Dart originally appeared in October 2011, and the 1.0 version was released in November 2013.
Dart is an object-oriented language, with syntax based on the C family. It can be used on the web, by trans-piling it to JavaScript. You can also use Dart to write desktop applications, thanks to the Dart Visual Machine that ships along with the Dart SDK (software development kit.)
For this post, we’ll need to create a console application in Dart. This will require you to download and install the Dart SDK on your platform. After the installation is complete, make sure to add the installation directory to your PATH environmental variable, so the “dart” command is universally available in your terminal.
Dart Logging ASAP
As we usually do with posts in the series, we’ll start by giving an example of how to start logging as quickly and easily as humanly possible. The approach you’re going to see is not what we’d call a “best practice.” Meaning, we don’t recommend that you use this approach in your real Dart applications. Its only purpose is to be an example of a rudimentary yet functional approach to logging.
Creating a Toy Application
With that out of the way, let’s get started. And to get started, we need an application, so let’s get us an application. We’ll create a console app based on the famous String Calculator kata. We’re not actually going to perform this as a code kata; we’re only using its premise as the business rules of our application.
The Business Logic Requirements
That’s how our app will work. It will start by prompting the user for a sequence of numbers, separated by a comma. The user will enter the sequence and then press enter. The app will then calculate and display the sum of the numbers. Numbers greater than 1000 should be ignored. Negative numbers shouldn’t be allowed. If the user informs one or more negative numbers, a message saying “Negative numbers are not allowed!” will be displayed, along with the number or numbers that violated the rule. The table below contains some examples of inputs along with their results:
| Input | Expected Result |
|---|---|
| 1 | 1 |
| 1,2,3 | 6 |
| 1,2,1000 | 1003 |
| 1,2,1001 | 3 |
| -5, -3, 2 | Negative numbers not allowed! (-5, -3) |
Getting Our Hands Dirty
Now it’s time to write our application. You can use an IDE like Visual Studio Code if you like, but any text editor will suffice. Create a new file, and paste the following content on it:
import 'dart:io';

void main() {
    stdout.writeln('Type the numbers separated by comma:');
    String input = stdin.readLineSync();
    var numbers = input.split(',').map((x) => int.parse(x));
    var negatives = numbers.where((x) => x < 0);

    if (negatives.isNotEmpty) {
        stdout.writeln("Negative numbers are not allowed! $negatives");
        return;
    }

    var result = numbers
        .where((x) => x <= 1000)
        .fold(0, (x, y) => x + y);
    stdout.writeln('Result: $result');
}
Save the file with the name “calculator.dart.” Now we’re ready to test our application. In a terminal window, navigate to the folder where you’ve saved the file. There, run “dart calculator.dart.” You should see something like the following image:
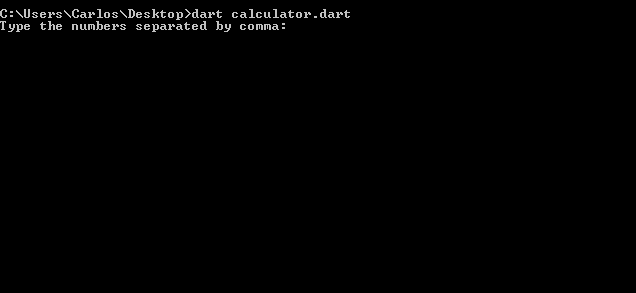
You can now type numbers separated by a comma to verify whether the app works as expected:
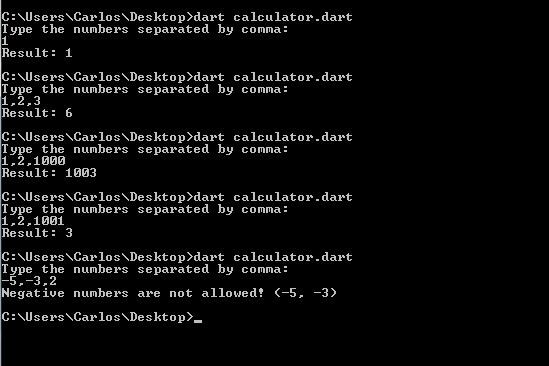
Feel free to perform your own tests. After you’re convinced that the app works satisfactorily, you’ll be ready to start logging.
Time to Log!
We’re now ready to add logging to our application, using what I’m calling the “rudimentary” approach. First, we’ll add the following line right before main():
var outputFile = new File('sample.log');
This line initiates a File object, which represents the text file we’ll be writing our log entries to. Now, let’s create a log function:
void log(String message) {
    var now = new DateTime.now().toUtc().toIso8601String();
    outputFile.writeAsStringSync("$now | $message\n", mode: FileMode.append);
}
As you can see, the function is really simple. It takes the message as a parameter. Then, it puts the current timestamp in ISO-8601 format with the message and appends the whole thing to the file. Now, all we have to do is add calls to this function at the points we wish to log. We’ll log both the happy and the sad paths. When the user supplies one or more negative numbers, we’ll log the fact that the user did that along with the number they supplied. If, on the other hand, the user supplies only valid numbers, we’ll log a message saying that the operation was successful, along with the supplied numbers and the result.
What follows is the complete updated code. The newly-added lines are in bold:
import 'dar
import 'dart:io';

var outputFile = new File('sample.log');

void main() {
    stdout.writeln('Type the numbers separated by comma:');
    String input = stdin.readLineSync();
    var numbers = input.split(',').map((x) => int.parse(x));
    var negatives = numbers.where((x) => x < 0);

    if (negatives.isNotEmpty) {
        stdout.writeln("Negative numbers are not allowed! $negatives");
        log("User attempted to pass negative numbers: $negatives");
        return;
    }

    var result = numbers
        .where((x) => x <= 1000)
        .fold(0, (x, y) => x + y);

    stdout.writeln('Result: $result');
    log('Calculation performed successfully. Numbers supplied: $input. Result: $result.');
}

void log(String message) {
    var now = new DateTime.now().toUtc().toIso8601String();
    outputFile.writeAsStringSync("$now | $message\n", mode: FileMode.append);
}
Now you can run the app again, using it normally. After you’re done, go to the folder where the app file location, and you should see a file named “sample.log.” Open it to see the log entries you’ve just generated. The image below shows the log entries I’ve obtained after recreating the examples of the previous section:

The Tip of the Dart Logging Iceberg
If you’ve ended up with a file that looks like the one in the image above, then congrats! You’ve just logged using the Dart programming language for the first time. You might be wondering, though, if what you’ve just seen is all that there is to logging. The answer is “no.” Keep reading to understand why.
What you’ve just seen is, as promised, a guide to starting logging in Dart as quickly as possible. And we’ve certainly delivered on our promise since what you’ve got is a functional, real, logging approach. However—as we’ve also promised—the approach described above is leagues away from being realistic. Besides not scaling beyond trivially sized applications, the approach also has a number of downsides we’ll discuss later in the article. So, to really get a sense of what a sophisticated, professional approach to logging looks like, keep reading.
Application Logging: What It Is and Do You Need to Care About It
You’ve just learned how to create your first Dart logger. Now you’re going to learn, in this order:
- What is application logging;
- Why people do it;
- What are the problems with the primitive logger we’ve just created
Equipped with that knowledge, we’ll then be able to go a step further and improve our logging approach.
What Is Application Logging?
You can find many definitions for application logging around the web. Some are more generic; others tend to focus on specific approaches and techniques. I personally prefer the definition we gave in our C# logging post. It’s shorter and simpler than most, goes straight to the point, and doesn’t go into specifics of any logging approach. Here it is:
Application logging involves recording information about your application’s runtime behavior to a more persistent medium.
Think about our sample app. It accomplished its goal, which was to allow the user to calculate the sum of the digits in a string. But suppose we need to record the supplied numbers along with their sums. Let’s say that we also need to store information about the failed attempts at performing the calculation. For situations like these, logging really comes in handy.
But we’re getting ahead of ourselves. We’re starting to get into the why of logging, and that’s a topic for the next section.
The Motivation Behind Logging
Why bother logging? The answer lies in the logging definition we’ve presented in the previous section. As you’ve seen, logging is the recording of some application’s behavior to a persistent medium.
We do such a recording so we can access it later. We want to be able to learn details about an application execution after the fact.
The reason behind doing that is simple: software is anything but simple. A software application is an incredibly complex thing. When it’s running in production, and the developers have no control over it, how do they know it’s going to behave correctly?
The simple answer is: they don’t. Everyone hopes the application will work fine, but when it inevitably fails, how is everyone involved going to know what went wrong?
In short: logging gives you a sort of time-travel superpower. By properly employing logging, you’re able to perform after-the-fact debug in your applications, and diagnose and fix problems you wouldn’t be able to otherwise.

Taking Our Logging Approach Up a Notch
Now we know what logging is and why it’s vital for any non-trivial application, it’s time to answer more questions. What should we capture when we log? Where should we store that data?
To answer those questions, we need to have a firm grasp of what a log entry is. And that is an event. Something relevant occurred, at a certain moment of time, and it has some data associated with it. That “moment in time” and that “data” are exactly the things that will define the value of your log entry.
What are the parts a typical log entry includes? For starters, a timestamp. The “moment in time,” we spoke of before. It’s recommended you format those in ISO-8601, just like we did in our example. Obviously, a log entry must have the message. This is the most crucial part of a log entry since it will describe the event along with context so it can be better understood by its future readers. Log levels are also crucial: they allow filtering, searching, and log messages, as well as fine granularity, in regards to the destination of logs.
Enter Logging Frameworks
I’ve got some good news and some bad news for you. And I’ll start with the bad news. Coming up with a robust logging approach is hard work. It requires answering many questions, and some of them are really tough. For instance, how to deal with concurrent access issues when it comes to the log files? How to handle logging to different destinations? Is there a way to automatically manage old entries and log files?
The good news is that you don’t need to be the one answering them.
As it turns out, there are people that already answered those questions and solved those problems in the past. Better yet, they’ve made their solutions publicly available, often for free; That way, you don’t have to wrack your brain trying to come up with solutions for these issues.
The solutions that those smart assembled are what we call a logging framework.
A logging framework is a software package that can provide easy, configurable logging readily available for you. All that it takes is installing it in your codebase and spending a little bit of time configuring it.
After that, you’ll be good to go. With the framework configured and installed, you’ll be able to make calls to the framework that look as simple as the ones we’ve made in our sample application. But the difference is that the framework offers nice formatting, powerful configuration, and many other goodies out of the box.
Installing a Logging Framework
We’re now going to install the standard logging package for Dart. For that, we’re going to use Pub, the package manager for Dart. Pub dependencies are expressed using the pubspec.yaml file. Create a new file using your editor and paste the following content on it:
name: string_calculator
dependencies:
 logging: ^0.11.3+2
Now, save the file as “pubspec.yaml” file on the same folder. Then, go to your terminal and run the following command:
pub get
If everything goes, that’s what you should see:
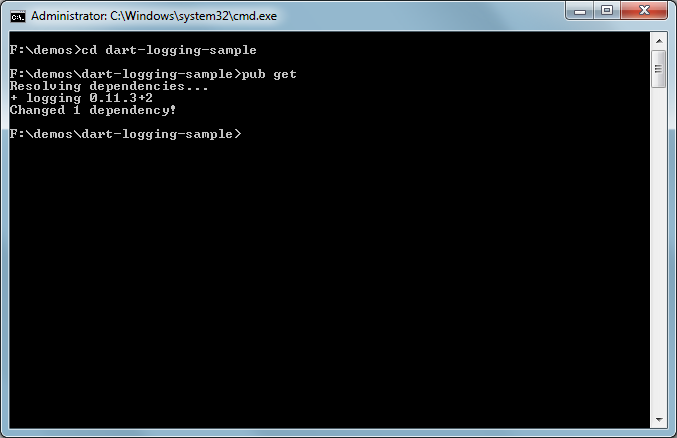
Now you’re ready to import the dependency to your application:
import 'package:logging/logging.dart';
Configuring Your Logger
The Dart logging package, by default, doesn’t do anything with the log messages. You have to configure both the logging level and also the handler for your log entries.
What follows is a basic handler configuration based on the “log” method in our previous example. This configuration will allow our logger to log to a text file:
Logger.root.level = Level.ALL;
Logger.root.onRecord.listen((LogRecord rec) {
    outputFile.writeAsStringSync("${rec.time} | ${rec.level} | ${rec.message} | ${rec.loggerName}\n", mode: FileMode.append);
});
As you can see, first we set the logging level. In this case, we’re setting ALL, which means that log entries of all levels will be logged. Then we configure the listener on the onRecord stream for LogRecord events. The LogRecord class stores several useful pieces of information about the event to be logged. In our example above, we’re recording the time and message, but also the time, level, and the name of the logger. We’re separating each piece of information with a pipe surrounded by spaces, in order to maximize the readability of our log file.
Now we need to add just another line of code to complete the configuration of our logger:
final Logger logger = new Logger('MyFirstLogger');
By adding that line to our main method, we initialize a new instance of the Logger class, which is now available for use throughout the code.
The final change is to replace the calls to our custom log() message with the calls to methods on the logger object. For the happy path, we’re going to use the info method. For the error condition, we’re going to use the warning method. Here it is the final, updated code:
import 'dart:io';
import 'package:simple_logger/simple_logger.dart';

var outputFile = new File('sample.log');

void main() {
    final Logger logger = new Logger('MyFirstLogger');

    Logger.root.level = Level.ALL;
    Logger.root.onRecord.listen((LogRecord rec) {
        outputFile.writeAsStringSync("${rec.time} | ${rec.level} | ${rec.message} | ${rec.loggerName}\n", mode: FileMode.append); });

    stdout.writeln('Type the numbers separated by comma:');
    String input = stdin.readLineSync();
    var numbers = input.split(',').map((x) => int.parse(x));
    var negatives = numbers.where((x) => x < 0);

    if (negatives.isNotEmpty) {
        stdout.writeln("Negative numbers are not allowed! $negatives");
        logger.severe("User attempted to pass negative numbers: $negatives");
        return;
    }

    var result = numbers
        .where((x) => x <= 1000)
        .fold(0, (x, y) => x + y);

    stdout.writeln('Result: $result');
    logger.info('Calculation performed successfully. Numbers supplied: $input. Result: $result.');
}
Now run the application and use it normally, testing both the happy and unhappy path scenarios. If everything went well, your log file should now look something like this:
2019-11-09 22:41:18.958158 | INFO | Calculation performed successfully. Numbers supplied: 1,2,3. Result: 6. | MyFirstLogger
2019-11-09 22:42:30.905273 | SEVERE | User attempted to pass negative numbers: (-5) | MyFirstLogger
Conclusion
In this post, we’ve covered logging in the Dart programming language. You’ve seen how to get started logging quickly using a functional, yet rudimentary approach. Then, we’ve proceeded to explain what logging is and why it’s crucial for modern software development.
After that, you’ve seen how to install the standard logging library using Pub, the package management system. We’ve shown you how to perform basic configuration of the library and used it to replace our calls to our home-made logging approach.
This post covered just the tip of the iceberg when it comes to logging, in Dart or otherwise. Don’t forget to stay tuned to the Scalyr blog to read more about logging best practices in a number of different languages and platforms.
Thanks for reading. Happy logging!

