
In Part 1 of our tutorial on macOS malware reverse engineering skills, we discovered a suspicious file containing encrypted code. Let’s continue our investigation of the malware sample in our isolated VM. It’s time to introduce static analysis techniques and the Mach-O binary format.
What is a Mach-O Binary?
Let’s change directory into ../MacOS/ and list the contents.
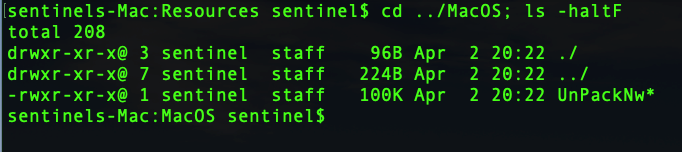
There’s a single binary as expected. Let’s run file on it and see what it says:
$ file UnPackNw

The file utility tells us that this is a Mach-O binary. We’ll keep the theory down to the minimum as this is a practical, hands-on tutorial, but we do need to cover the basics of what this means.
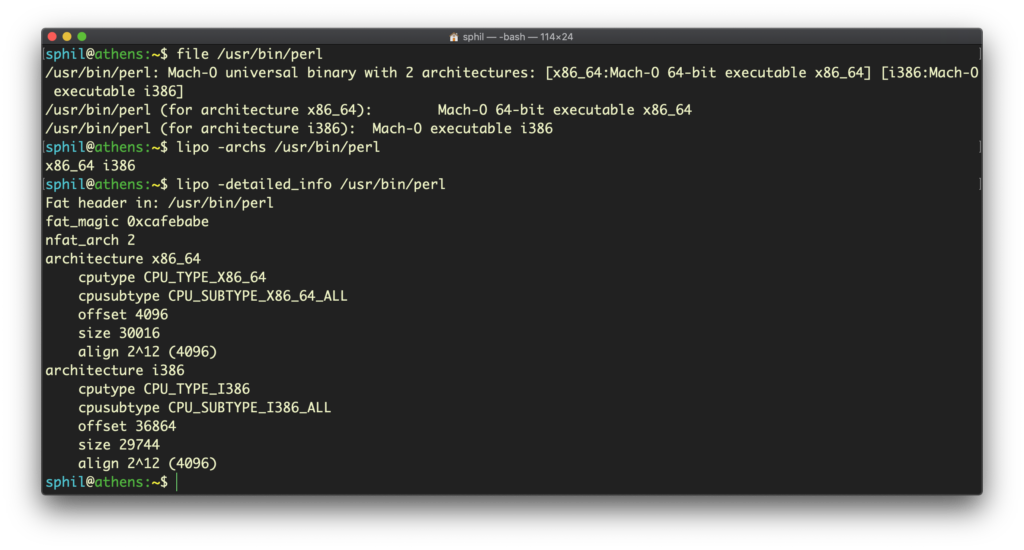
If you’ve come from a Windows or Linux background, you’ll perhaps be familiar with their basic file types, PE and ELF. Although macOS shares Linux’s Unix heritage, it cannot natively run ELF (or, indeed, PE files, at least not without the help of importing a framework like Mono, anyway). Instead, it has a unique file format called Mach-O, which essentially comes in two flavors: the so-called “fat” or universal binaries which contain multiple architectures, and the single architecture Mach-O type. If you examine the perl binary, for example, with file and lipo, you’ll see that it’s a “fat” file.
If you find yourself dealing with a “fat” binary, you can easily use the lipo tool to extract the Mach-O architecture, but we won’t be needing to do that in this tutorial.
Reversing Malware by Exploring Segments & Sections
Let’s use the pagestuff utility to have a first look at our binary’s internal structure. This tool is kind of odd in that the switches come after the file name:
$ pagestuff UnpackNw -a
Our Mach-O binary contains a number of segments, which are in turn composed of sections. For the purposes of this tutorial, we only need to know that the __TEXT segment contains the __text section, which contains all the executable functions and methods. A couple of good intros on this topic, which I highly recommend for anyone serious about getting into macOS malware reverse engineering, can be found here and here.
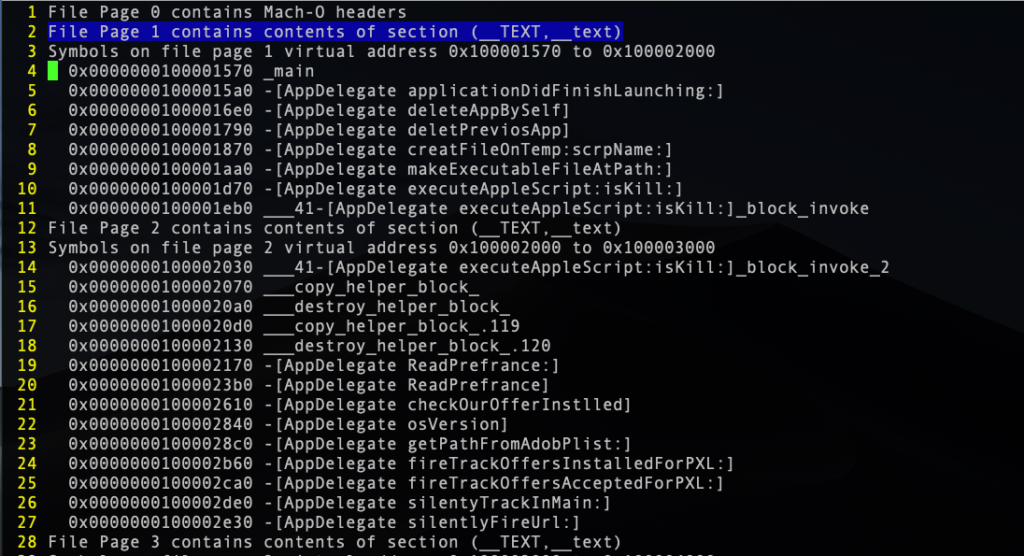
The output of pagestuff shows us that the malware contains some interestingly-named Objective-C methods, including “deleteAppBySelf” and “silentlyFireURL:”.
We can get similar and perhaps more useful info using the nm utility. I’ll use the -m switch here to display the Mach-O segment and section names in alphabetical order, but you should definitely check out its man page to see some of the other options.
$ nm -m UnpackNw
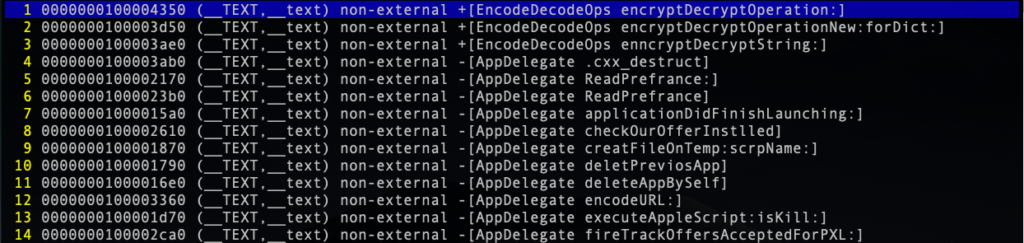
The method that immediately catches my eye from these outputs with regard to our mysterious encrypted text file is the “encryptDecryptOperation:” class method. Let’s do some more digging.
The Power of Pulling Strings
One of the most useful utilities for static analysis is the strings utility.
Let’s dump the ASCII strings from the binary to a separate text file so we can more easily view and manipulate them. The strings utility has a number of options, but I like to use the - option. This causes the utility to look for strings in all bytes of the file:
$ strings - UnPackNw > ~/Malware/strings-.txt
There’s some interesting things in here, including some URLs and other bundle identifiers. We even find a file reference to the developer’s own file system and some user names. This kind of info can be extremely useful if you are trying to establish attribution in a malware campaign.
If you’re familiar with using strings on Linux, be aware that the macOS version isn’t quite the same. Specifically, it doesn’t have the ability to decode unicode, so for serious work you might want to try something like floss, which is a bit more powerful.
Examining the strings in a file can give you a very good overview of a malware’s functionality, but we still haven’t got any closer to our encrypted text file. It’s time to introduce you to otool.
Using Otool To Examine A Binary
One of my main “go to” tools is otool. Let’s take a quick look at what you can do with it. As with strings and other tools, I usually dump all this info to separate text files so that I can pore through them at will.
Let’s start with seeing what shared libraries a binary links to.
$ otool -L UnPackNw > ~/Malware/libs.txt

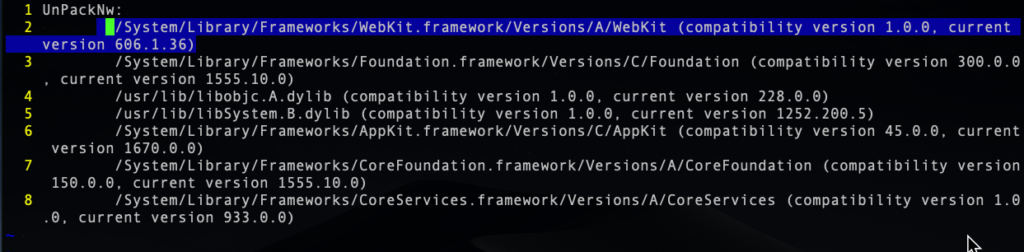
From this, we can see our malware will have some ability to implement browser features via linking to the WebKit framework, something we’d expect in an adware type infection.
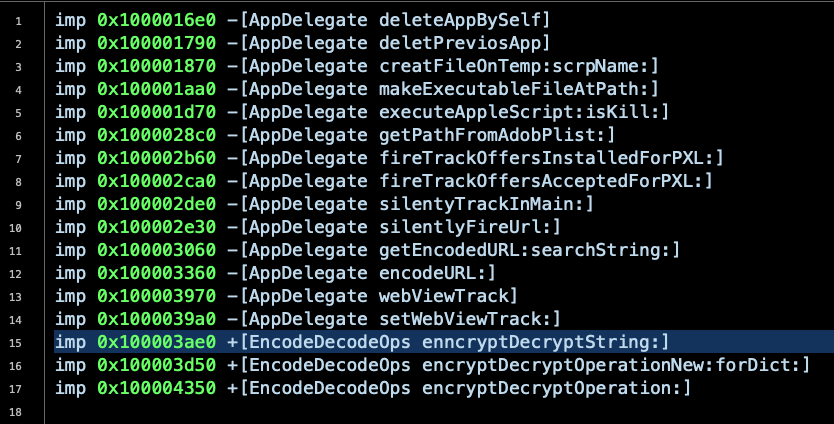
We can also dump the method names from the Mach-O binary’s ObjC section:
$ otool -oV UnPackNw > ~/Malware/methods.txt
Most usefully, we can obtain the disassembly with:
$ otool -tV UnPackNw > ~/Malware/disassembly.txt
In the disassembly, let’s search for the name of our obfuscated text file, ‘unpack’:
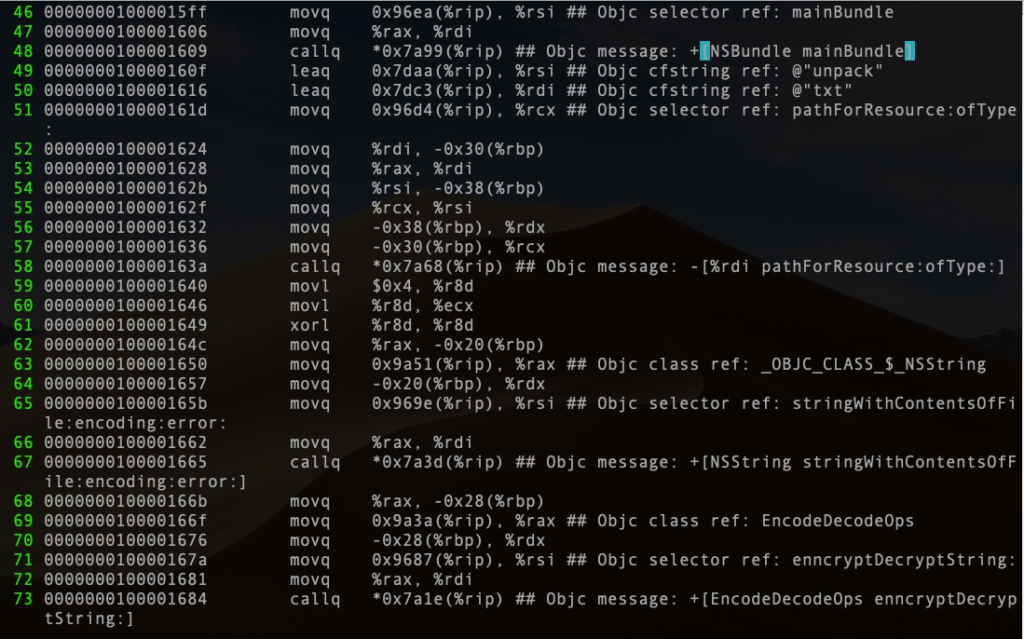
Examine the code between lines 48 and 58. Here we see the call to get the file’s contents from the bundle’s Resource folder. Scrolling down to line 67, we see the creation of a string from the contents of the file and then the call to decrypt the string on line 73.
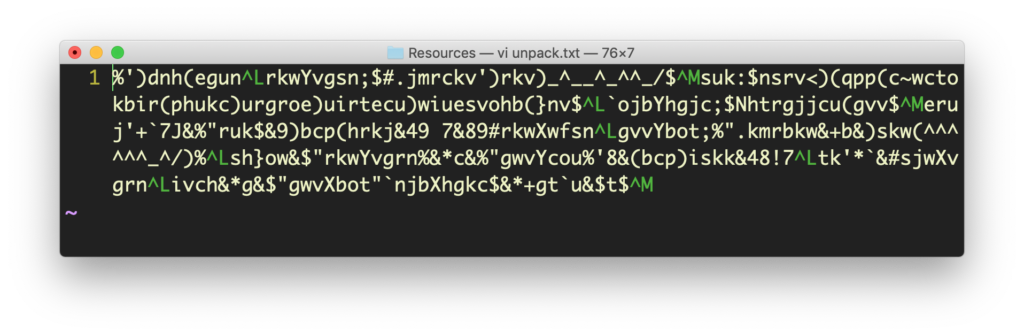
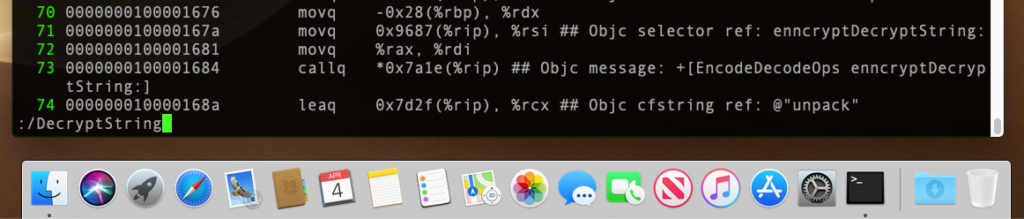
Let’s take a look at the decryption method, which we can search for on vi’s command line:
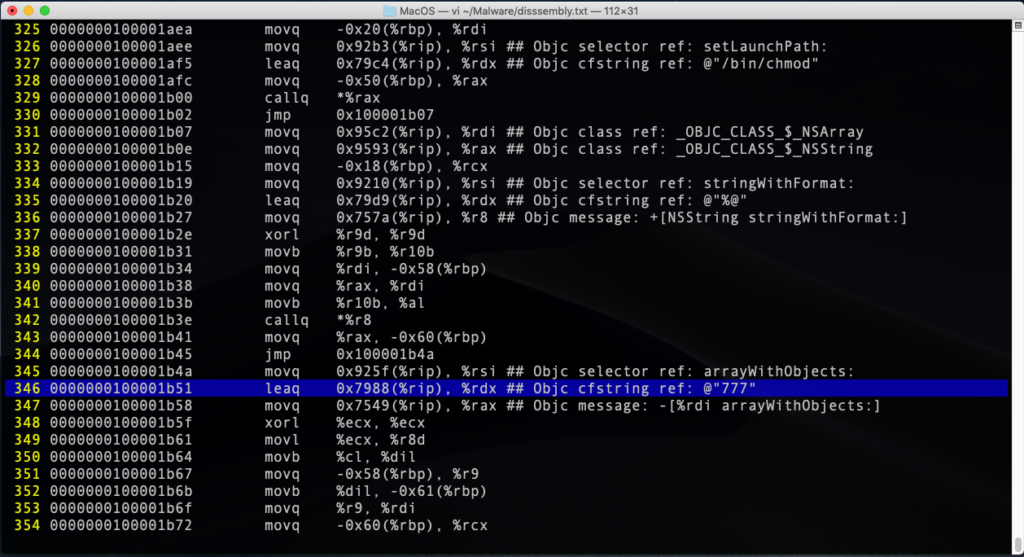
That takes us to Line 2185:

Lines 2190 to 2193 are revealing. We’re starting to get closer to solving the mystery of our encrypted text file. At this point, I’d probably jump into Cutter or Hopper and see how this looks in pseudocode, but the assembly already suggests to us that this is going to iterate over some hardcoded strings and likely XOR each character from the encrypted unpack.txt file.
It can be an interesting exercise in scripting to build your own decryptor based on the assembly, but it’s quicker to run the code and view it being decrypted in memory. In other words, we need to dive into some dynamic analysis. That’s precisely what we’re going to do in Part 3.
Compiling Indicators of Compromise
However, before we go, let’s continue to search around the disassembly to see what else we can determine. From our strings output, we noticed some references to /bin/ and NSTask, which are tell-tale indicators that the malware is calling command line utilities, so let’s search for those in the disassembly. Check out line 327:
Here, we can see the code loads the chmod string into the register and that the malware changes the permissions on a file to make it world readable, writable and executable at line 346. Other searches will reveal that the binary is going to create, execute and delete a script of some kind, and also use AppleScript to read in a file and execute it.
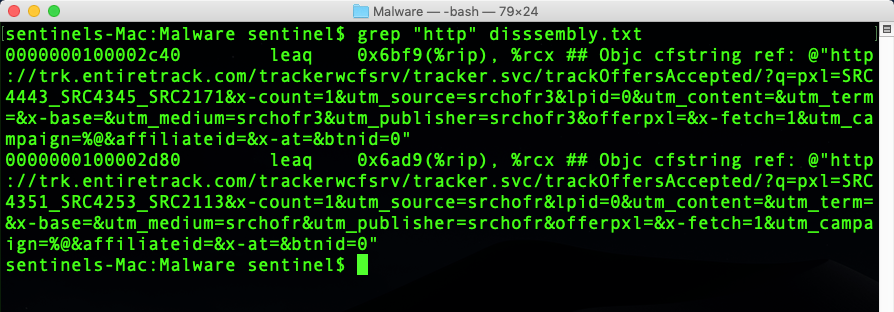
My advice at this stage is to search for things of interest till you get an overall impression of what the binary is up to. For example, grepping the disassembly and strings files can reveal hardcoded URLs.

By examining the kind of output we’ve produced so far, you’ll get a sense of how the malware is going to work, and you should be able to develop IoCs for Yara rules or other search engine parameters. Depending on how you want to detect this malware, you could easily build rules that would search a binary for strings like those at line 2190 or for hardcoded URLs, but at the same time it would also be easy for malware authors to substitute those for others in their next iteration, thus breaking your detections. A little more robust would be to hit on the method names, and you would probably want to choose a couple of other things to make sure you avoid false positives.
That will defeat lazy malware authors, but it doesn’t take much effort for adversaries to refactor their code at build-time and obfuscate method names, so even that kind of string detection is only likely to work temporarily.
Also, notice that aside from not having yet found our obscured text, we don’t know if there are other IoCs that are only resolved at runtime. This means that you need to supplement your static analysis with a look at the sample in action because a lot of interesting behaviour cannot be determined except at runtime. Dynamic Analysis, then, is our next task!
Conclusion
In this post, we looked at how to disassemble a file and extract strings and other important information from it. We’ve done all this in a kind of “old school” way without using professional grade tools in order to illustrate the fundamental techniques. We’re now at the stage where we really need to see what the malware does in action, and while doing that we will hopefully catch the encrypted string in the unpack.txt file being decoded in memory. That’s where we’re headed next, so if you enjoyed this and the previous post and want to follow along to see how we finally decrypt the mysterious encoded text file, be sure to subscribe to the blog and join us in Part 3. See you there!

