
Kotlin logging is the next chapter in our “Getting Started Quickly” logging series. This series has already spawned two different ebooks, but we’re just getting started.
Kotlin is a relatively new language. It was open-sourced in 2012 by JetBrains, the company behind IntelliJ, Resharper, and other popular developer tools. Kotlin is a statically-typed language that has rich support for functional programming. It’s often run in Java’s JVM and supports Java libraries, but can be compiled to Javascript or native code. You’ll be using the JVM version in this article.
As with most of the articles in this series, I’ll start with the simplest example of Kotlin logging that can work. Then, after discussing why logging matters and how it affects your ability to support your code, I’ll use better logging tools. I’ll also explain how proper logging improves your ability to track down problems, watch your app, and improve service for your customers.

The Simplest Kotlin Logging That Could Possibly Work
Since the JetBrains team created Kotlin, it makes sense to use IntelliJ for this tutorial. If you don’t have it installed already, you’ll find the community edition here.
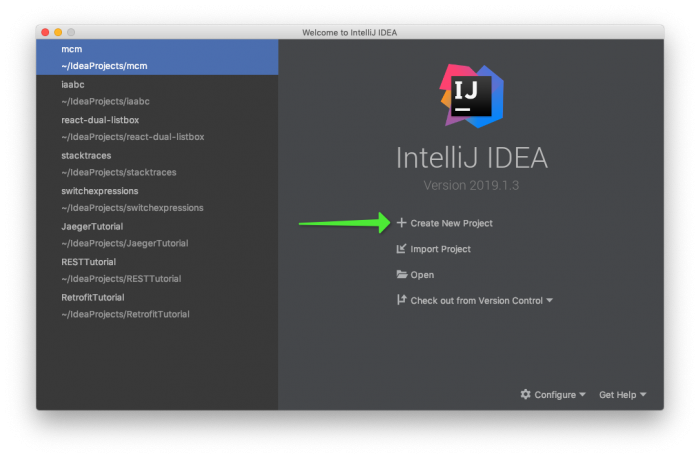
Start by creating a new project. Click the new project menu entry in the welcome screen.
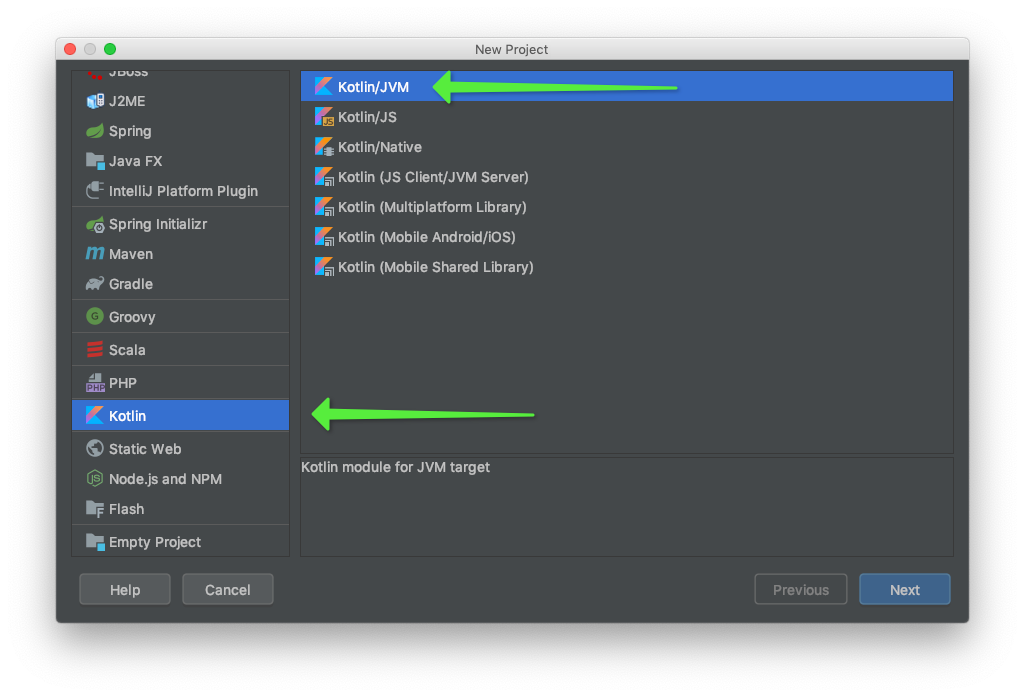
Next, select Kotlin and Kotlin JVM in the project options.
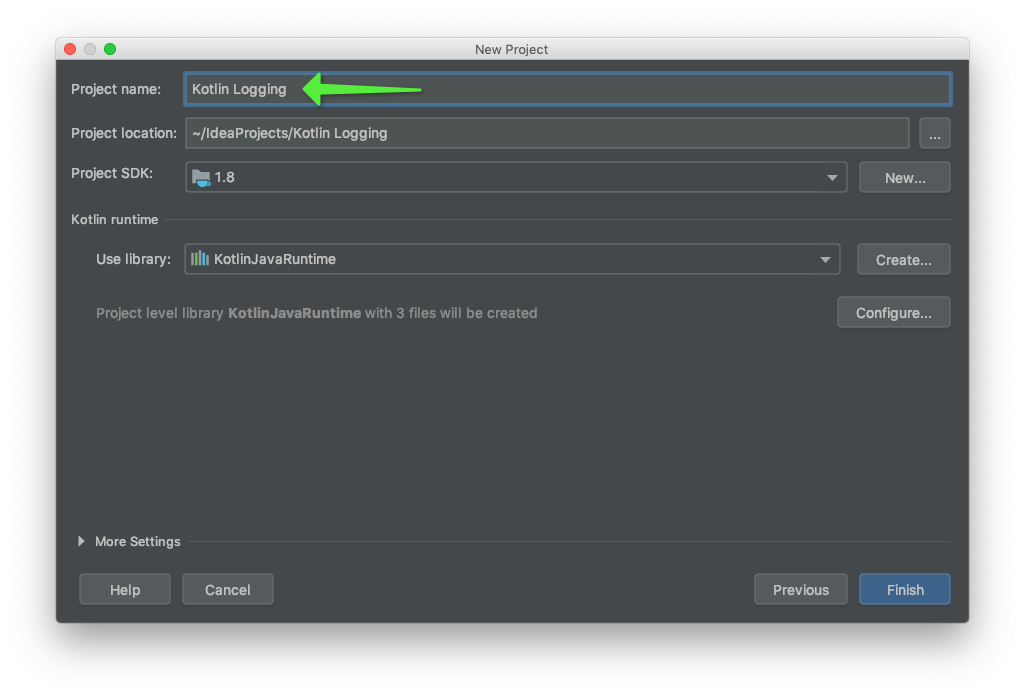
Click next, and give your project name.
Click finish, and IntelliJ will create your project.
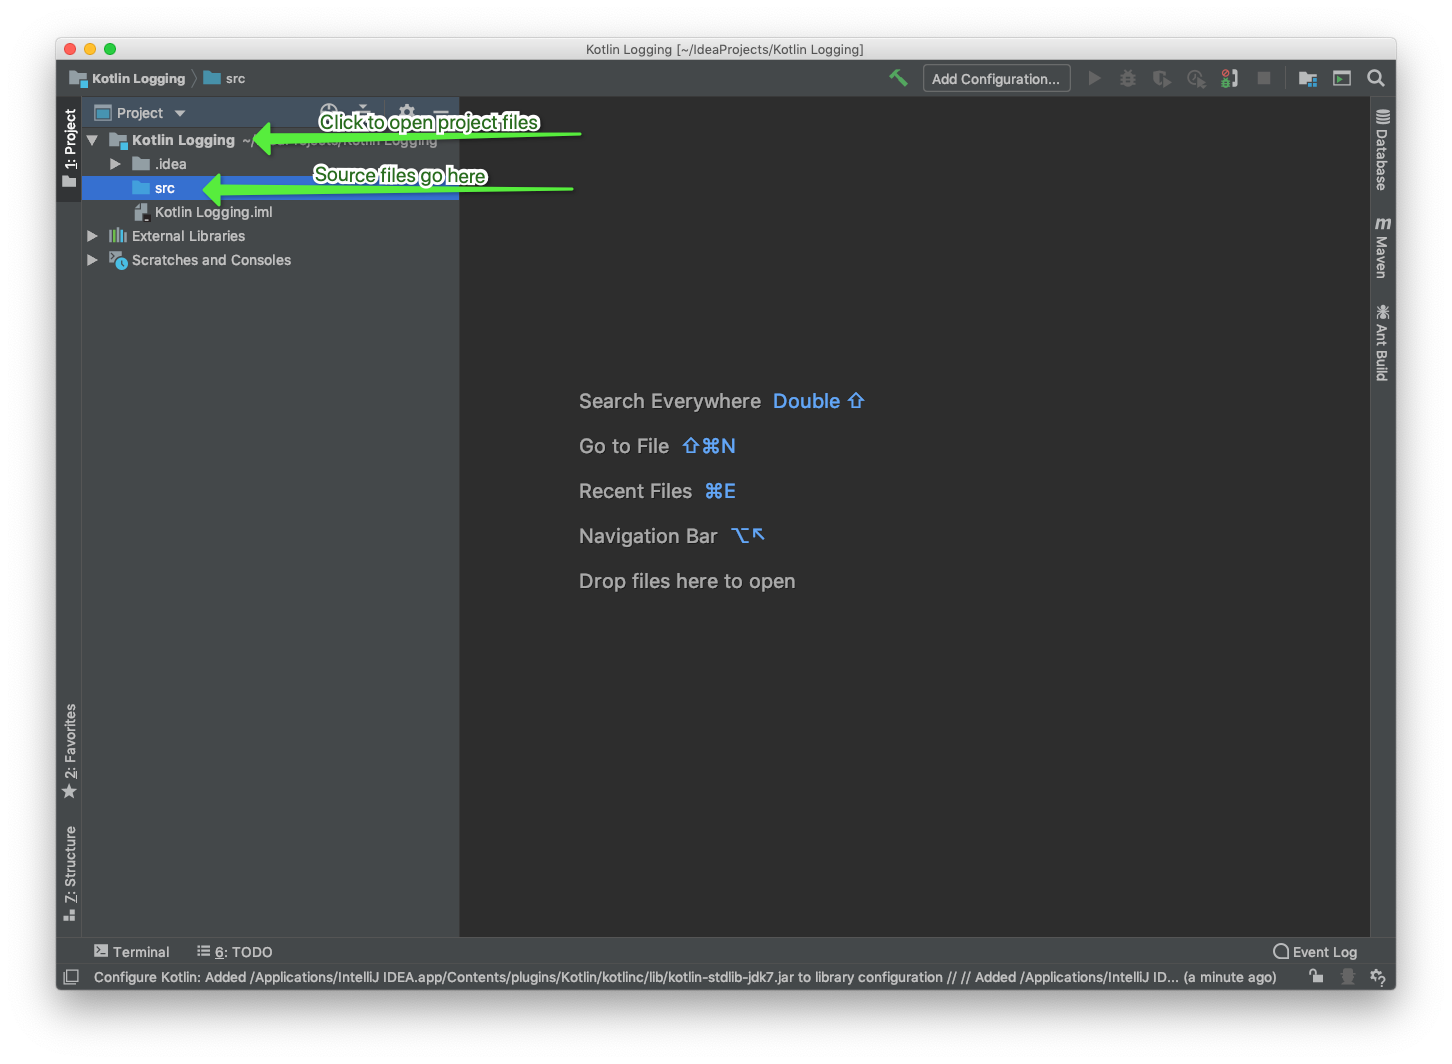
Now it’s time to create your first file and log a message. Open the project directory and then right click on the src folder.
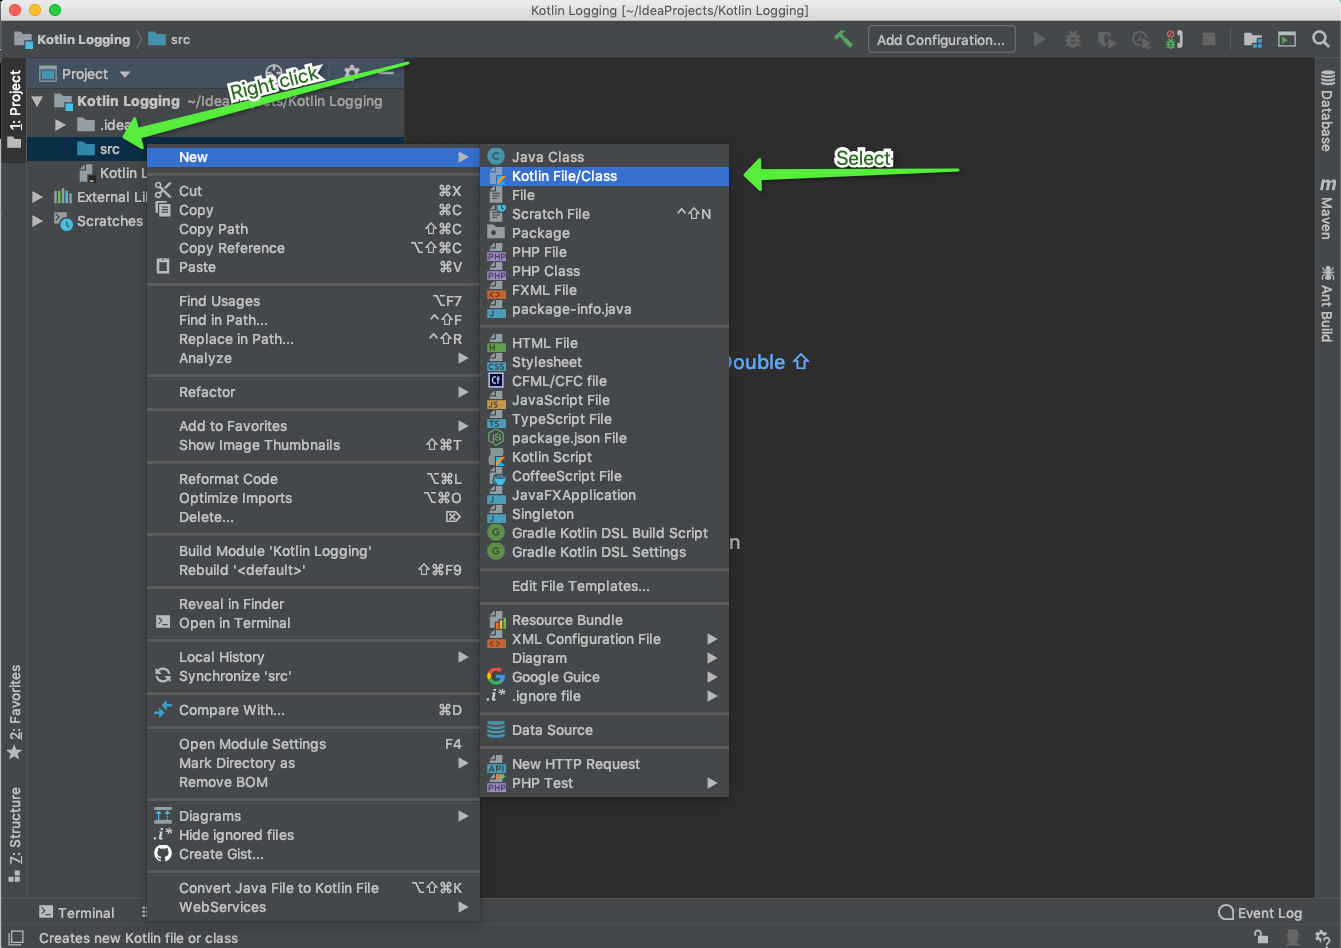
This will open a window for the file name. Name it logging.
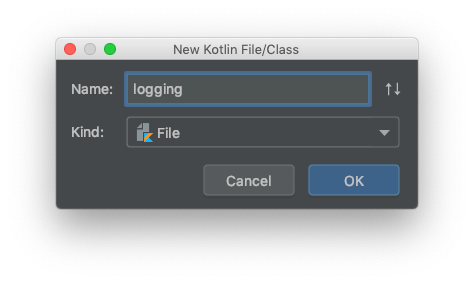
Click OK, and you’re ready to write some code!
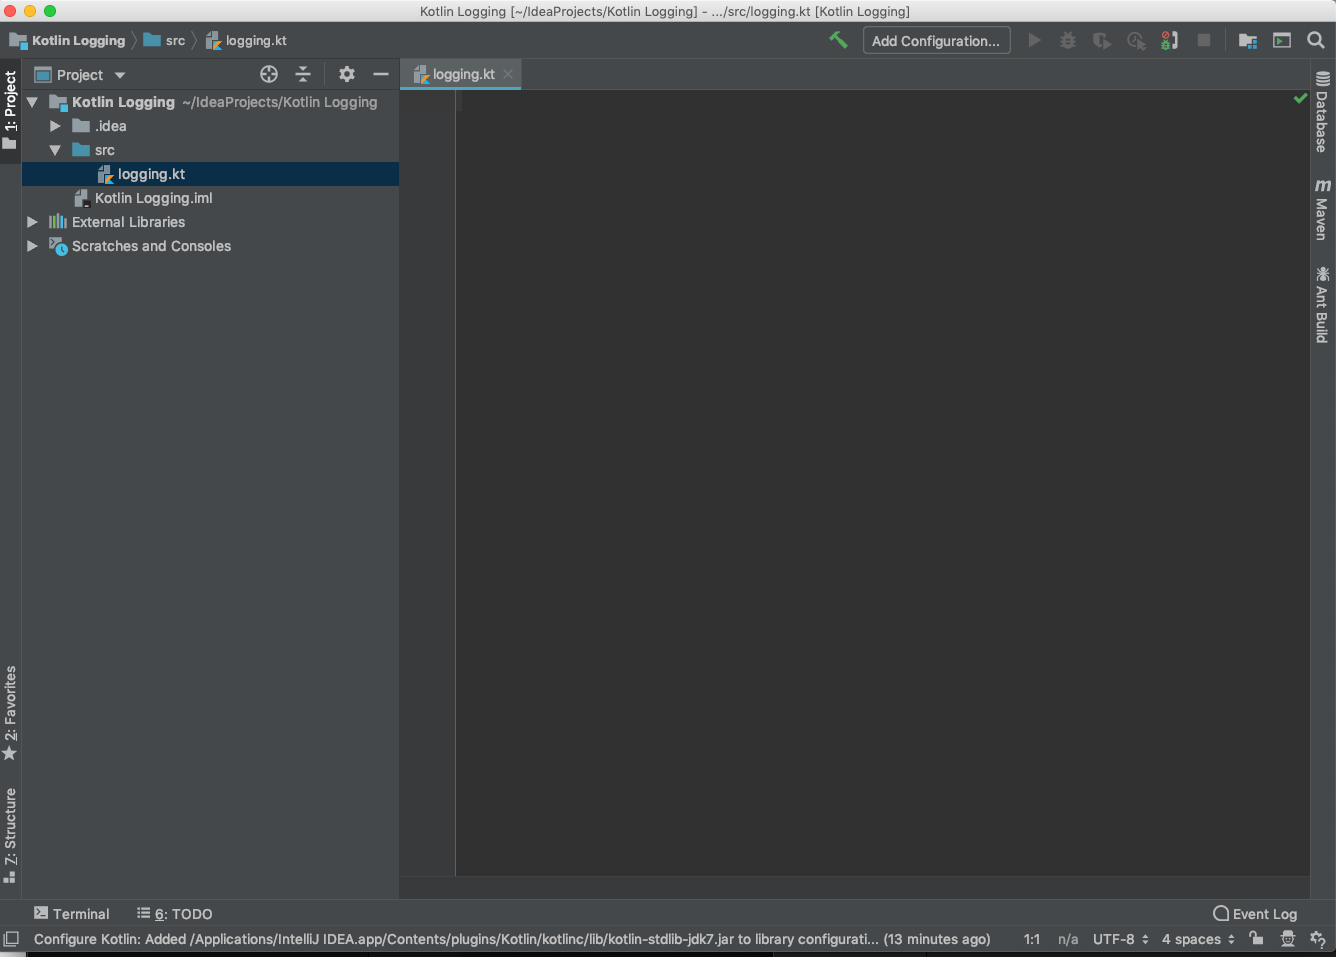
You’re creating the simplest Kotlin logging example that’ll work, so you’ve already done the hard part. Here’s the code for your first program:
import java.io.File

fun main() {
    File("application.log").writeText("Hello, Logging")
}
Enter that, and then run your application by right-clicking on the source file and selecting run.
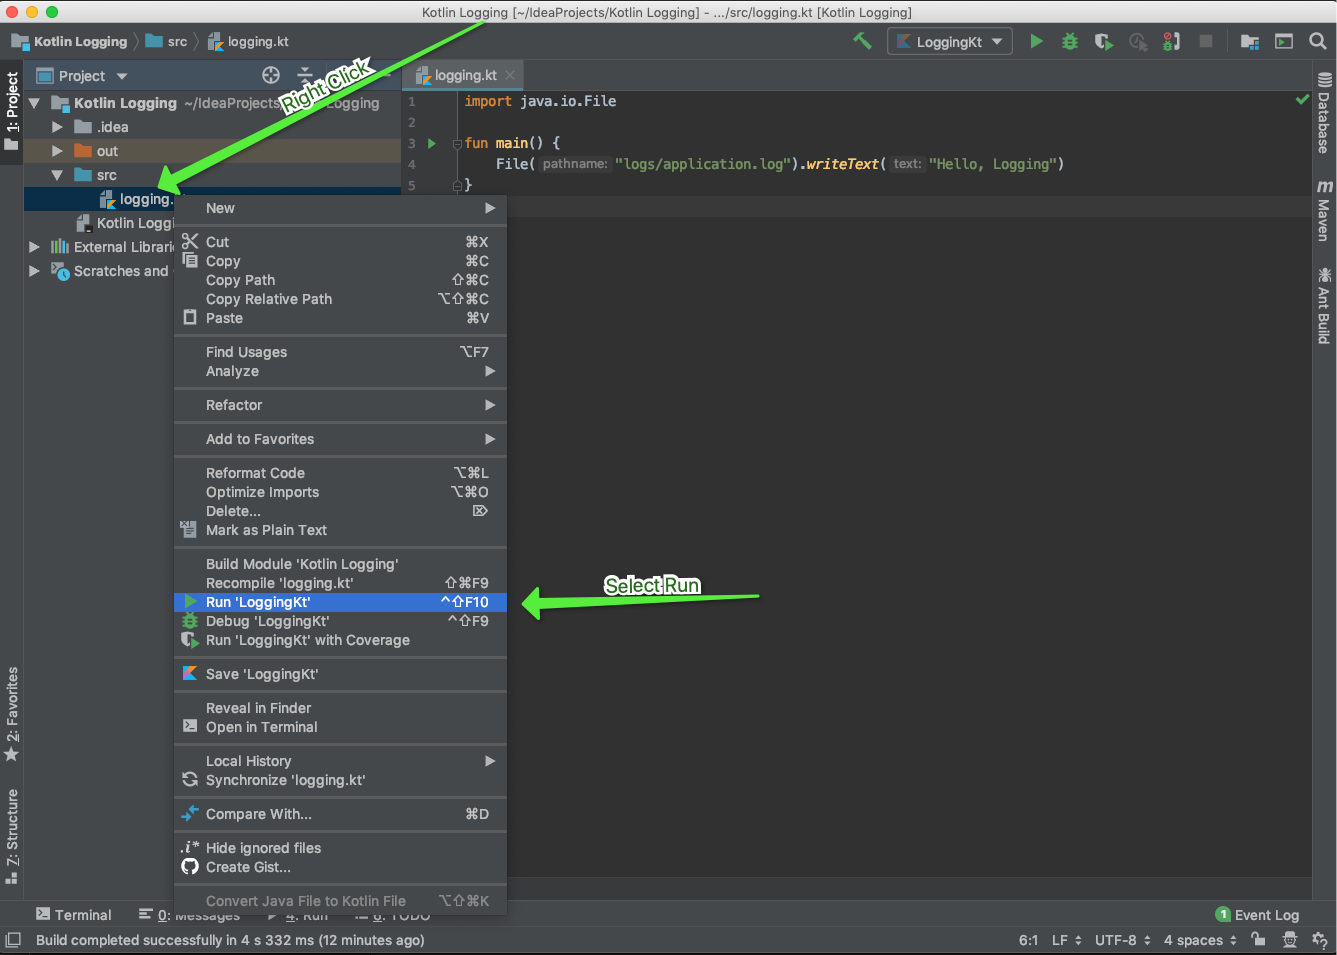
IntelliJ will build and run your code.
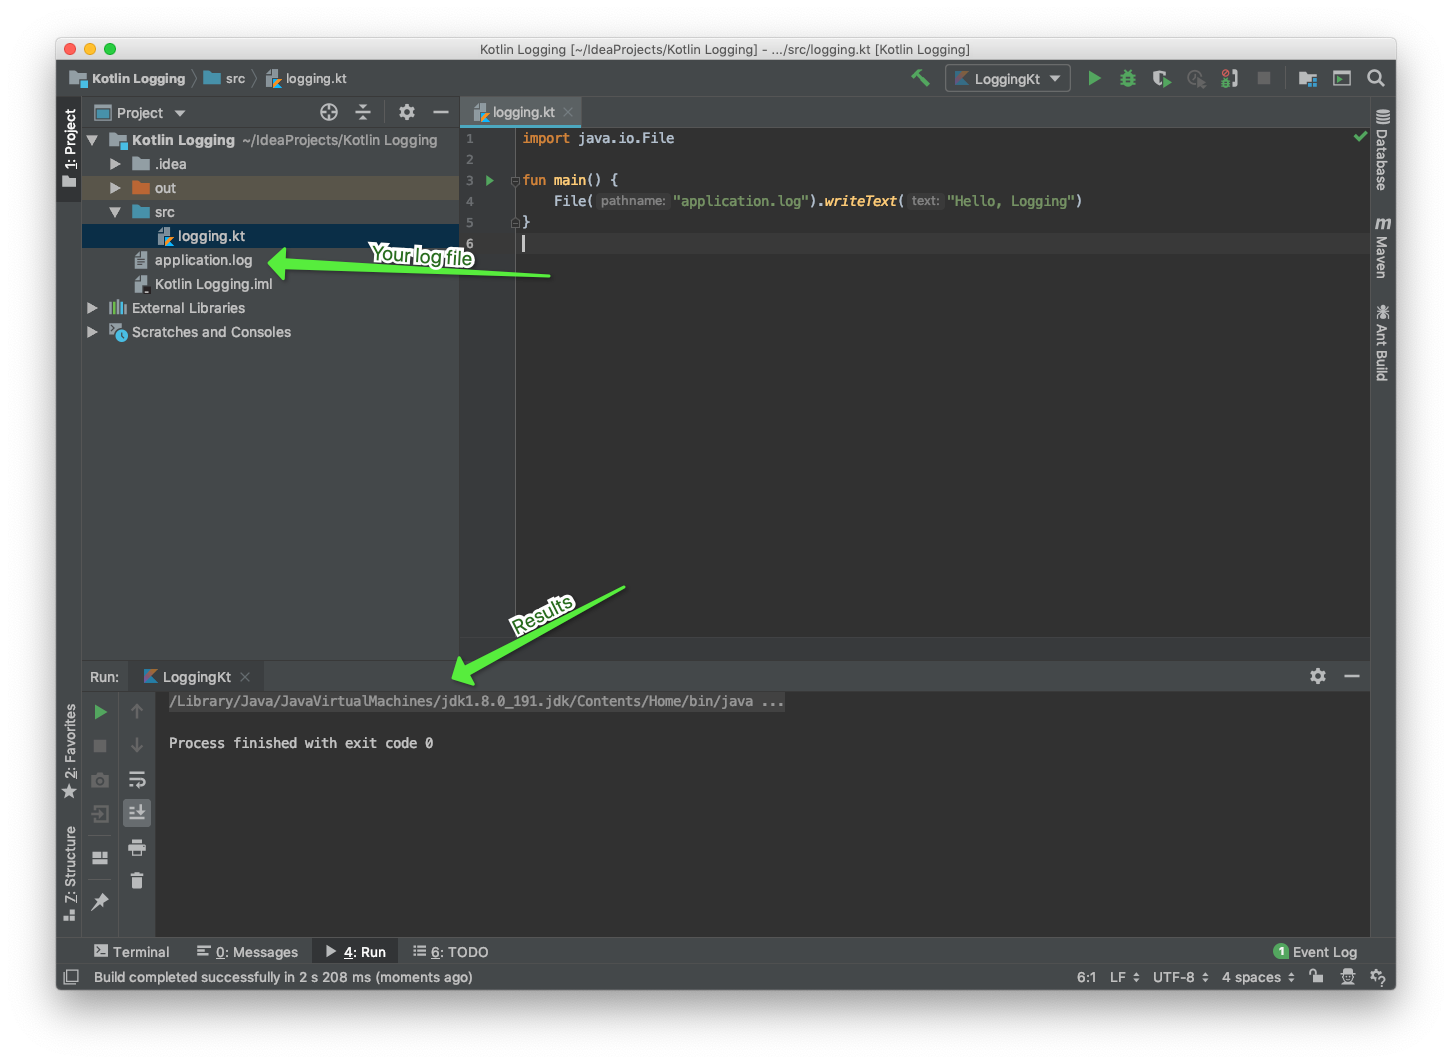
IntelliJ displays the results in the bottom of the IDE window. Your log file will appear in the project’s working directory since you told Kotlin to create it there. Double click on your log file to open it in the editor, and you’ll see the log message.
This code works for simple logging, but it’s not a sustainable solution. Is Kotlin keeping the fit open in the background, or opening it for every call? What would happen after thousands of messages? Is it threadsafe, or does opening the file each time block the program? Would multiple threads corrupt the file?
Let’s look at a better way to do Kotlin logging, after a brief aside on what logging is.
What Is Application Logging?
Let’s discuss what logging is before we improve how you do it in Kotlin. You’ve dealt with it before and know what logging is, but I’ll define it, so we’re sure we’re talking about the same thing. If you’ve read entries in this series before, you’re familiar with our definition from the first article:
Application logging involves recording information about your application’s runtime behavior to a more persistent medium.
There’s a lot packed in there. You record behavior with logging. The messages to document events occurring inside your app. Plus, since the definition it talks about runtime, it implies that you create logs with a notion of time. You want to record the messages as they occur with information about when they happened.
Also, you store logs in a persistent medium. Why? So you can review events after they happen. You need this for activities that occur too quickly to follow. If you’re trying to track down an error, a record of events is invaluable. If you need to maintain an audit trail, persistent storage might even be mandatory. A persistent medium is a disk, a relational database, or a search platform like Scalyr.
So, that’s what logging is. So how can you manage your Kotlin logging better than the first example? Let’s get back to work.
Using Logback for Kotlin Logging
Add Logback to Your Project
When you run Kotlin in Java’s JVM, your code can access any Java library. So, let’s set your application up for Logback, one of Java’s most widely used logging frameworks.
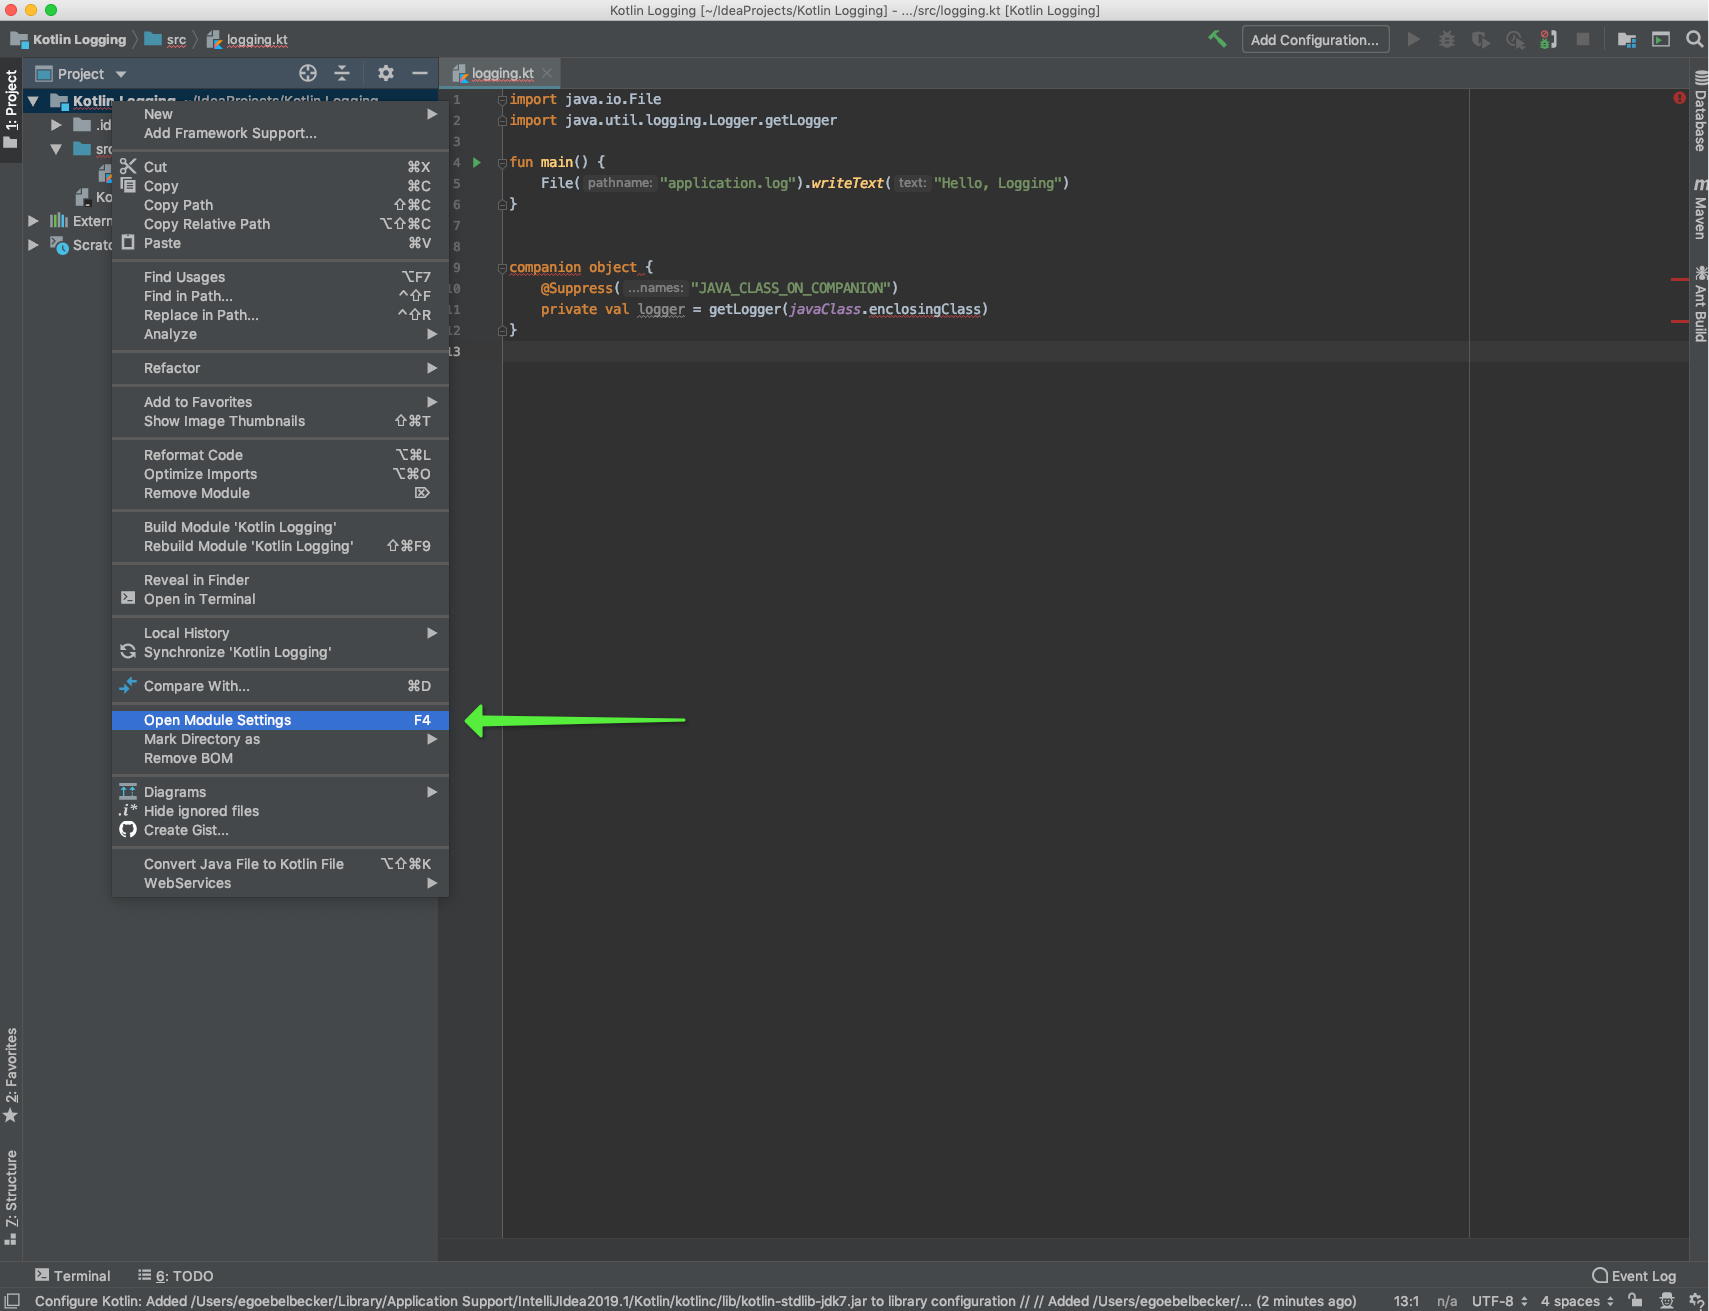
First, open your project’s module settings by right-clicking on the project name and selecting the module settings menu entry.
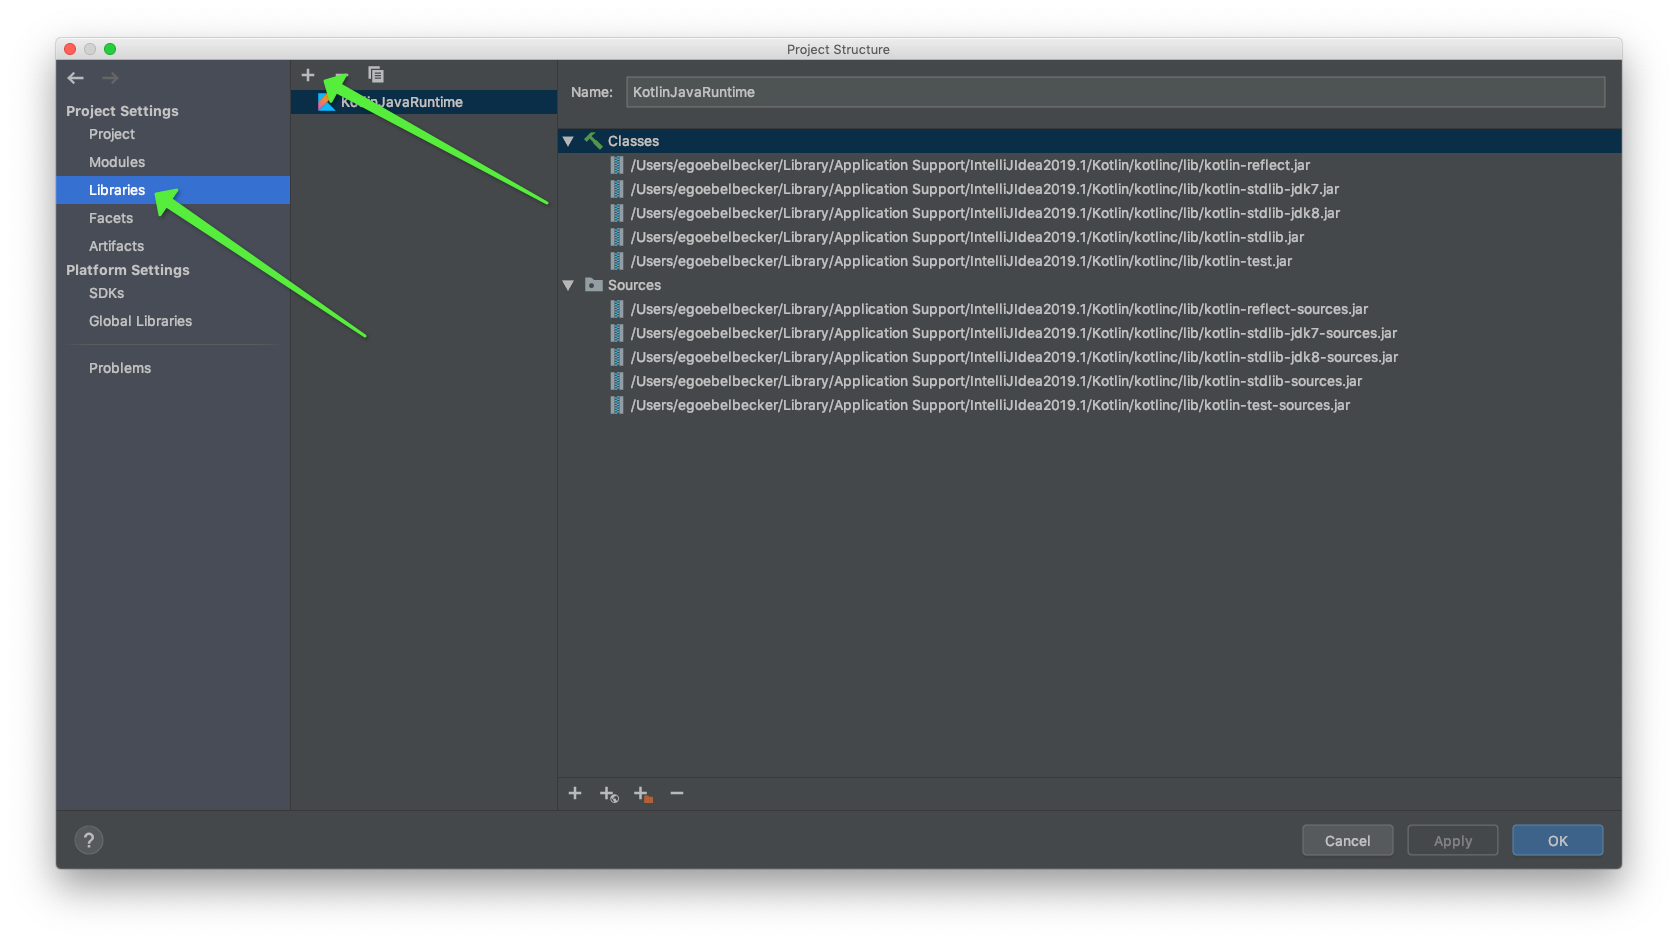
Next, select add library and find the + button near the top of the window.
This button drops down a menu. Select from maven.
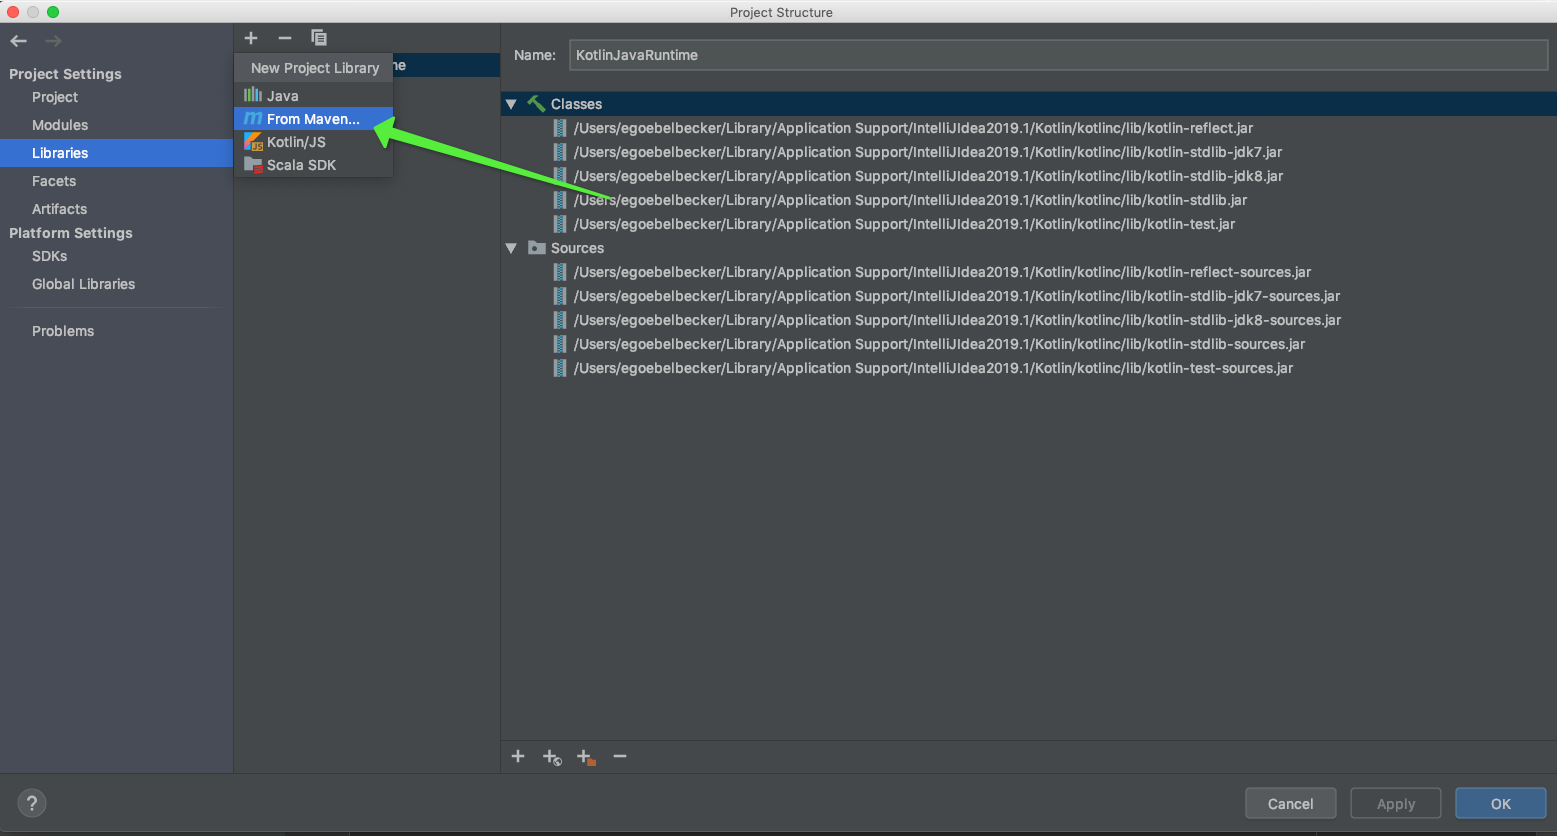
A dialog will open. Use this search facility to locate and add these three libraries:
- org.slf4j:slf4j-api:1.7.26
- ch.qos.logback:logback-classic:1.2.3
- ch.qos.logback:logback-core:1.2.3
After you enter a name, select the disclosure indicator as shown. IntelliJ will search maven and populate the list of libraries. Select the correct one.
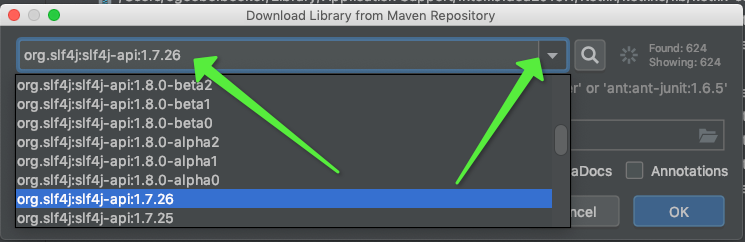
IntelliJ will add it to the module. Repeat for all three libraries.
You added the Simple Logging Facade for Java and two libraries for Logback. Simple Logging Facade is the library you’ll call from Kotlin. Logback will do the actual logging.
Calling LogBack from Kotlin
Now, you can call Logback from Kotlin. Add a new Kotlin file to the project. Name it Utils.
Here’s the code:
fun getLogger(): Logger = LoggerFactory.getLogger(Logger.ROOT_LOGGER_NAME)

fun getLogger(name: String): Logger = LoggerFactory.getLogger(name)
These two functions retrieve a Simple Logging Facade Logger instances. The first retrieves the root or top-level logger. The second retrieves one based on an arbitrary name. We’ll talk about what the difference is below.
Next, modify logging.kt to log with a logger and rerun the code.
fun main() {
    getLogger().debug("Hello, Logging")
}
Your output will resemble this:
17:23:55.984 [main] DEBUG ROOT - Hello, Logging
You have a timestamp, function name, logging level, logger name, and the message now. So, with just a few lines of code, you’ve already improved your logging!
Let’s talk a little bit more about logging best practices before we wrap things up.
Why Log?
Kotlin is a useful language. It has complete access to Java’s rich ecosystem with more compact syntax and support for functional and object-oriented programming. But that doesn’t mean your Kotlin code is bulletproof. You still need a way to see what’s going on inside that app. Even your best Kotlin work has deficiencies and will face unexpected conditions. You need Kotlin logging.
Kotlin is a popular language for Android development. Android apps see a lot of conditions you won’t anticipate. You can run your app in a simulator and capture errors in development. But, a system for capturing logs as part of bug reports is a valuable tool. You can run a remote debugging session on your client devices. Logs are as close as you can get to being there.
Isolating bugs isn’t the only use for logs, either. You can use them to watch your application while it’s working and find opportunities for improvement. And, of course, the usefulness of logs doesn’t stop there. If your code is processing financial transactions, logs are a business requirement.
How Should You Log?
We’ve already changed a simple print statement into a complete log message. Before we finish the job, let’s talk about what we need our log messages to contain. How can you make sure your logs are useful when it comes time to track down a problem? Most logging systems include at least the following information in each log entry:
- Timestamp: when the event in the log entry happened. We’ll see how to add this to messages below.
- Event context: where did this happen? To whom? “It worked” or “It’s broken” might be useful or entertaining during a debugging session. “Failed to connect to database at 192.9.168.3:5000” is more useful in production.
- Severity level: entries need a flag that puts them in context compared to other messages. Logback defines ERROR, WARN, INFO, DEBUG, and TRACE. We’ll take a closer look at logging levels below.
These are only the basics when it comes to logging best practices. Scalyr has an article about logging best practices here. There’s also an excellent cheat sheet here.
Configuring the Logger
You configure Logback file that you supply to the library via a Java property or by placing it in the classpath. You’ll use the classpath for this tutorial to keep things simple.
Create a new file in the source directory of your project. Name it logback.xml, the default configuration file name. Add these contents:
<configuration>
    <appender name="FILE" class="ch.qos.logback.core.FileAppender">
        <file>myApp.log</file>
        <encoder>
            <pattern>%date %level [%thread] %logger{10} [%file:%line] %msg%n</pattern>
        </encoder>
    </appender>

    <appender name="STDOUT" class="ch.qos.logback.core.ConsoleAppender">
        <encoder>
            <pattern>%msg%n</pattern>
        </encoder>
    </appender>

    <root level="debug">
        <appender-ref ref="FILE" />
        <appender-ref ref="STDOUT" />
    </root>
</configuration>
Since the directory you run your code from is part of the project’s classpath, Logback will find this file at runtime. It has three sections. Two of them are log appenders. The other defines the root logger.
A log appender is precisely what its name implies. It’s an object that appends to a log. The first appender logs to a file, and the second logs to standard output; the terminal. With Logback, it’s easy to send logs to more than one place; just define another appender. Each appender has an encoder. The encoder formats the message before the appender passes it to the logger. We’ll see how the two encoders differ in a moment.
Finally, the configuration defines the root logger. I mentioned different loggers above when you added Logback to your code. Logback places logger instances in a hierarchy that resembles an object-oriented hierarchy. A logger inherits its property from the hierarchy. By configuring the root logger, we’re defining the properties for all loggers in the application. Unless a logger explicitly overrides these properties, Logback creates it with them.
This root logger will log all messages that are passed to it with a level that’s DEBUG or higher. Logback will send entries to both log appenders.
Formatting Kotlin Logging Messages
So, rerun the application with the configuration file.
The terminal output looks like this:
Hello, Logging
The program also creates a log file in the project root name myApp.log. It contains one line:
2019-06-15 22:44:03,105 DEBUG [main] ROOT [logging.kt:3] Hello, Logging
The logging output went both appenders, but the messages are configured differently. The encoders are different.
Here’s the encoder for STDOUT:
<encoder>
    <pattern>%msg%n</pattern>
</encoder>
Here’s the encoder for the file:
<encoder>
        <pattern>%date %level [%thread] %logger{10} [%file:%line] %msg%n</pattern>
</encoder>
Logback has a rich set of conversion words for formatting log messages. Since we only see the content of the log message in the terminal output, it’s safe to assume that %msg is the formatter for the log contents. Here’s a table describing the rest.
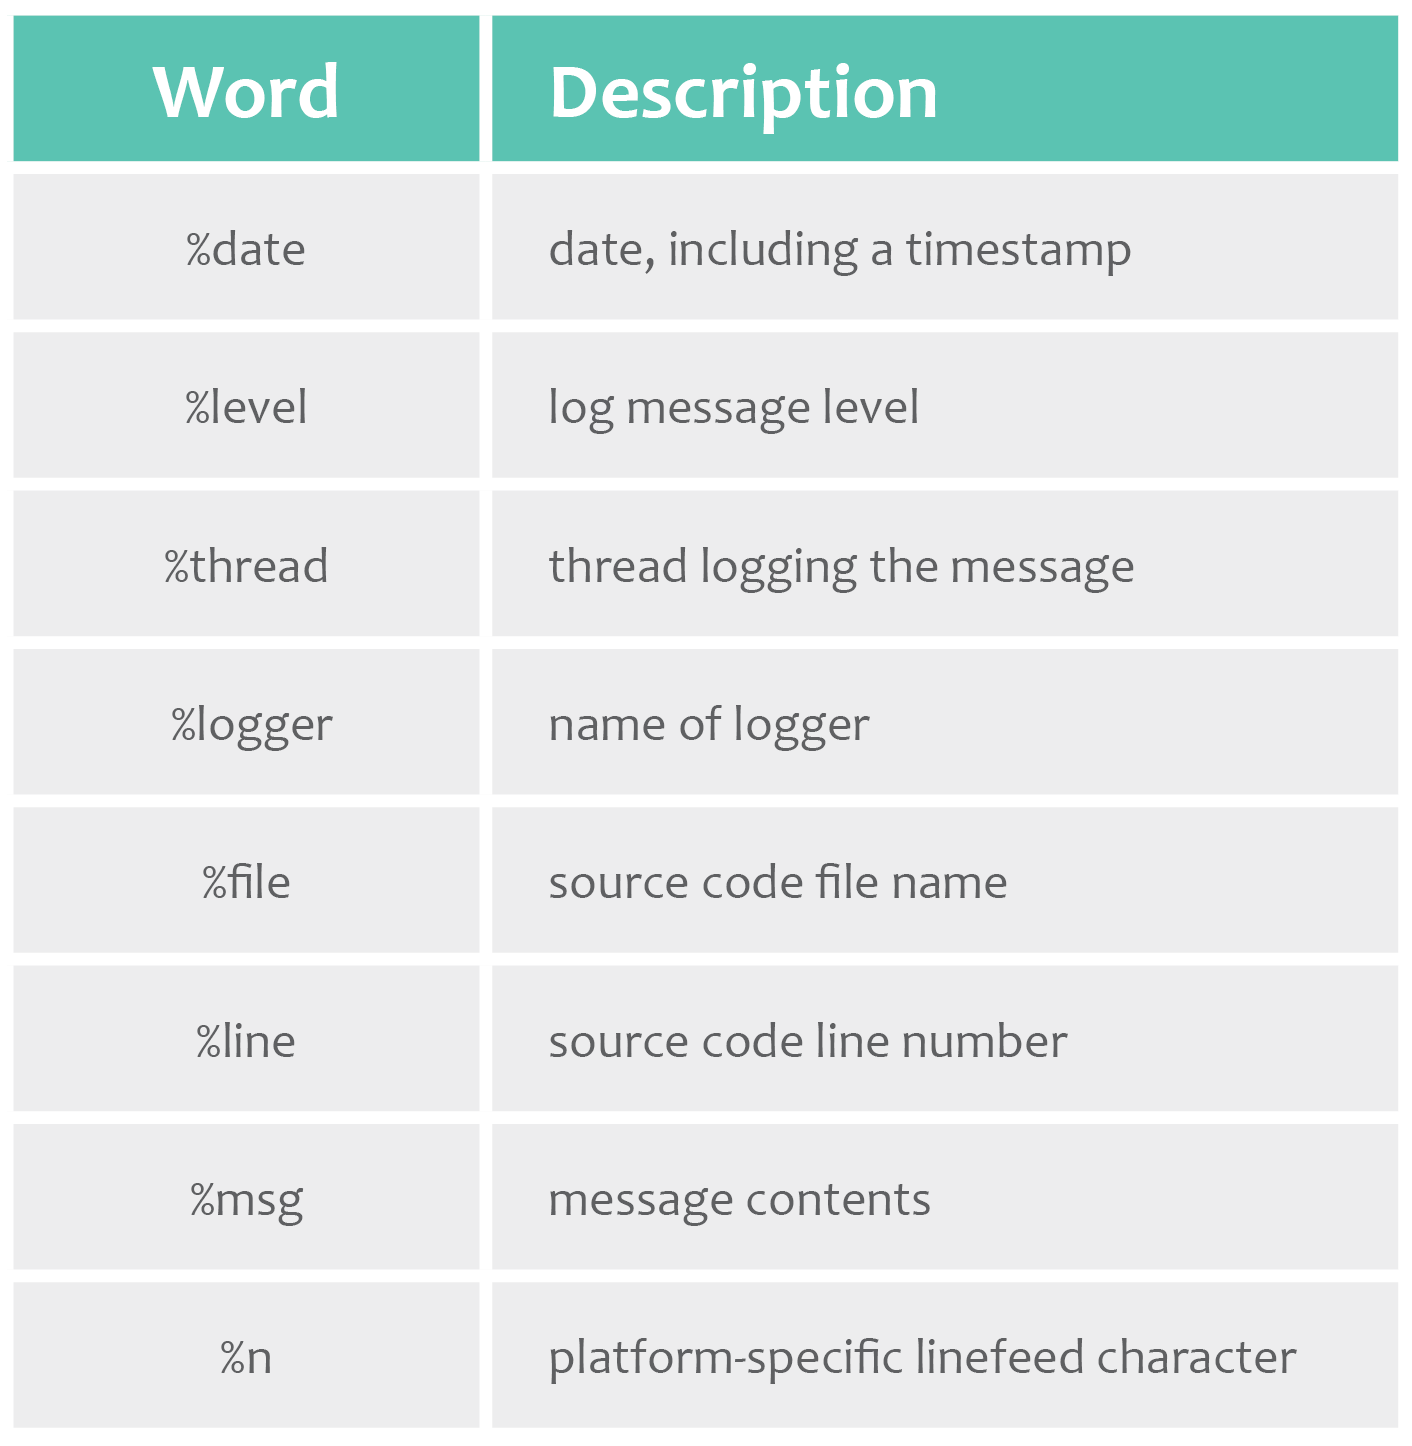
These are only the basic formatters, but you’ve already satisfied the requirements for a useful log message with the file encoder. It tells you exactly where the message came from in your source code. It has a date and time, and it contains the log level.
Logging to a File
Your log files are going to a persistent medium now, too.
<appender name="FILE" class="ch.qos.logback.core.FileAppender">
    <file>myApp.log</file>
    <encoder>
       <pattern>%date %level [%thread] %logger{10} [%file:%line] %msg%n</pattern>
     </encoder>
 </appender>
The file appender creates the file and opens and closes it with each execution of your program. Rerun it, and you’ll see a second line added to it.
Logback has a RollingFileAppender, too. It will create a new file and rename the old one for you, so your log files don’t get too big to manage, or if you want a new file created a regular interval.
Setting Kotlin Logging Levels
Modify the Logback configuration file.
<root level="info">
        <appender-ref ref="FILE" />
        <appender-ref ref="STDOUT" />
    </root>
Rerun the application. The log message is suppressed because we set the root logger to INFO.
You can use appenders and loggers to route messages to specific destinations. Let’s imagine you want to send debug messages to the console, and only info or higher to a file. Create a new logger and move the file appender to it:
<root level="debug" >
    <appender-ref ref="STDOUT" />
</root>

<logger name="production" level="info">
    <appender-ref ref="FILE" />
</logger>
Now, modify the application to log two messages.
fun main() {
    getLogger("production").info("Starting log test")
    getLogger("test").debug("w00t!")
}
Instead of the root logger, we’re using two named loggers. One of them is the production logger you defined in the Logback configuration. Rerun the application.
Both messages go to the console:
Starting log test
w00t!
But only the first message goes to the log file:
2019-06-15 23:20:16,969 INFO [main] production [logging.kt:3] Starting log test
The new logger inherited the output to terminal from the root logger. But, since we set its level to info, it did not inherit the debug messages. That’s a lot of control for just a few lines of code.
What Now?
We’ve covered the hows and the whys of Kotlin logging with Logback. Logback is a powerful framework that makes logging easy for an application developer. But with great power comes great responsibility. You need a logging strategy. Start here, and don’t forget the cheat sheet.
Scalyr’s log aggregation tools help you aggregate, process, search and visualize your logs. This makes it easier to find what you need in the vast ocean of log entries produced by your growing applications. So now that you know the fundamentals, get started with logging in your Swift applications today!

