Picking up from the previous logging articles on how to get started logging with C# and Java, today we’ll be looking at how to get up and running quickly with Python logging.
Even if you’ve already read the previous articles, this post is worth a read. It will cover new ground, like the basics around application logging in Python and a few other things, such as
- Configuring the logging module.
- What to log and why.
- The security implications of logging.
So what are you waiting for? Keep reading, and let’s set up a simple project to begin working with.

As a developer, logging is essential for tracking and debugging your code. It allows you to monitor the execution of your program, track errors, and gain insight into what’s happening behind the scenes. This comprehensive guide will teach you how to master Python logging to help you become a more efficient and effective developer.
Introduction to Python Logging
Python logging is a built-in module that allows developers to log messages from their code. It provides a standard interface for logging messages and can easily customize your needs. In addition, logging can be configured to write to various outputs, including files, databases, and email.
Logging is an essential tool for developers because it provides a window into what’s happening inside your code. It allows you to monitor the execution of your program, track errors, and gain insight into what’s happening behind the scenes. Logging can also help diagnose performance issues and optimize your code.
To start with Python logging, you must import the logging module and create a logger object. Once you have a logger object, you can log messages from your code. There are five logging levels: DEBUG, INFO, WARNING, ERROR, and CRITICAL. You can set the logging level for each logger object to control the amount of log information.
Python logging can be easily customized to fit your specific needs. You can configure logging to write to various outputs, including files, databases, and email. You can also customize the formatting of log messages to include specific information, such as the time, the level of logging, and the module that generated the message.
To make the most of Python logging, it’s important to follow best practices. These include setting appropriate log levels, logging messages with context, avoiding logging sensitive information, and regularly reviewing and archiving log files. Following best practices will help you avoid common pitfalls and ensure your logs provide the necessary information.
What’s the Motivation for Logging? Why Bother?
Before you start logging, you should understand why logs are valuable. If you don’t know what you want to get from your logs, you won’t know what you should log.

Logging can provide us with information on the health of an application, and it can allow us to:
- Reconstruct what went wrong with a business process.
- Review requests and contextual information in the case of a security breach.
- Provide data for marketing analytics.
- Monitor for policy violations and regulations.
You need a logging strategy in your application to ensure that the proper data is being logged and managed.
What You Should (and Shouldn’t!) Log
There are a lot of things we can put into a log file, but there are some pieces of information that we should never, ever include in log output. You shouldn’t log any form of sensitive business data or personally identifiable information (PII).

What is and isn’t sensitive can vary depending on the industry, but at the very least, you shouldn’t log the following:
- Account numbers
- Credit card numbers (including expiration dates and CVV codes)
- Passwords
- Session identifiers
- Encryption keys
- Social security numbers
- Birth dates
- Full names
- Email addresses
- Driver’s license numbers
In short, treat your logs as if they’ll one day become public. Log data is a great source of information for an attacker to exploit.
The Open Web Application Security Project (OWASP) has a great cheat sheet on logging that would definitely be worthwhile to read over for more information.
The Simplest Python Logging That Could Work
For this demo, I’m going to use the free community edition of JetBrain’s PyCharm IDE. If you haven’t used it before, go ahead and download it and get it installed. Once you have PyCharm installed, open it up.
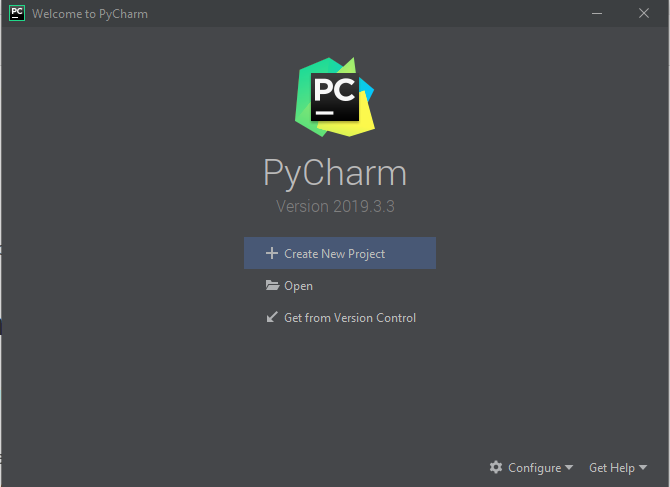
At the “Welcome” screen, click on the “Create New Project.”
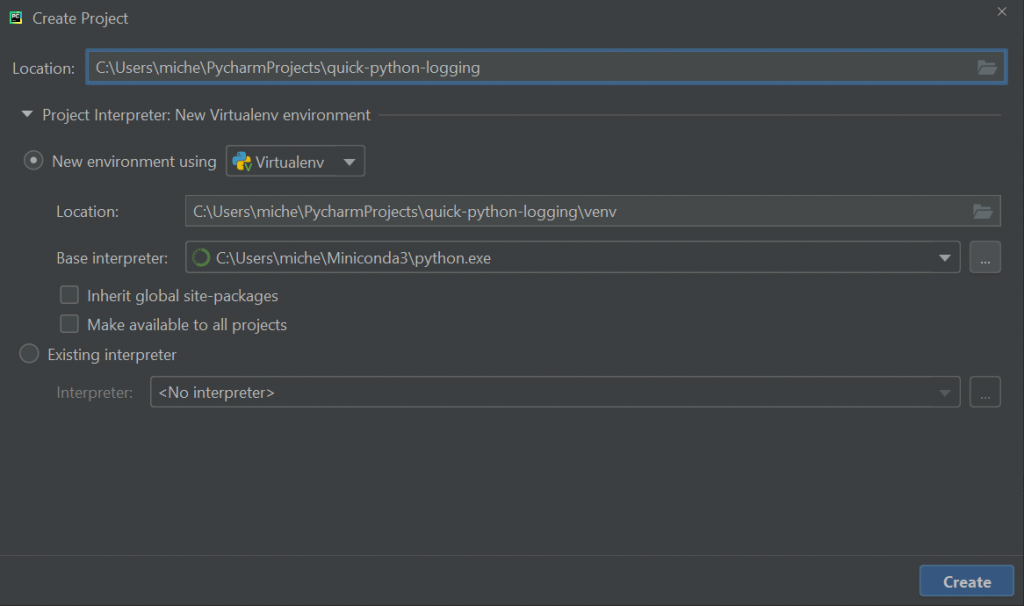
On the next screen, we’ll need to set a few options.
First, set the location. It should default to the PyCharm project location. You can call the project whatever you want. I’m calling mine quick-python-logging.
Expand the section below the “Location” option, and you’ll see options related to the Python virtual environment and interpreter. If this isn’t set up for Python3, refer to this guide, which will get you up and running.
Once you have all of those options in place, go ahead and click “Create.”
PyCharm will create a new virtual environment for us, and after a minute or two, we’ll have an empty Python project ready for us to start writing code.
Let’s create a new Python file by right-clicking on the project name and selecting “New Python File” from the “New” submenu dropdown.
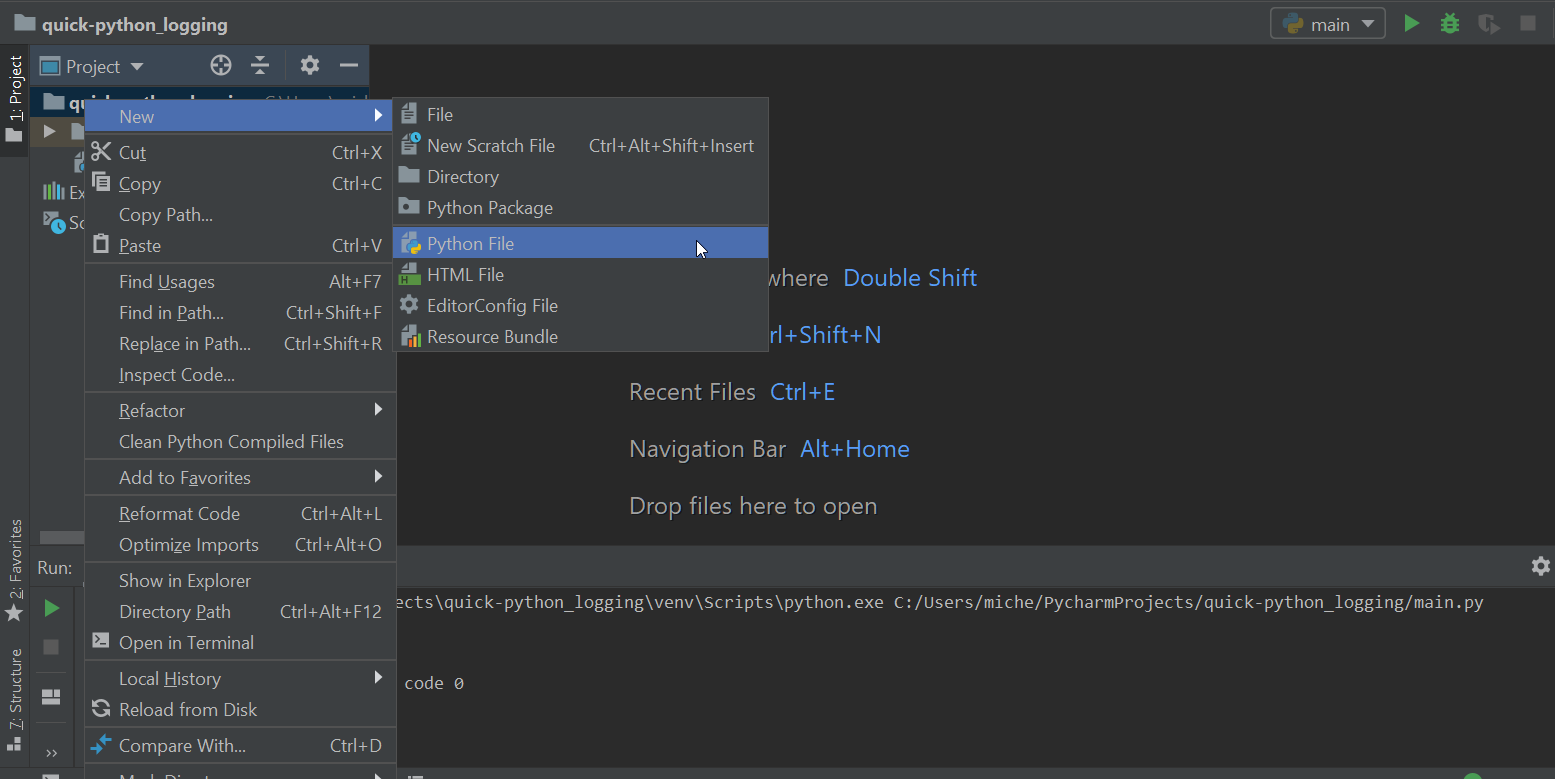
Call it main.py.

Go ahead and update our new main.py file with the following code:
if __name__ == "__main__":
     print("Hello, Python!")
Now, let’s just verify that your interpreter is set up correctly. Go to Run > Run ‘Main’ or use the shortcut Shift + F10 (Windows and Linux) or Control + R (Mac).
If everything is set up properly, PyCharm will bring up the run output window, where we’ll see our message. It should look like this:

While we can use the print statement to display messages to the console—and who hasn’t done this to debug an issue?—this isn’t an ideal way for us to handle logging in any application.
Application logging is more than just printing messages to the screen.
Enter the Python Logging Framework
Python’s logging module is a set of functions that take printing information to the console to the next level. With those functions, developers are able to log not only to the console, but also to any open file handle.
Like many logging modules, Python provides a series of escalating logging levels which provide developers a granular way to categorize their logs.
Python uses the following priority levels, starting with the highest priority first:
- Critical
- Error
- Warning
- Info
- Debug
- Notset
The Python logging module is set at the warning logging level by default. This means that any requests at the warning level or higher priority are logged to the destination. The rest are ignored.
Go ahead and modify your main.py to import the logging library and add a couple of log messages to our application.
import logging if __name__ == "__main__":
     logging.warning("I'm a warning!")
     logging.info("Hello, Python!")
     logging.debug("I'm a debug message!")
Now, if you run this, you might see something unexpected:

Where are our other messages? Why was only the warning message printed?
Well, it has to do with logging levels. We’ll get to handling these in a moment, but let’s first look at a couple of other things regarding our logging code.
While we can continue to use our logging library to print messages to the console, this isn’t probably going to work long-term.
We know that we need to persist the information, so why not a file?
This is straightforward to do, but we need to look at how to configure the logging module.
Configuring the Logger
The Python logging module is broken into four different abstractions: loggers, handlers, filters, and formatters.
- Loggers expose the primary interface that we use to log events from the application.
- Handlers, well, handle where the log event is sent. Using different handlers, we can have log events go to different files or some to one file and the rest to syslog.
- We can change what log events get written or add contextual information to an event by using a filter.
- Finally, log formatters allow us to specify the layout of our data when it gets written.
We can also configure logging at different module and class levels. This allows us to have finer-grained control over what’s being logged and where it’s being sent.
Configuring Logging in the Code
Let’s get our current logging demo writing to a log file. We’ll use the basicConfig method on the logging module to quickly configure logging for our application.
Run this and you’ll see that a file named demo.log is created in your project directory.
Open that up, and you’ll find that it contains the following:
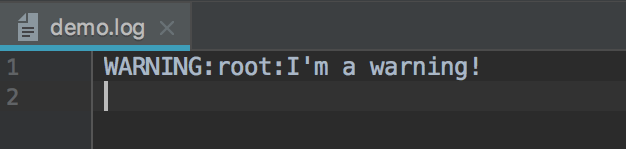
Before we move on, let’s get the rest of our messages writing to the log file. Earlier, I mentioned our other messages weren’t appearing due to the logging level. Let’s change that so we’re logging everything.
Go to your main.py and update the configuration:
import logging

logging.basicConfig(filename='demo.log', level=logging.DEBUG)

if __name__ == "__main__":
     logging.warning("I'm a warning!")
     logging.info("Hello, Python!")
     logging.debug("I'm a debug message!")
Now run the application. You’ll see the rest of our messages in the file.
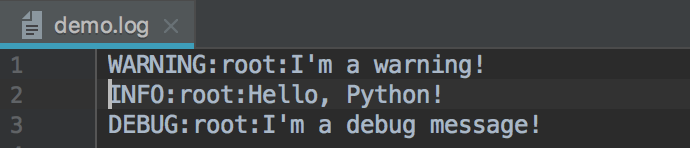
So, what did we do?
We configured our code to log all messages of level DEBUG and above. Before, when the default level was used, only levels WARNING and above would be logged.
Formatting Our Messages
Now that we have our log messages being written to a persisted medium, we need to make our messages more useful.
Let’s configure a formatter to create a better layout and to include additional information for helping with debugging our application.
Add the following to your main.py:
import logging

logging.basicConfig(filename='demo.log',
                    level=logging.DEBUG,
                    format='%(asctime)s - %(name)s - %(threadName)s -  %(levelname)s - %(message)s')

if __name__ == "__main__":
     logging.warning("I'm a warning!")
        logging.info("Hello, Python!")
     logging.debug("I'm a debug message!")
Now run the application again and open up the demo.log file.
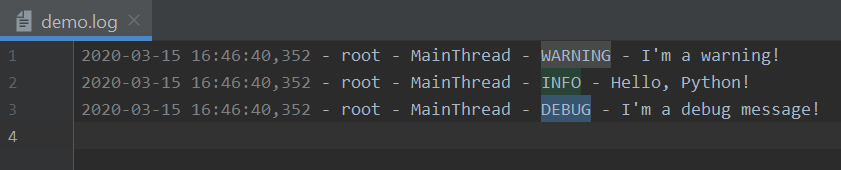
Now we’re getting somewhere. Our little logger is much more useful.
So what’s going on with this format statement? Here’s the info message from our log file:
2020-03-15 16:25:59,157 - root - MainThread - INFO - Hello, Python!
Let’s break it down.
2020-03-15 16:25:59,157
We first log the time stamp through the Python asctime variable. This is an ISO8601-compliant time stamp.
root
This is the name of the logger. You can view loggers as a tree, and since we didn’t give our logger a name, we’re given the root logger by default.
MainThread
MainThread is the name of the current thread. This is very useful when logging in a multi-threaded application.
INFO
This is the logging level of the message.
Hello, Python!
Finally, we have the message itself.
Now What?
Logging frameworks are a powerful and necessary tool. We can do a lot more with our logging module, such as configuring logging for multiple modules or using a configuration file. We also need to decide on an overall logging strategy.
Far more options can be used to configure the logger, handlers, and formatters. I encourage you to experiment and see what works best for your application.

The Python documentation has a lot of information on the logging module, as well as a basic and advanced logging guide.
Stay tuned to the blog here at Scalyr for more articles on logging and logging best practices.
For now, take a look at the applications you’re working on and consider the current logging strategy in use. There’s most likely room for improvement, so what are you waiting for?

