
As we saw in previous posts, macOS privilege escalation typically occurs by manipulating the user rather than exploiting zero days or unpatched vulnerabilities. Looking at it from from the perspective of a red team engagement, one native tool that can be useful in this regard is AppleScript, which has the ability to quickly and easily produce fake authorization requests that can appear quite convincing to the user. Although this in itself is not a new technique, in this post I will explore some novel ways we can (ab)use the abilities of AppleScript to spoof privileged processes the user already trusts on the local system.
What is a Privileged Helper Tool?
Most applications on a Mac don’t require elevated privileges to do their work, and indeed, if the application is sourced from Apple’s App Store, they are – at least technically – not allowed to do so. Despite that, there are times when apps have quite legitimate reasons for needing privileges greater than that possessed by the currently logged in user. Here’s a short list, from Apple’s own documentation:
- manipulating file permissions, ownership
- creating, reading, updating, or deleting files
- opening privileged ports for TCP and UDP connections
- opening raw sockets
- managing processes
- reading the contents of virtual memory
- changing system settings
- loading kernel extensions
Often, programs that need to perform any of these functions only need to do so occasionally, and in that context it makes sense to simply ask the user for authorization at the time. While this may improve security, it is also not the most convenient if the program in question is going to need to perform one or more of these actions more than once in any particular session. Users are not fond of repeated dialog alerts or of repeatedly having to type in a password just to get things done.
Privilege separation is a technique that developers can use to solve this problem. By creating a separate “helper program” with limited functionality to carry out these tasks, the user need only be asked at install time for permission to install the helper tool. You’ve likely seen permission requests that look something like this:
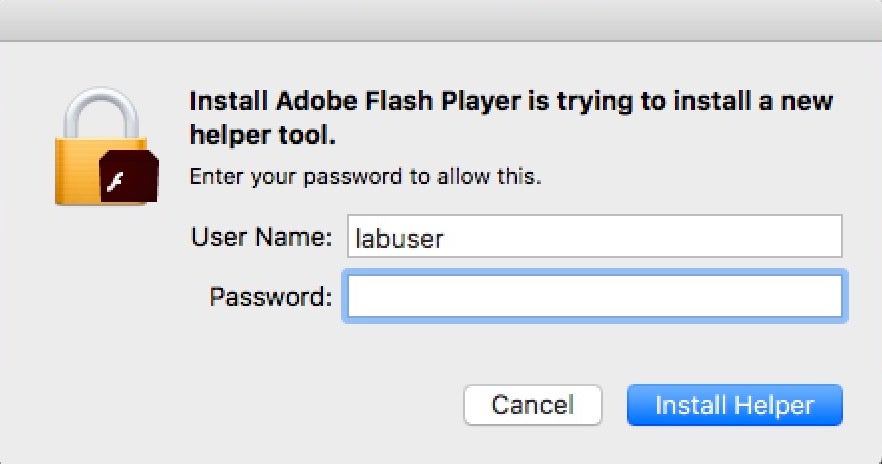
The helper tool always runs with elevated privileges, but it is coded with limited functionality. At least in theory, the tool can only perform specific tasks and only at behest of the parent program. These privileged helper tools live in a folder in the local domain Library folder:
/Library/PrivilegedHelperTools
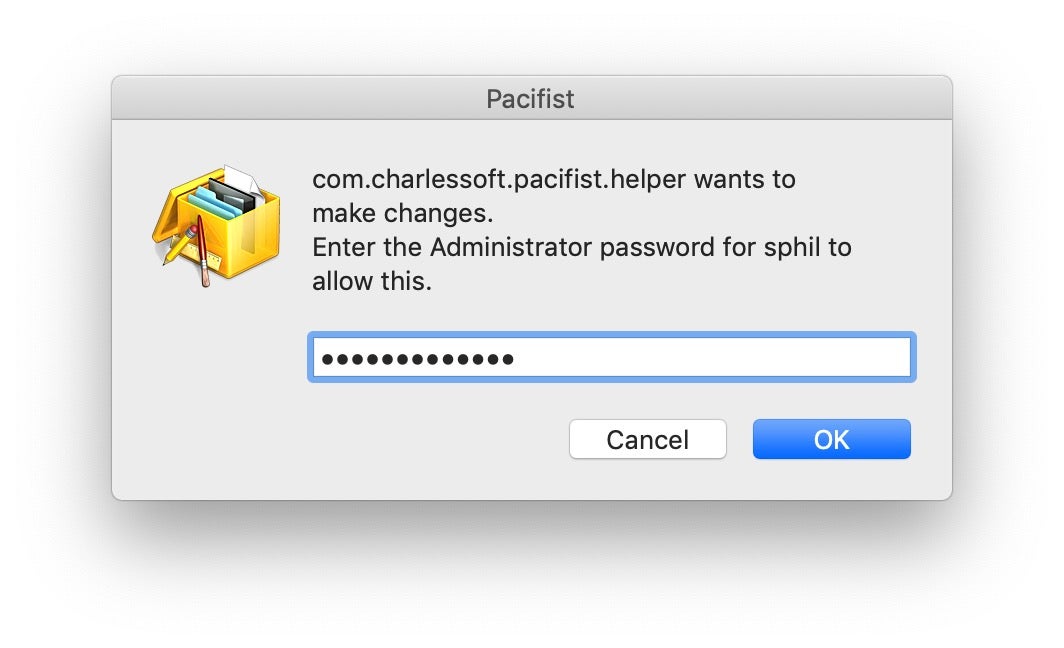
Since they are only installed by 3rd party programs sourced from outside of the App Store, you may or may not have some installed on a given system. However, some very popular and widespread macOS software either does or has made use of such tools. Since orphaned Privileged Helper Tools are not removed by the OS itself, there’s a reasonable chance that you’ll find some of these in use if you’re engaging with an organisation with Mac power users. Here’s a few from my own system that use Privileged Helper Tools:
- BBEdit
- Carbon Copy Cloner
- Pacifist
Abuses of this trust mechanism between parent process and privileged helper tool are possible (CVE-2019-13013), but that’s not the route we’re going to take today. Rather, we’re going to exploit the fact that there’s a high chance the user will be familiar with the parent apps of these privileged processes and inherently trust requests for authorization that appear to be coming from them.
Why Use AppleScript for Spoofing?
Effective social engineering is all about context. Of course, we could just throw a fake user alert at any time, but to make it more effective, we want to :
- Make it look as authentic as possible – that means, using an alert with convincing text, an appropriate title and preferably a relevant icon
- Trigger it for a convincing reason – apps that have no business or history of asking for privileges are going to raise more suspicion than those that do. Hence, targeting Privileged Helper tools are a useful candidate, particularly if we provide enough authentic details to pass user scrutiny.
- Trigger it at an appropriate time, such as when the user is currently using the app that we’re attempting to spoof.
All of these tasks are easy to accomplish and combine using AppleScript. Here’s an example of the sort of thing we could create using a bit of AppleScripting.
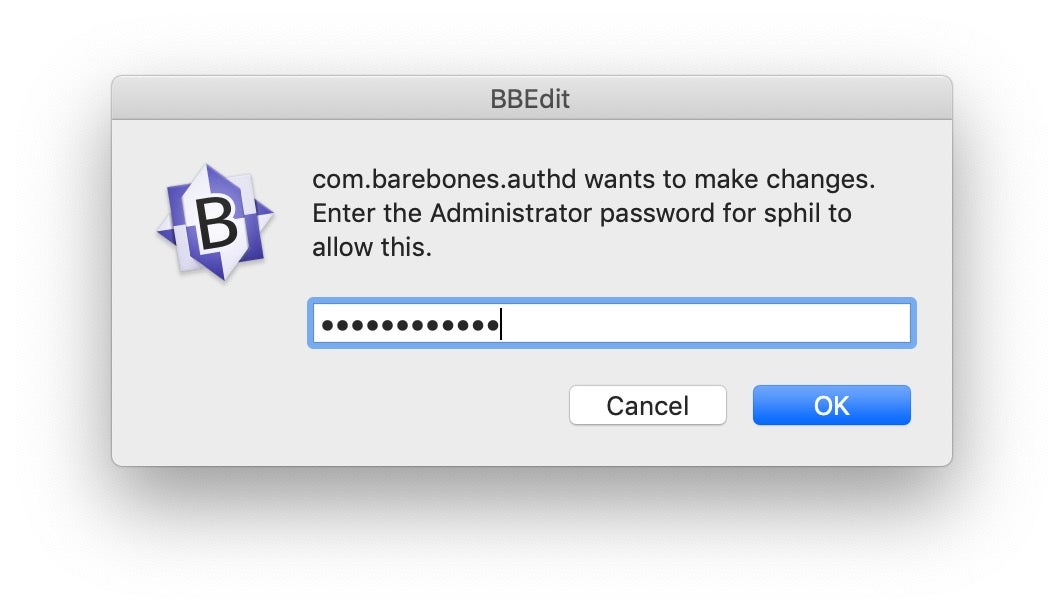
The actual dialog box is fairly crude. We haven’t got two fields for input for both user name and password, for one thing (although that is possible), but even so this dialog box has a lot going for it. It contains a title, an icon and the name of a process that if the user were to look it up online, would lead them back to the Privileged Helper tool that they can verify exists in their own /Library/PrivilegedHelperTools folder. The user would have to dig quite a bit deeper in order to actually discover our fraud.
Of course, a suspicious user might just press “Cancel” instead of doing any digging at all. Fortunately, using AppleScript means we can simultaneously make our request look more convincing and discourage our target from doing that again by wiring up the “Cancel” button to code that will either kill the parent app or simply cause an infinite repeat.
An infinite repeat might raise too many suspicions, however, but killing the app and throwing a suitable alert “explaining” why this just happened could look far more legitimate. When the user relaunches the parent app and we trigger our authorization request again, the user is now far more likely to throw in the password and get on with their work.
For good measure, we can also reject the user’s first attempt to type the password and make them type it twice. Since what is typed isn’t shown back to the user, making typos on password entry is a common experience. Forcing double entry (and capturing the input both times) should ensure that if the first attempt contained a typo or was not correct, the second one should be (we could also attempt to verify the user’s password directly before accepting it, but I shall leave such details aside here as we’ve already got quite a lot of work to get through!).
Creating the Spoofing Script
If you are unfamiliar with AppleScript or haven’t looked at how it has progressed in recent years since Yosemite 10.10, you might be surprised to learn that you can embed Objective-C code in scripts and call Cocoa and Foundation APIs directly. That means we have all the power of native APIs like NSFileManager, NSWorkspace, NSString, NSArray and many others. In the examples below, I am using a commercial AppleScript editor, but which is also available in a free version and which is far more effective as an AppleScript development environment than the unhelpful built-in Script Editor app.
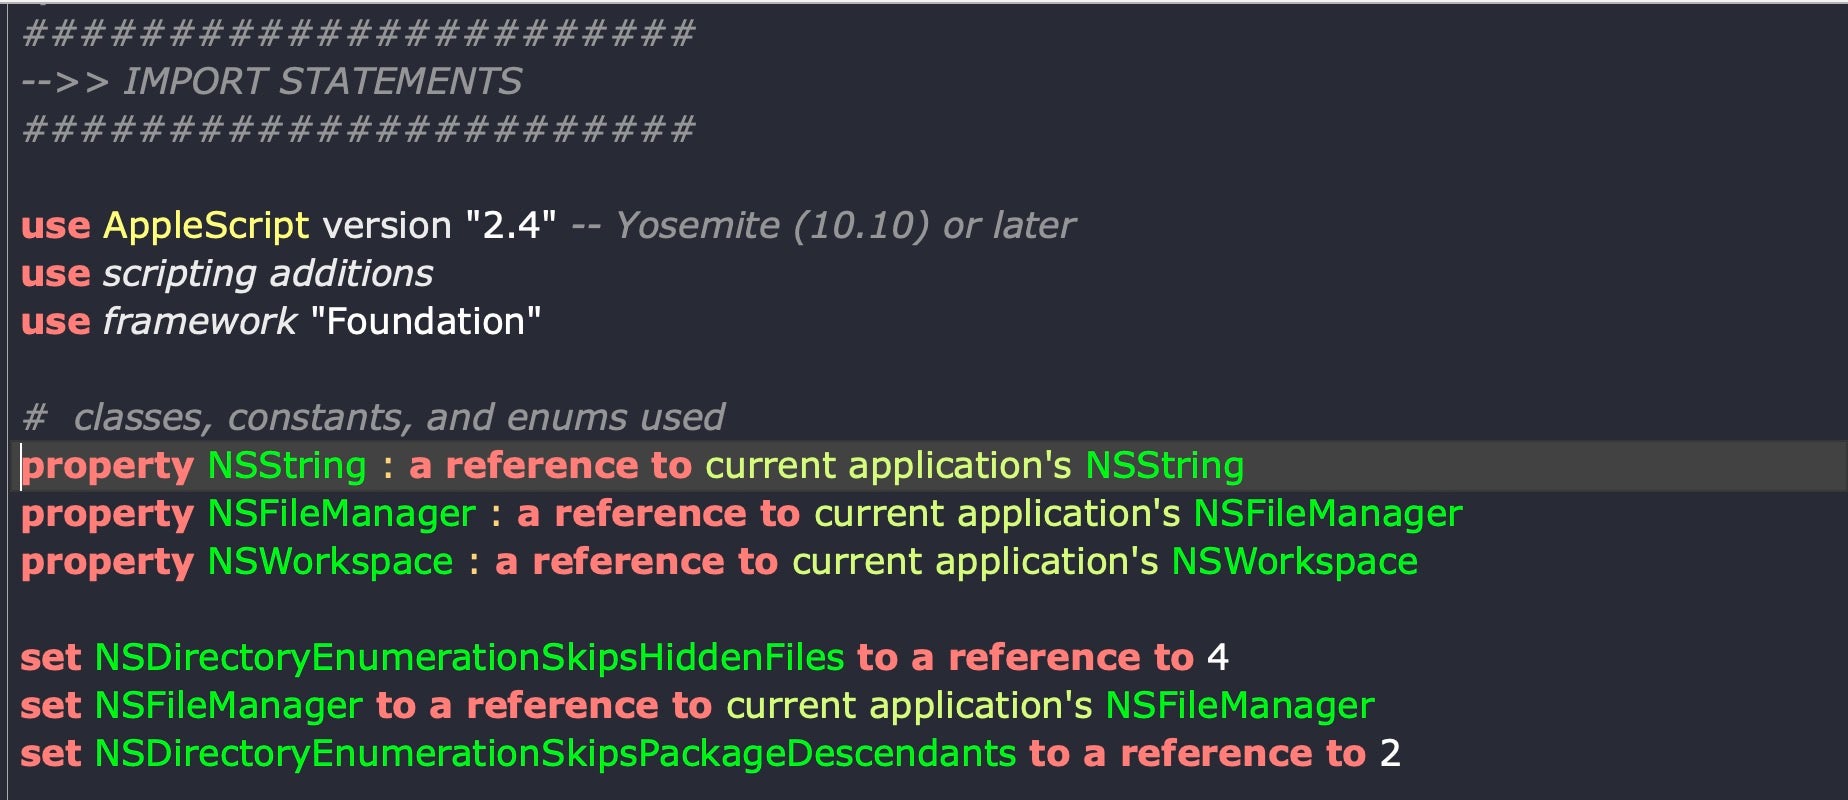
As with any other scripting or programming language, we need to “import” the frameworks that we want to use, which we do in AppleScript with the use keyword. Let’s put the following at the top of our script:
These act as both shortcuts and a bridge to the AppleScript-Objective C scripting bridge and make the named APIs accessible in a convenient manner, as we’ll see below.
Next, let’s write a couple of “handlers” (functions) to enumerate the PrivilegedHelper tools directory. In the image below, the left side shows the handler we will write; on the right side is an example of what it returns on my machine.

As we can see, this handler is just a wrapper for another handler enumerateFolderContents:, which was borrowed from a community forum. Let’s take a look at the code for that, which is a bit more complex:
# adapted from a script by Christopher Stone
on enumerateFolderContents:aFolderPath
	set folderItemList to "" as text
	set nsPath to current application's NSString's stringWithString:aFolderPath
	--- Expand Tilde & Symlinks (if any exist) ---
	set nsPath to nsPath's stringByResolvingSymlinksInPath()

	--- Get the NSURL ---
	set folderNSURL to current application's |NSURL|'s fileURLWithPath:nsPath

	set theURLs to (NSFileManager's defaultManager()'s enumeratorAtURL:folderNSURL includingPropertiesForKeys:{} options:((its NSDirectoryEnumerationSkipsPackageDescendants) + (get its NSDirectoryEnumerationSkipsHiddenFiles)) errorHandler:(missing value))'s allObjects()
	set AppleScript's text item delimiters to linefeed
	try
		set folderItemList to ((theURLs's valueForKey:"path") as list) as text
	end try
	return folderItemList
end enumerateFolderContents:
Now that we have our list of Privileged Helper Tools, we will want to grab the file names separately from the path as we will use these names in our message text to boost our credibility. In addition, we want to find the parent app from the Helper tool’s binary both so that we can show this to the user and because we will also need it to find the app’s icon.
This is how we do the first task, again with the code on the left and example output shown on the right:
Now that we have our targets, all that remains is to find the parent apps. For that, we’ll borrow and adapt from Erik Berglund’s script here.

In this example, we can see the parent application’s bundle identifier is “com.barebones.bbedit”. There are a number of ways we can extract the identifier substring from the string, such as using command line utils like awk (as Erik does), or using cut to slice fields, but I’ll stick to Cocoa APIs for both the sake of speed and to avoid unnecessarily spawning more processes. Be aware with whatever technique you use, the identifier does not always occur in the same position and may not begin with “com”. In all cases that I’m aware of, though, it does follow immediately after the keyword “identifier”, so I’m going to use that as my primary delimiter. Do ensure your code accounts for edge cases (I’ll omit error checking here for want of space).
In the code above, I use Cocoa APIs to first split the string around either side of the delimiter. That should leave me with the actual bundle identifier at the beginning of the second substring. Note the as text coercion at the end. One hoop we have to jump through when mixing AppleScript and Objective C is converting back and forth between NSStrings and AppleScript text.
With the parent application’s bundle identifier to hand, we can find the parent application’s path thanks to NSWorkspace. We’ll also add a loop to do the same for all items in the PrivilegedHelperTools folder.
Note how I’ve moved the text conversion away from the bundleID variable because I still need the NSString for the NSWorkspace call that now follows it. The text conversion is delayed until I need the string again in an AppleScript call, which occurs at the end of the repeat method.
At this point, we now have the names of each Privileged Helper tool and its path, as well as the bundle identifier and path to each helper tool’s parent app. With this information, we have nearly everything we need for our authorization request. The last remaining step is to grab the application icon from each parent app.
Grabbing the Parent Application’s Icon Image
Application icons typically live in the application bundle’s Resources folder and have a .icns extension. Since we have the application’s path from above it should be a simple matter to grab the icon.
Before we go on, we’ll need to add a couple of “helper handlers” for what’s coming next and to keep our code tidy.
Also, at the top of our script, we define some constants. For now, we’ll leave these as plain text, but we can obscure them in various ways in our final version.
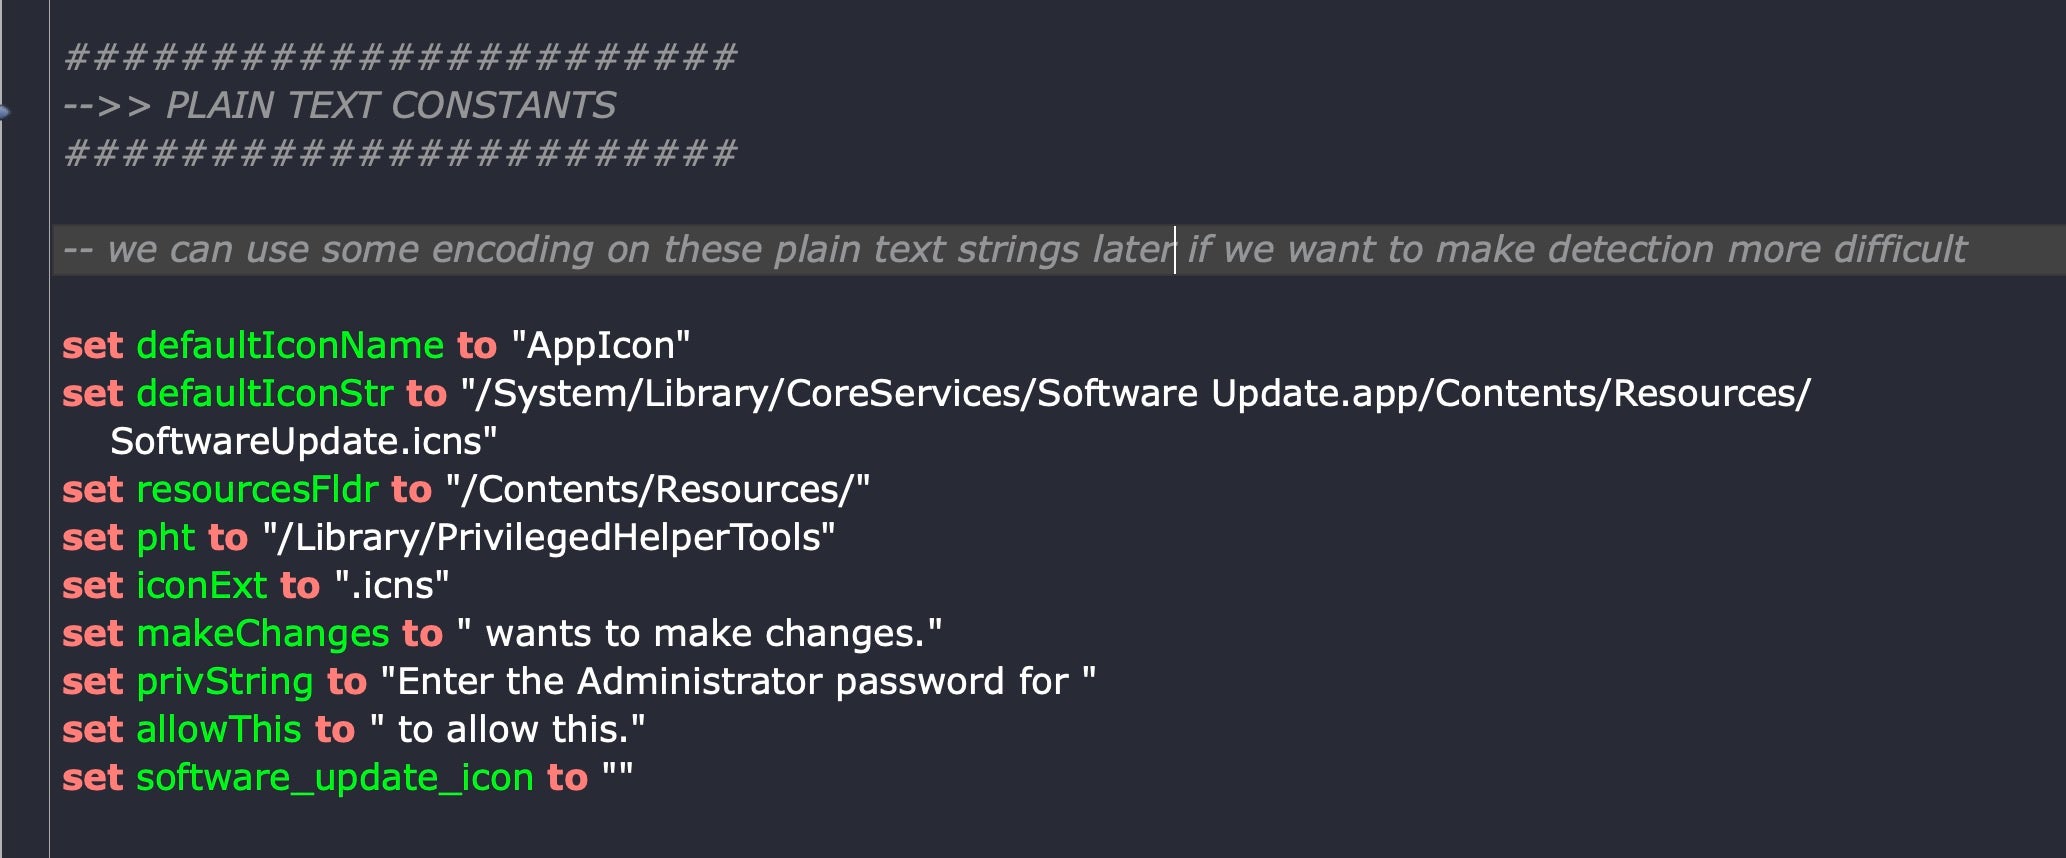
Notice the defaultIconStr constant, which provides our default. If you want to see what this looks like, try calling it with the following command:
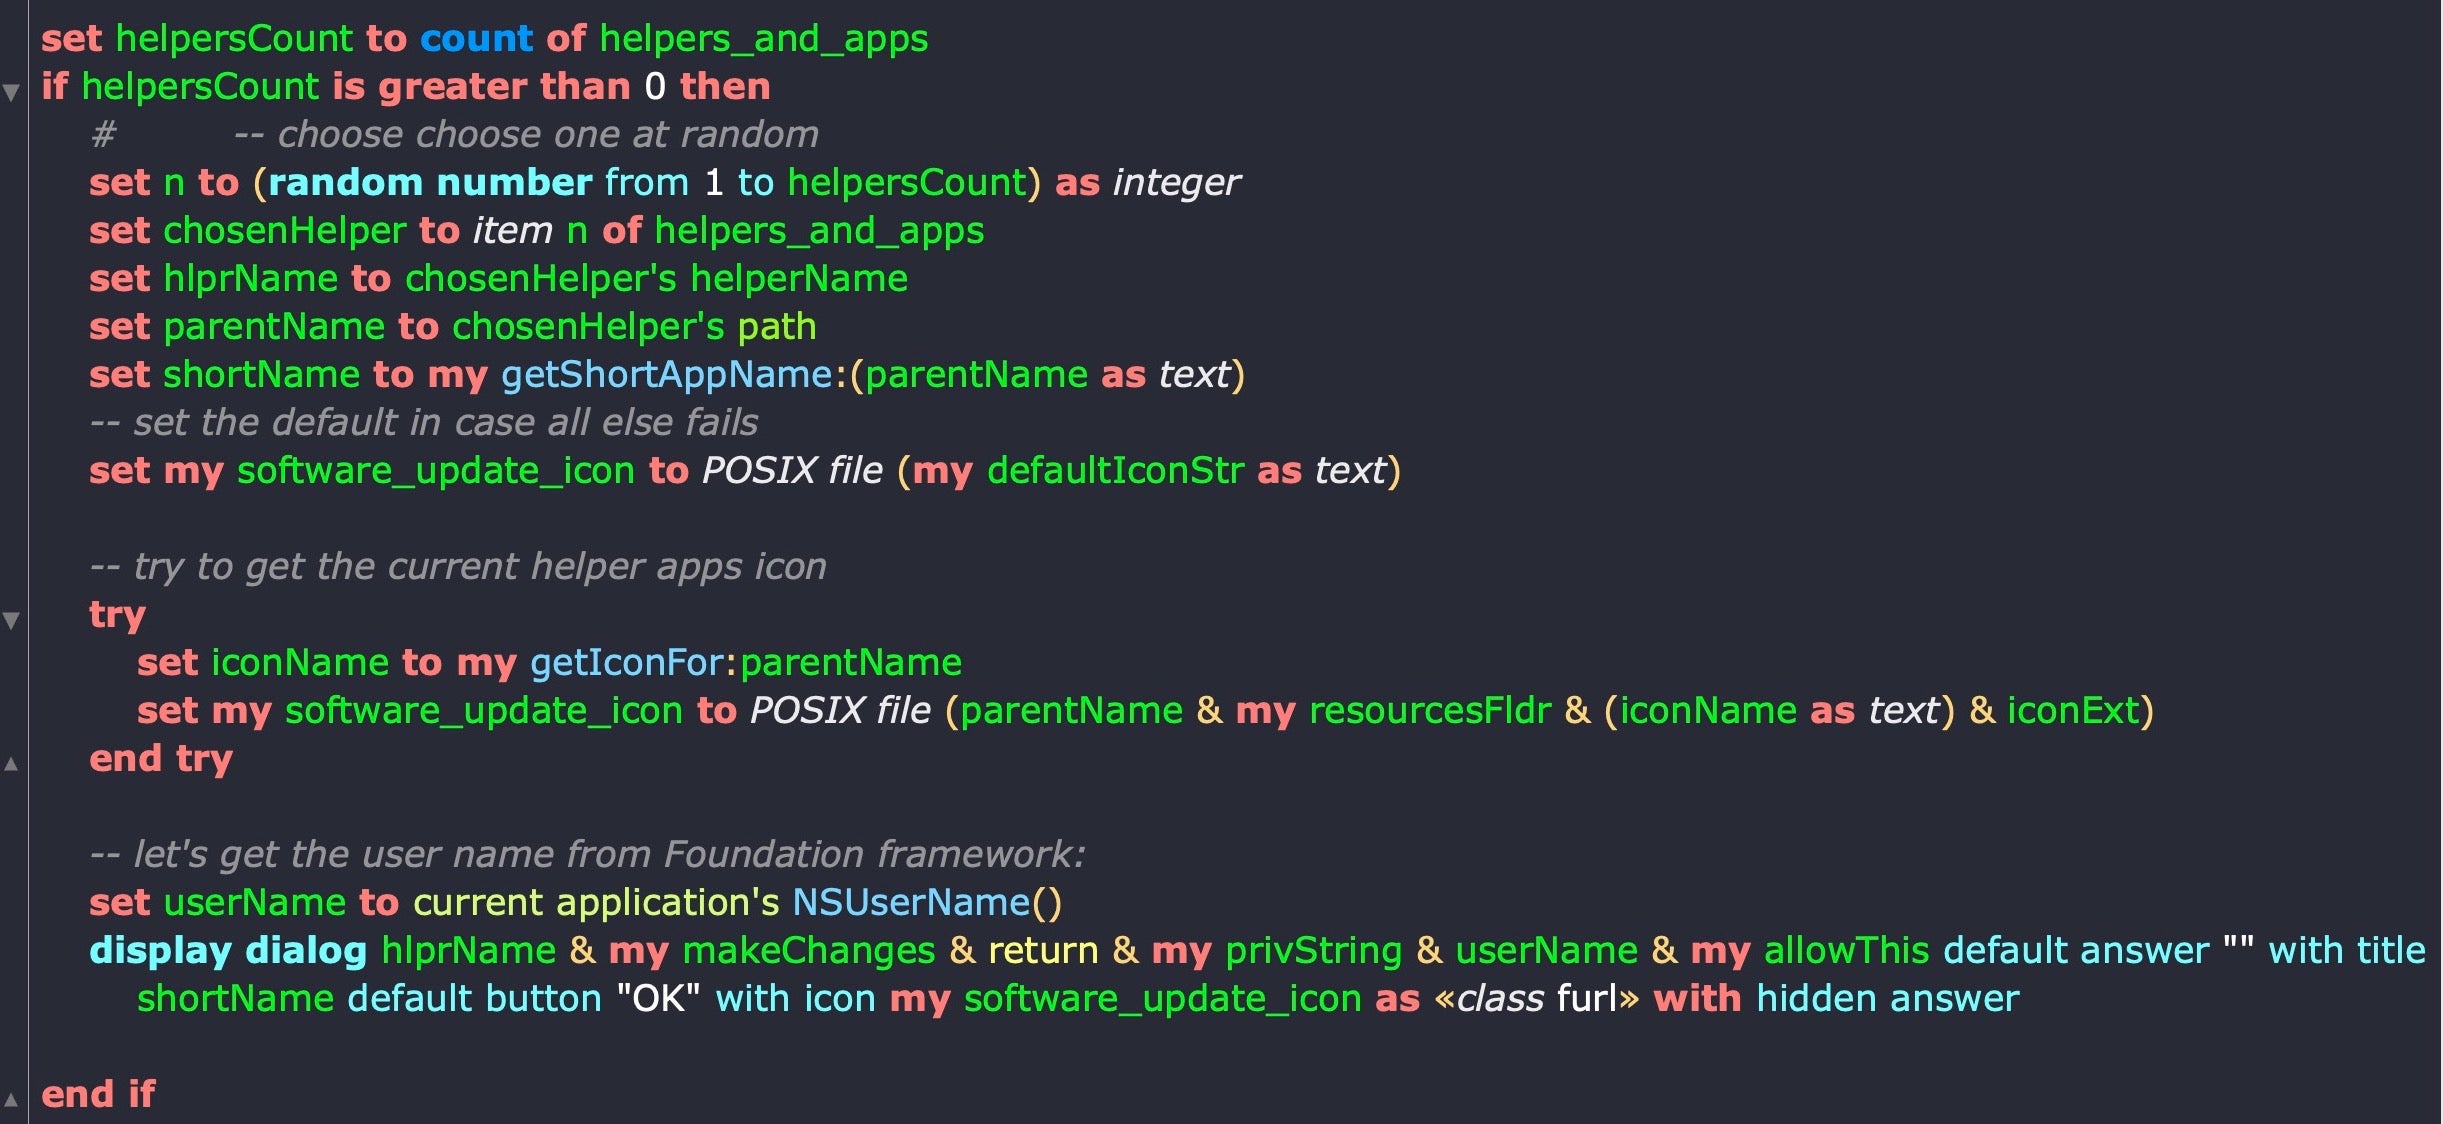
-- let's get the user name from Foundation framework:
	set userName to current application's NSUserName()
	display dialog hlprName & my makeChanges & return & my privString & userName & my allowThis default answer "" with title parentName default button "OK" with icon my software_update_icon as «class furl» with hidden answer
![]()
Hmm, not bad, but not great either. It would look so much better with the app’s actual icon. The icon name is defined in the App’s Info.plist. Let’s add another handler to grab it:

Here’s our code for grabbing the icon tidied up:
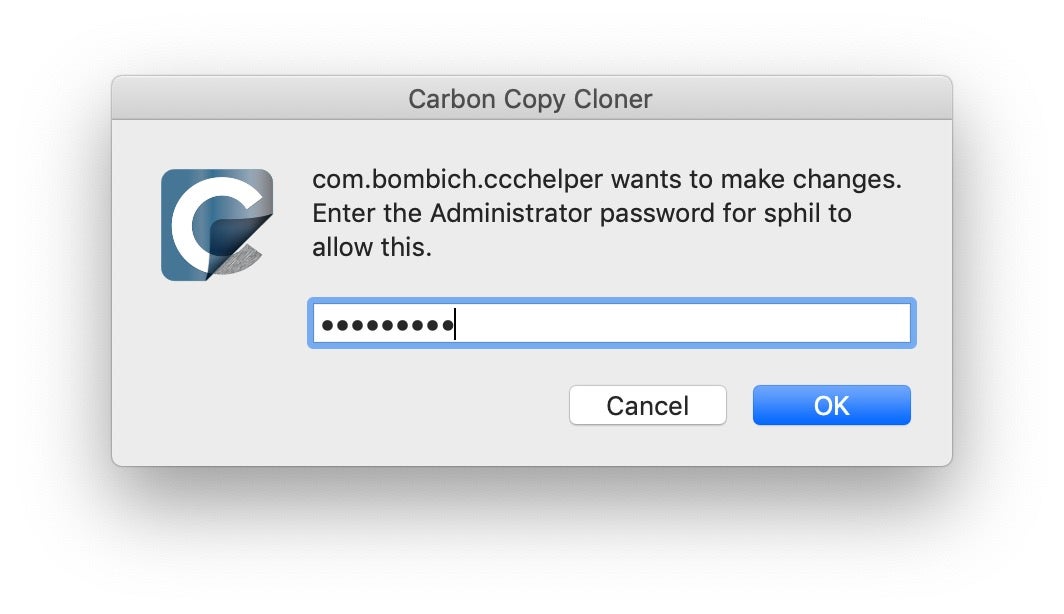
And here’s a few examples of what our script produces now:
Conclusion
Our authorization requests are now looking reasonably convincing. They contain an app name, and a process name, both of which will check out as legitimate if the user decides to look into them. We also have a proper password field and we call the user out by name in the message text. And it’s worth reminding ourselves at this point that all this is achieved without either triggering any traps set in Mojave and Catalina for cracking down on AppleScript, without knowing anything in advance about what is on the victim’s computer and, most importantly, without requiring any privileges at all.
Indeed, it’s privileges that we’re after, and in the next part we’ll continue by looking at the code to capture the password entered by the user as well as how to launch our spoofing script at an appropriate time when the user is actually using one of the apps we found on their system. If you enjoyed this post, please subscribe to the blog and we will let you know when the next part is live!
Disclaimer
To avoid any doubt, all the applications mentioned in this post are perfectly legitimate, and to my knowledge none of the apps contain any vulnerabilities related to the content of this post. The techniques described above are entirely out of control of individual developers.

