

Kubernetes has gained lots of momentum in the last several years. At Scalyr, we always strive to build a product that supports the latest technology trends, therefore, we announced improved support for Kubernetes cluster-level logging at the end of 2018 to help increase the observability of infrastructure complexity, like Kubernetes logs and pod logs, and simplify troubleshooting on a Kubernetes cluster.
Containerization enables quick deployment at scale, however, building an application on a Kubernetes cluster is very different compares to most monolithic environments, so developers may shy away from adopting it despite its benefits. For example, a couple of the questions they might ask are where do I store my logs at and how can I access logs of my application?
Google’s Kubernetes Engine makes it really easy to launch a Kubernetes cluster for free, so it’s a great space for trial and error. In addition, because the platform comes with a cloud shell, so all you need is a Chrome browser to deploy and monitor your application running on a Kubernetes cluster. Here are the steps…

Create a Kubernetes cluster:

- Sign up a GCP free trial account at https://cloud.google.com
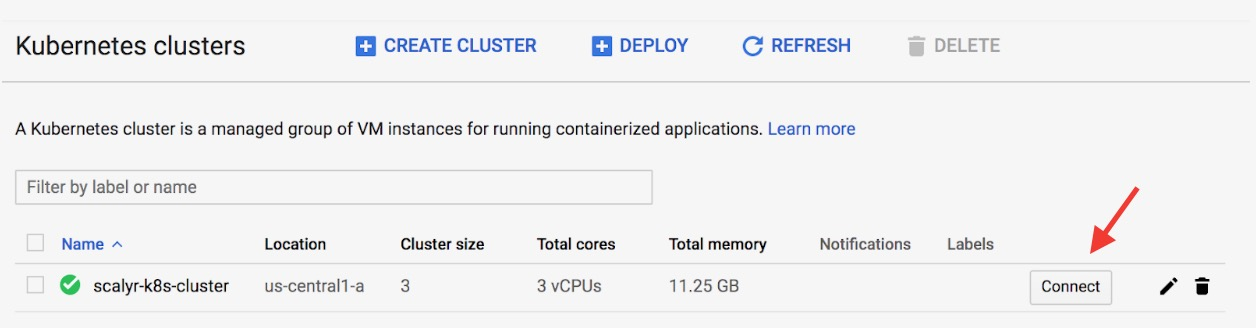
- You will be redirected to a console overview page once you complete registration. Clicking “Kubernetes Engine” from the navigation menu and selecting “cluster” to create a K8s cluster.
- Setup the cluster parameters based on your requirements. Here are the parameters I use for my cluster:
Name: scalyr-k8s-cluster
Cluster templates: standard cluster
Location type: Zonal
Zone: us-west-2-a
Master version: 1.12.7-gke.10
Number of nodes: 3
Machine Type: 1 vCPU (3.75GB, n1-standard-1)
Clicking “Create”.
That’s it! You just create a 3-node Kubernetes cluster in less than a minute. Now, we can start deploying Scalyr Kubernetes agent to the cluster
Launch Scalyr Kubernetes agent:
(If you don’t already have access to Scalyr, sign up for a free trial here.)
- Click “Connect” to connect to the cluster.
2. Click “Run in Cloud Shell” to open the terminal
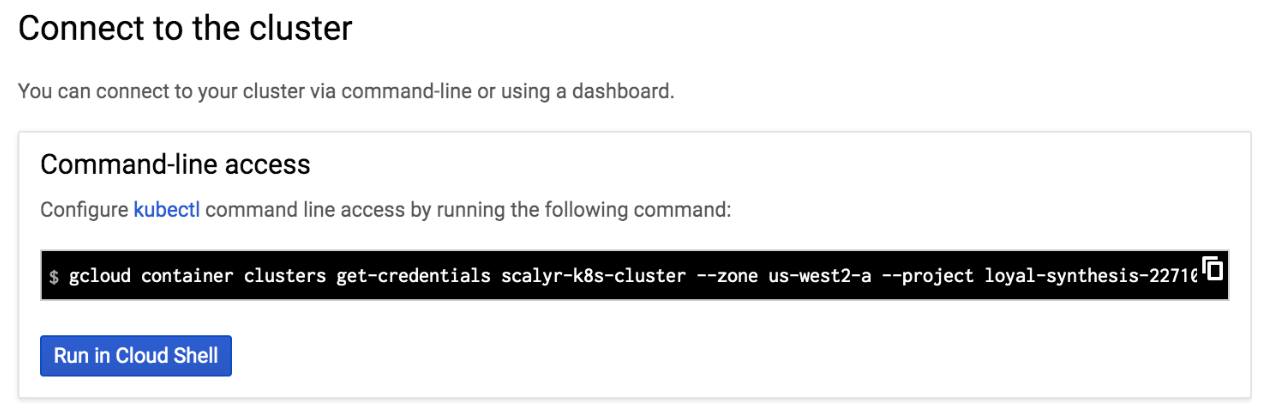
3. Copy and paste the following commands to the terminal. Execute them in sequence to launch Scalyr agent.
kubectl create secret generic scalyr-api-key --from-literal=scalyr-api-key="<log_write_api_key>"You can retrieve your “log_write_api_key” here.
kubectl create configmap scalyr-config --from-literal=k8s_cluster=<your_k8s_cluster_name>In this example, my cluster name is “scalyr-k8s-cluster”.
kubectl create clusterrolebinding cluster-admin-binding --clusterrole cluster-admin --user <google_cloud_account>Bootstrap a user to allow them to create RBAC Roles and ClusterRoles. Replacing “google_cloud_account” with your GCP email address.
kubectl create -f https://raw.githubusercontent.com/scalyr/scalyr-agent-2/release/k8s/scalyr-service-account.yamlkubectl create -f https://raw.githubusercontent.com/scalyr/scalyr-agent-2/release/k8s/scalyr-agent-2.yamlDeploy service account and the Scalyr agent daemonset to the cluster.
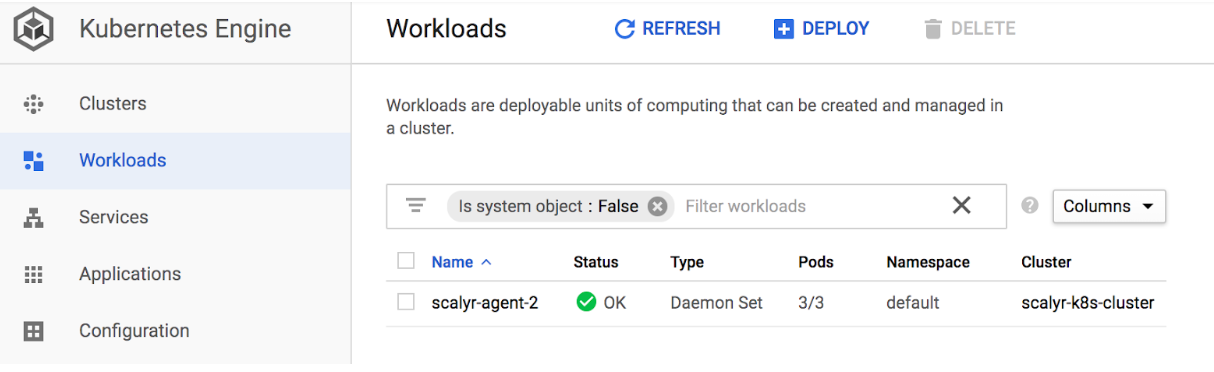
Congratulations! Your Scalyr agent is running on your cluster. You can navigate to the “Workloads” page to find all the containerized applications currently running on your cluster.
Ingest Logs to Scalyr:
Finally, you’re ready for logs ingestion. If you don’t have any applications to use for testing, you can just follow the instructions below to launch NGINX deployments to the cluster.
- Clicking “Deploy” on the “Workloads” page takes you to a container deployment page.
- Selecting “Existing container image” and “nginx:latest” as the image path. Clicking “Continue”.
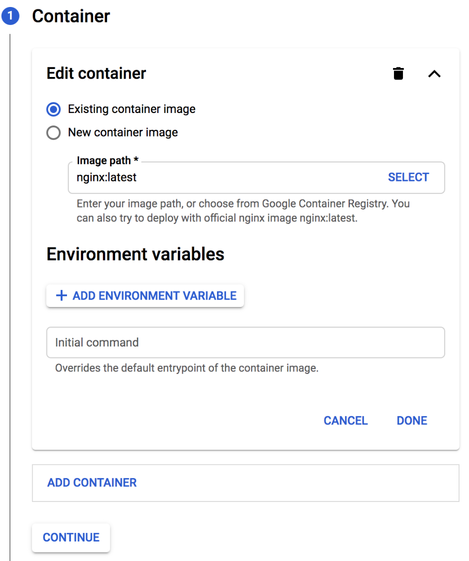
3. Using the default configurations so we can keep it simple.
Application name: nginx-1
Namespace: default
Labels:
– key: app
– value: nginx-1
Cluster: scalyr-k8s-cluster
Clicking “Create new cluster”. NGINX deployment should be ready in a few seconds.
4. Let’s expose the NGINX deployment using a load balancer, so it’s easier to generate some NGINX logs. You can do so by connecting to the cluster using cloud shell and executing the following command.
kubectl expose deployment nginx-1 --port=80 --target-port=80 --type=LoadBalancer5. Navigating to the “Services” tab and you will find a load balancer service called “nginx-1”.
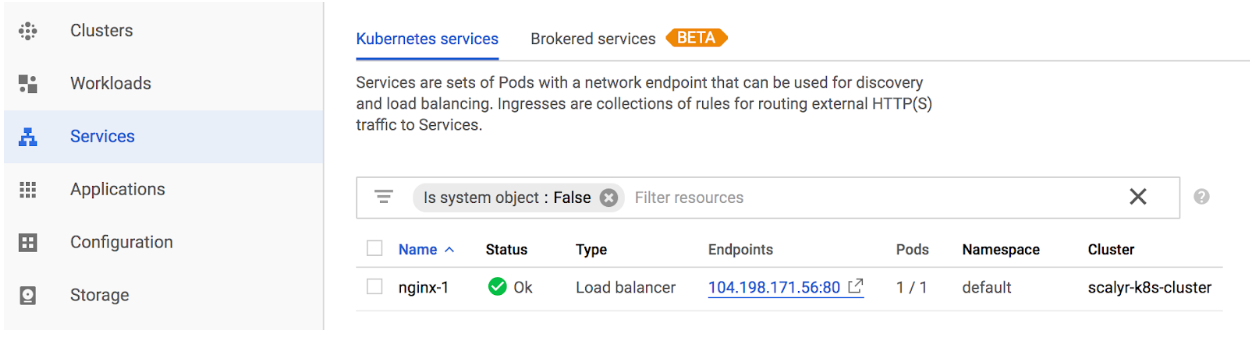
6. Clicking on the endpoints redirects you to an NGINX welcome page.

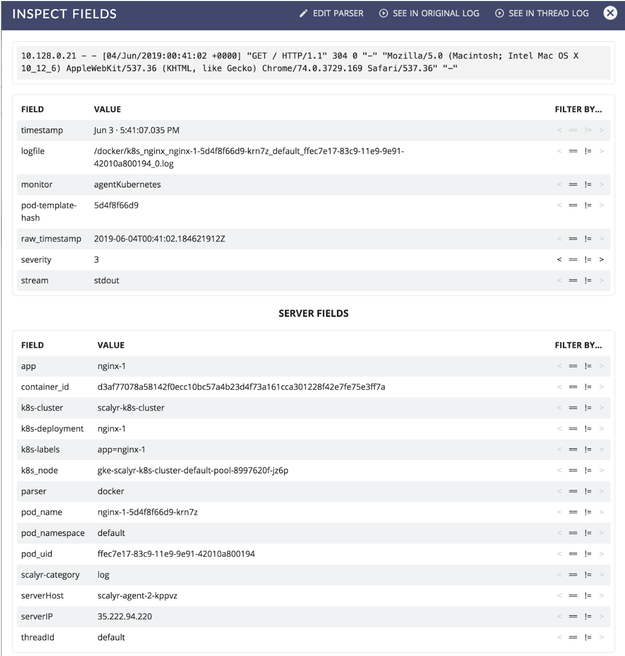
7. Log into Scalyr and search for k8s-cluster == “scalyr-k8s-cluster” k8s-deployment == “nginx-1” to view the logs.

That’s’ all! Setting up Kubernetes logs to work with Scalyr is straightforward and gives you access to the performance and clarity Scalyr is known for.
Please give this tutorial a try and we’d love to hear your feedback. Let us know if you find this tutorial is simple and easy enough. Leave us your thoughts in the comments.

