
AWS Lambda is a way to run code without thinking about servers. But even though you may not have to think about servers, you do have to think about how you program for AWS Lambda. You see, AWS Lambda—not to be confused with Java lambdas—is a stateless runtime environment.
In this post, you’ll find out how to create AWS Lambda functions with Java.

Overview
There are seven basic steps to creating AWS Lambda functions that run Java. We’ll start at the beginning of the developer workflow and end up at runtime monitoring. Before we get started, there are just a couple of things you need to consider.
First, you’ll need an AWS account with permissions to create AWS Lambda functions. It’s easy enough to create an account on your own. Amazon gives you access to several services on AWS for free for the first 12 months. Even after that, it’s not very costly to run a few Lambda executions.
But, a word of caution: You need to be mindful of leaving AWS Lambdas running, since the possibility of staggering cost exists.
Next, there are several possible ways to accomplish any given task. This post will cover one possible approach to running Java with AWS Lambdas. You should take it as one example of how to do it. I’ll mention a few other ways to accomplish some of the tasks in this post. Since you’re a very clever person, you’ll find a way that works for you!
Finally, the steps from here on out are as follows:
- Import the aws-lambda-java-core package (Maven).
- Write your code (Java 8).
- Package your code (Maven).
- Deploy your package (AWS Lambda).
- Run your AWS Lambda (AWS).
- Version your AWS Lambda (AWS Lambda).
And with that, we’ll begin by importing the necessary package.
Import Package Dependency
Obviously we can’t import a package until we have a project started. We’ll create a Maven project (quickstart here). I’m using the Maven for Java extension in VS Code, but you can use whatever IDE you like or even the Maven CLI.
Once we have a project, we’ll need to add the following XML to the POM file in order to import the AWS Lamba dependency:
<!-- https://mvnrepository.com/artifact/com.amazonaws/aws-lambda-java-core --> <dependency>
     <groupId>com.amazonaws</groupId>
     <artifactId>aws-lambda-java-core</artifactId>
     <version>1.2.1</version>
</dependency>
This package defines the types we’ll need in order for AWS Lamba to call our Java function. Then we need to import the Context class from this package:
package com.philn5d.samples.aws.lambda;
import com.amazonaws.services.lambda.runtime.Context;
// We'll change everything below here later...
 public final class App {     public static void main(String[] args) {         System.out.println("Hello World!");
     }
}
Once this is in place, we’re ready to start coding our function. Just to make sure everything’s in order, go ahead and compile your code at this point. Next, we’ll change the main file to work in AWS Lamba.
Write Your Function Code
Now that we have a project and the main dependency in place, it’s time to write the code!
What’s our little AWS Lambda function going to do? We’ll figure that out in a bit; for now, we can be sure that our function will need a single public method with a specific method signature.
Let’s go ahead and start there.
package com.philn5d.samples.aws.lambda;
import com.amazonaws.services.lambda.runtime.Context;
public final class App {
     public static String handleRequest(String arg, Context context) {
         return arg;
     }
 }
For now, we’ll just send back whatever is passed in. The first parameter is the data and the second is the context. The context for AWS Lamba contains execution information such as the function name and version.
At this point, we actually have everything we need to create an AWS Lamba with Java! Keeping with the principle of doing simplest thing that works, let’s move on to packaging and deploying this, shall we?
Package Your Function
Now it’s time to package the function. This is a really easy step. All you need to do is open your terminal in the project directory and run mvn package. That’ll output a jar file with your function. You’ll upload that bad boy to your AWS Lambda. Let’s get to that now.
Deploy Your Function
While you can use the AWS CLI to deploy your function, it’s a bit more tangible to see it in the AWS Console. Login to the AWS console and go to the Lambda compute service. It’s under Services > Compute > Lambda. Or you can type “lambda” in the search bar.
Create Function
Once you have opened the Lamba Management console, you’ll need to create a function. Choose the following options and create your first function.
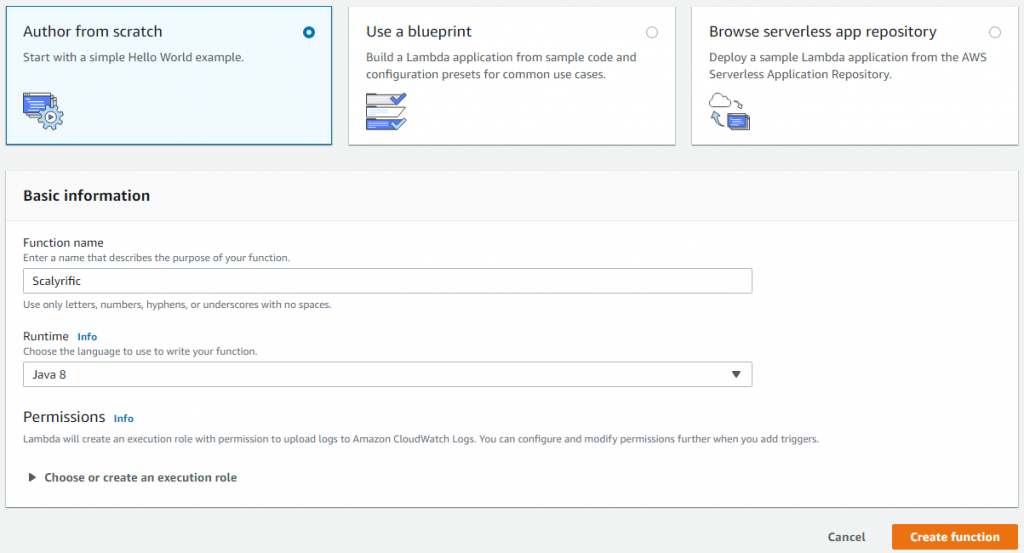
The runtime needs to be Java 8 or you won’t be able to run Java. As you may have noticed, there are several other options for runtime. Some of those options allow you to edit your functions right in the AWS Console. But alas, there’s no Java compiler in AWS Lambda, so you have to upload a compiled function.

Upload Function Code
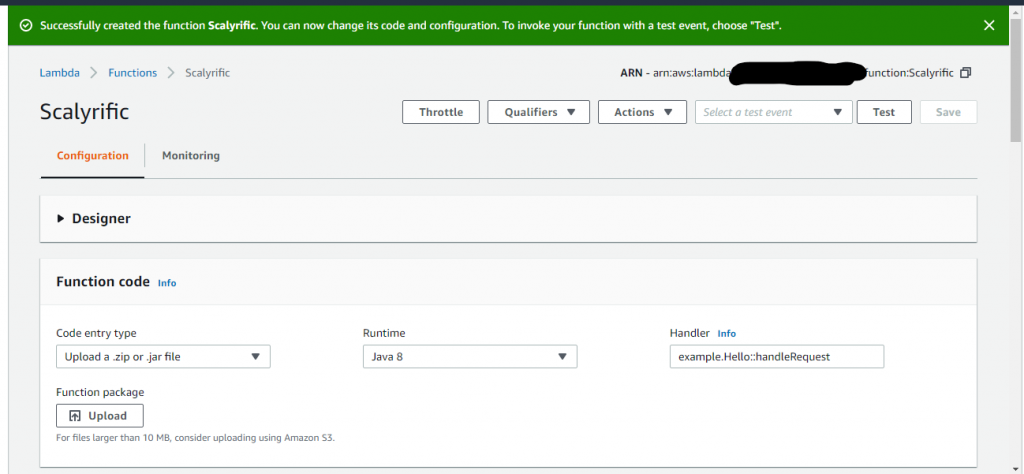
The magic happens when you upload your function code. Assuming you’ve successfully packaged your function code into a jar, you’ll click the Upload button and grab that output file. Check out the following screenshot. I’ve collapsed the Designer panel in the AWS Console to focus on the Function Code panel.
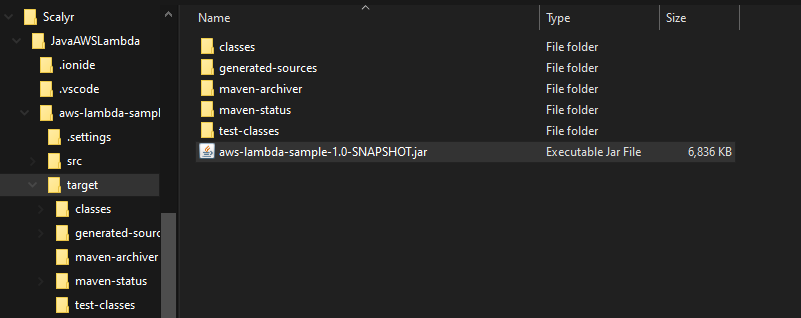
Once you hit upload, you’ll have to navigate all the way down to your jar file. It’s in the target folder inside your project folder along with all the other build artifacts. You only need to upload the jar though.
You’re not quite done yet, though. Once the file is uploaded, you also need to tell AWS Lamda the name of your handler. The pattern it needs is <package>.<class>::<function>. You’re ready to save when it looks similar to this:
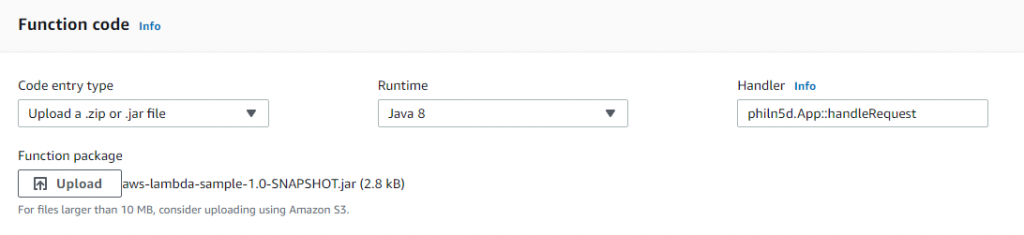
Go ahead and save. Once that’s done, your first AWS Lambda is ready to go!
Or is it? I mean, it’s deployed, but it’s just sitting there. How do we actually run it? That’s next.
Run Your Function
Now that your function is coded, uploaded, and saved you’ll want to run your function. You may have noticed all the other panels in the AWS Console in the function page. The Designer page is where you can link in triggers to your function. But first, we should test the function to make sure it’s good to go.
Test Your Function
In order to test your function, we’ll focus on the upper right hand of the function page in the AWS Console. Look here:
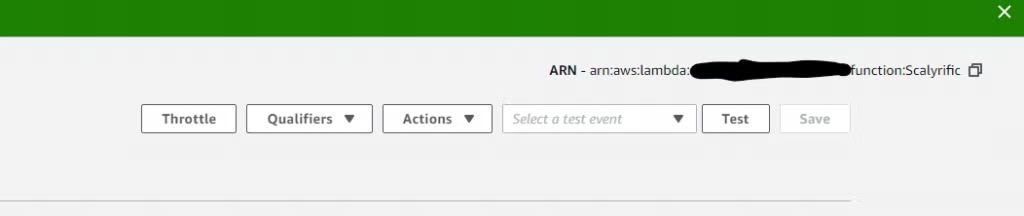
From the Select a test event drop-down menu, choose the Configure test events option. (If you don’t have any test events, it’s the only option available.)
From there, you’ll get a modal window. Just keep everything the same in that form except the Event name and the body. For those, put SayHello as the event name and add some quippy string in the body.

Click Create, then hit the Test button and see if it shows you good news! If so, you’ll get a success message with a bunch of info about the execution. This is great, but remember that this was only a test. Let’s set up a trigger so our function does something for real.
Trigger Your Function
Triggering your function is where the rubber hits the road! Actually, we’re just configuring the trigger.
You can set up one or many triggers actually, but we’re just going to do one for now. There are a lot of options to choose from and each serves a great number of purposes.

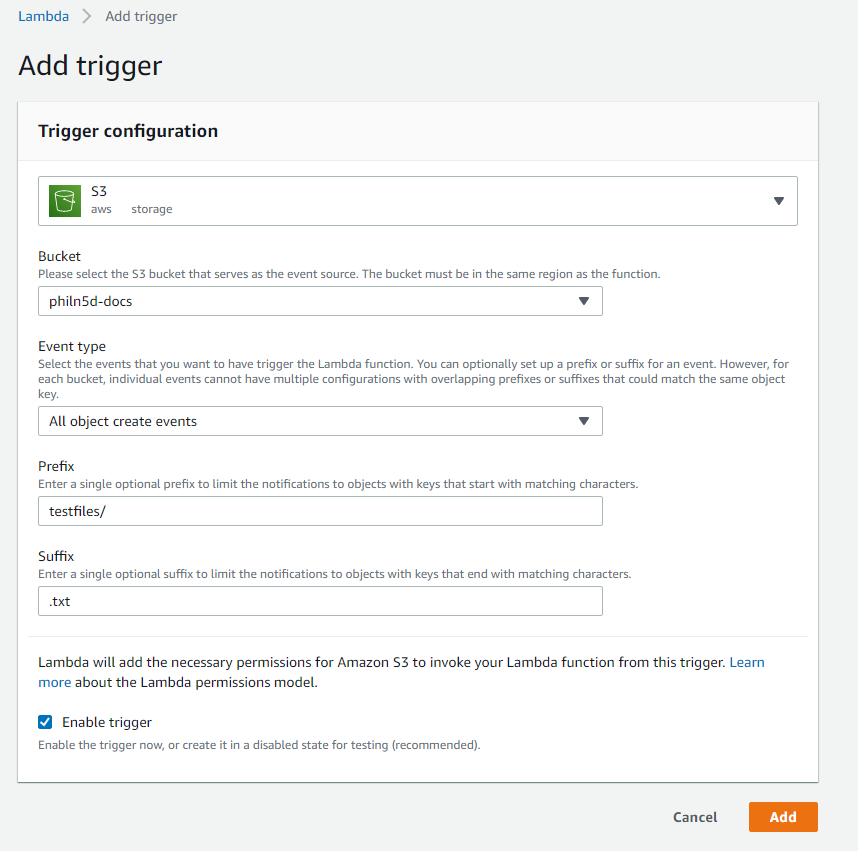
I’m going to use an S3 trigger. If you have an S3 bucket that you can upload to, use that. Otherwise, it’s fairly easy to create a new one. Alternately, you can use any other trigger that you don’t mind setting up.
I’ve set up my trigger to use the key prefix testfiles/ and to only take action on files with the .txt extension.
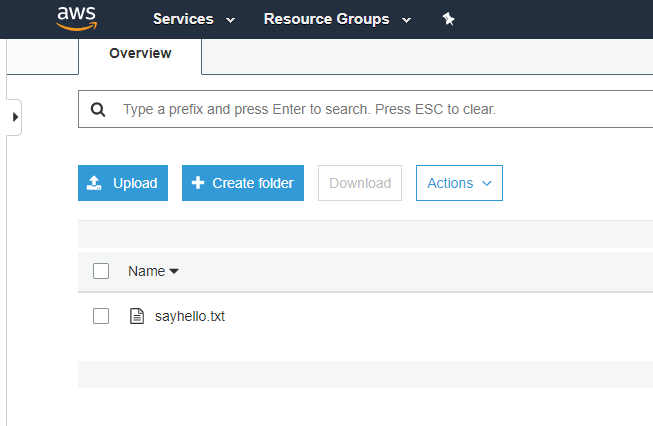
I’ll upload a file to that bucket. The file will be named sayhello.txt and go into the testfiles folder in the philn5d-docs S3 bucket. That event will trigger my AWS Lambda.
After uploading the file, we can see that the function was invoked:
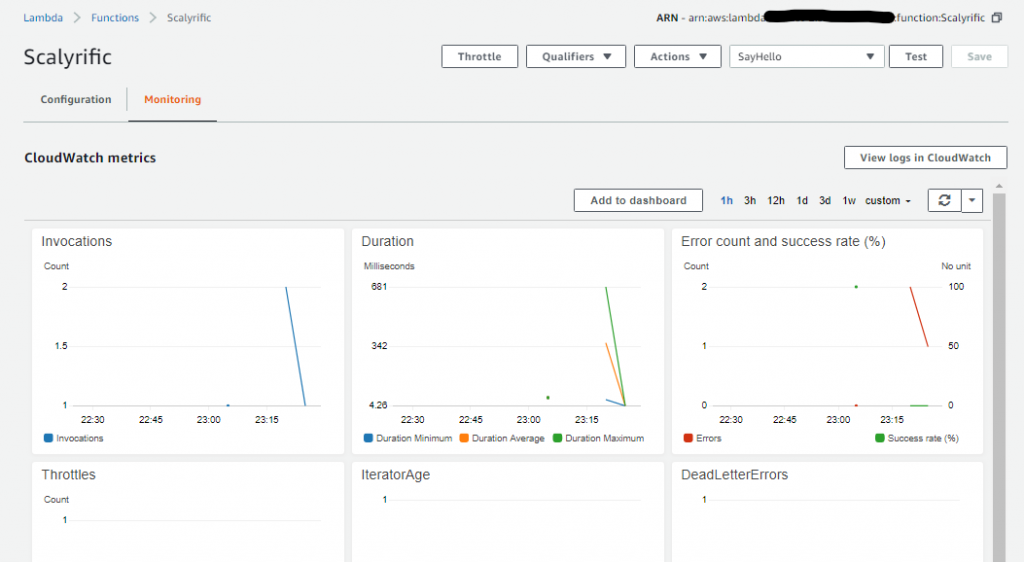
None of the invocations succeeded. In order to find out why that is, we need to go to the CloudWatch console. From there, we can see the problem if we dig a little bit.
Here’s the exception event in the log:
An error occurred during JSON parsing: java.lang.RuntimeException java.lang.RuntimeException: An error occurred during JSON parsing Caused by: java.io.UncheckedIOException: com.fasterxml.jackson.databind.JsonMappingException:
Can not deserialize instance of java.lang.String out of START_OBJECT token
  at [Source: lambdainternal.util.NativeMemoryAsInputStream@28d25987; line: 1, column: 1]
Caused by: com.fasterxml.jackson.databind.JsonMappingException:
Can not deserialize instance of java.lang.String out of START_OBJECT token
  at [Source: lambdainternal.util.NativeMemoryAsInputStream@28d25987; line: 1, column: 1] at com.fasterxml.jackson.databind.JsonMappingException.from(JsonMappingException.java:148) at com.fasterxml.jackson.databind.DeserializationContext.mappingException(DeserializationContext.java:857) at com.fasterxml.jackson.databind.deser.std.StringDeserializer.deserialize(StringDeserializer.java:62) at com.fasterxml.jackson.databind.deser.std.StringDeserializer.deserialize(StringDeserializer.java:11) at com.fasterxml.jackson.databind.ObjectReader._bindAndClose(ObjectReader.java:1511) at com.fasterxml.jackson.databind.ObjectReader.readValue(ObjectReader.java:1102)
The reason for the exception is that we’re expecting a string, but the trigger event is passing an object that represents the S3 PUT event. So we need to fix our code to take in the correct type! In order to do that, we’re going to need to create a new version of our AWS Lambda as well. No problem!
Versioning Your AWS Lambda
So we have a problem with the code right now. Let’s first confirm my analysis by using the Test feature in the AWS Lambda Console. Configure a new test event. Only this time, start with the Amazon S3 Put template. Click Test and you’ll see the exact same error in the AWS Lambda Console. Suspicion confirmed, so let’s fix this issue.
Change Your Code
First, before you change your code, you’ll go the AWS Lambda Console and select Actions then Publish new version. Give it a name and go for it.
Next, you’ll need to get the package that has the S3 classes. See, the Java handler function has to take the S3 Put type as the first parameter. Get that from the aws-lambda-java-events package. You’ll also need the S3 package. Both are included below:
<!-- https://mvnrepository.com/artifact/com.amazonaws/aws-lambda-java-events -->
<dependency>
     <groupId>com.amazonaws</groupId>
     <artifactId>aws-lambda-java-events</artifactId>
     <version>2.2.9</version>
</dependency>
<dependency>
     <groupId>com.amazonaws</groupId>
     <artifactId>aws-java-sdk-s3</artifactId>     <version>1.11.792</version>
</dependency>
Add these dependencies to the POM in order to use the S3Event type.
Change the App.java class as follows:
package com.philn5d.samples.aws.lambda;
import com.amazonaws.services.lambda.runtime.Context;
import com.amazonaws.services.lambda.runtime.events.S3Event;
public final class App {
     public static String handleRequest(S3Event event, Context context) {
         System.out.println("event received");
         return "";
     }
 }
Add the import and change the first parameter to S3Event so the trigger event can be deserialized to that.
We’ll also need to add the maven-shade-plugin so the S3Event goes into the same jar. If you don’t do this for non-built-ins, you’ll get an error that the class cannot be found.
<plugin>
    <groupId>org.apache.maven.plugins</groupId>
    <artifactId>maven-shade-plugin</artifactId>
    <version>3.2.3</version>
    <configuration>
        <createDependencyReducedPom>false</createDependencyReducedPom>
    </configuration>
    <executions>
        <execution>
            <phase>package</phase>
            <goals>
                <goal>shade</goal>
            </goals>
        </execution>
    </executions>
</plugin>
This plugin goes into the build/plugins section of the pom file.
Follow the same package and deploy process including saving and testing your AWS Lambda. This package will be about 6MB. When we have packages over 10MB, we’ll need to put them in an S3 bucket first.
Version Your AWS Lambda
Again, publish a new version and give it a name. Now, you can create an Alias named prod and another for dev. Point prod at version 2 and dev at $LATEST. Now, any time you publish a new version it’s going to be in the dev environment. Once you’re ready to go to prod, update the prod alias to point to that specific version.
Each version has its own trigger. That’s part of the versioning. So, we need to remove the trigger from the Unqualified alias and add it to the prod alias. Then we’re ready to go!
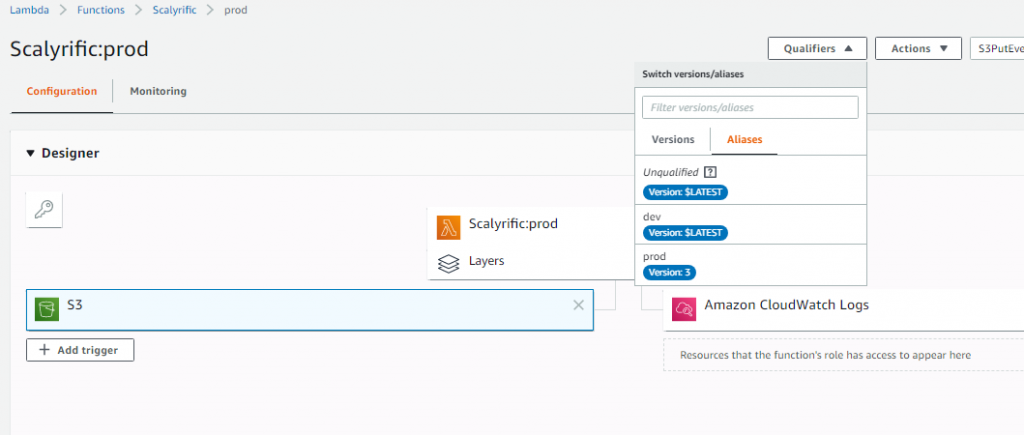
I’ve added the trigger only to the prod alias. Even the version it points to does not have a trigger. Now I can go to the prod alias and switch it to the version I want. Let’s say I make another change to the code, package, deploy, and test that one. To release it to prod, I’ll publish a new version (version 3) then switch the prod alias to point to version 3.
That’s versioning in a nutshell.
Pay For Your Functions (or not?)
By now, you might be wondering about the cost of AWS Lambda. Does it cost less than servers or EC2 instances or container services? As usual, it depends on your usage and circumstances.
See, AWS Lambda charges a little bit per million executions plus a bit more for resources used for each execution. You would also be charged for some of the other services used during execution, such as read/write to S3, data transfers outside the region, and such. Best to keep your functions deployed in the same region as other resources it talks to if the cost is a concern.
On the free tier, you get the first 1 million executions free of charge plus you get 400 thousand GB-seconds (which is the unit they use to charge for CPU and memory). Beyond that, you might pay $.20 per million requests and a very small fraction of a cent per GB-second (1 second of 1024MB memory). To keep this cost down, be sure to set your provisioned memory to only what you need to run your function. Any more might not make a difference in time, so you’d just be throwing money away!
You would have to calculate your own cost-benefit between using Lambda and something else such as EC2 (Virtual Servers) or ECS (Containers). It really depends on your application and usage patterns. I would encourage you to give AWS Lambda a try nonetheless, if only because you have to think somewhat differently about how to code and deploy.
Many companies are moving toward using AWS Lambda to approach a “serverless” architecture. Instead of running their applications on a single monolithic server or as microservices, they use “nanoservices.” Each tiny bit of code does one thing, and one thing only, as a Lambda function. Adherents to this style note that it is more constricting, but it also drastically reduces the risk of bugs and allows near-infinite scalability of just the parts of your application you need.
Monitor and Log Your Function
If you’re thinking about monitoring and logging Java AWS Lambda apps, you might want to head over and take a look at Scalyr’s tech. They’ve got this whole CloudWatch log importer figured out so you’re covered on the AWS Lambda front. It’s worth giving Scalyr a try for better logging and monitoring. Head over to the demo sign-up and check it out for yourself
Closing Out
Now, once you’re done with your AWS Lambda playground, you’ll want to clean up. Go back to Functions in the AWS Console and delete it. Clean up any other resources as well if you wish.
In this post, we took a rather in-depth look at how to create and deploy an AWS Lambda using Java as our language of choice. The sample used an S3 bucket as a trigger.
Though we only captured the S3Event, we could have grabbed the file from S3 using the information in that event payload. This is a useful way to process incoming files.
There are many other uses for AWS Lambdas. And, now that you know the ins and outs of making one with Java, you can start thinking about building applications in a whole new way!

