
We’ve covered a lot of bases in our “getting started quickly” posts. In addition to JavaScript and Node.js, we’ve created guides for C#, Java, Python, and more. Today we’ll discuss logging from a Meteor point of view.
Now, since Meteor can follow the same premise as JavaScript and Node.js, we’re going to change things up a bit. Instead of an empty app, we’re going to clone an existing sample app and add logging to it. But if this tutorial isn’t quite what you were looking for, go check out the basic JavaScript and Node.js posts. They’ll cover anything else you might need.
But don’t worry, we’ll still cover these topics:
• Meteor overview
• Basic logging
• Where to log
• What to log
Now let’s get started.

Meteor Logging (But Before, A Brief Meteor Overview)
If you came to this blog post by searching for Meteor logging, you might not need this section. But I’d like to make sure we’re all starting from the same point, so here’s some quick Meteor info. Don’t worry, I’ll be brief.
Meteor is a full-stack JavaScript framework that allows you to develop both web and mobile applications. Meteor includes important tools for building rich, reactive applications. It also includes a build tool along with a set of packages from the Node.js and general JavaScript community, so you can start writing useful code right away, without the need for reinventing the wheel.
As a bonus, Meteor provides easy MongoDB integration right out of the box as well.
The idea behind Meteor is simple, yet powerful: JavaScript, everywhere. In other words, the idea is to allow the developer to write JavaScript code for all environments: the backend (application) server, the web browser, and the mobile device. Meteor uses data on the wire. That means that the server sends not HTML, but data and the client is responsible for rendering it.
Last, but not least, Meteor provides full-stack reactivity. That allows your UI to easily reflect and adapt to the current state of the world and your data, with minimal development effort required on your side.

Basic Meteor Logging
As I mentioned above, instead of creating a bare application, we’re going to clone one of the existing sample applications that the folks over at Meteor have provided. Since we’re adding logging to an already existing app, we’ll be able to see different logs come through with minimal effort.
Setup
If you haven’t used Meteor before, their basic setup is a breeze. First, you’ll need to install both Node.js and npm. Also, if you’re on a Mac, you’ll need Xcode as well.
For step two, we’ll install Meteor using either Chocolatey or a curl command, depending on your operating system.
curl https://install.meteor.com/ | sh//
OR...choco
install meteor
All set? Great. Next, let’s clone the simple todo app from Meteor.
git clone https://github.com/meteor/simple-todos.git
Once you’ve got everything downloaded and installed, cd into the simple-todo directory and run the app using the Meteor command.
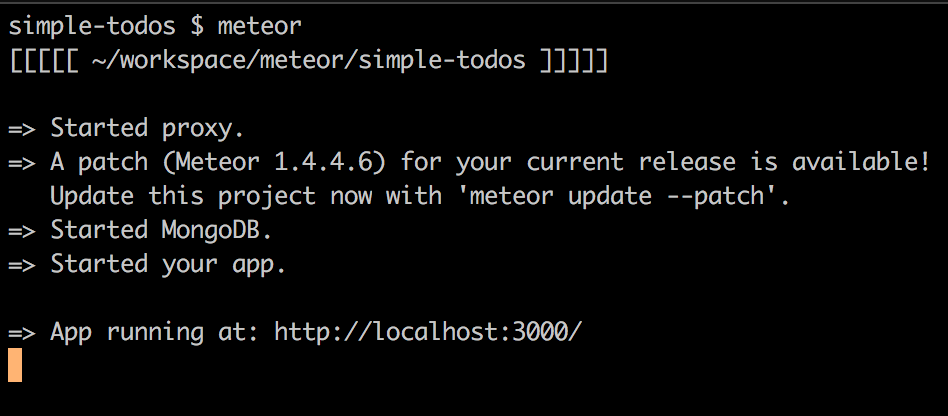
Once the application has started, go to http://localhost:3000/. You should see a simple todo app there.
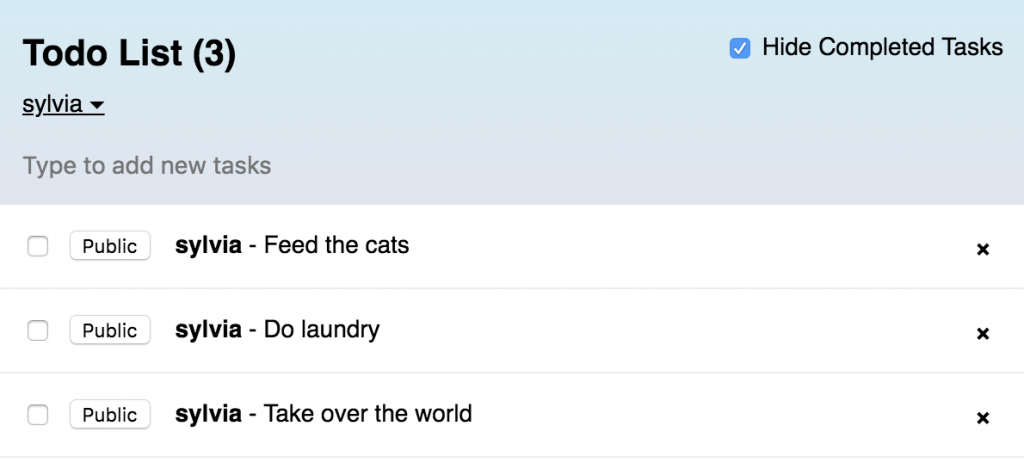
You should be able to add users, add items to the checklist, and so on. Go ahead and play around with it. I’ll be waiting at the next section for you.
Console Logging
Now that you’ve had a chance to check out the application, let’s get started. To demonstrate some simple logging, we’re going to add some console logs to our application. This can be helpful for debugging issues on the client side while you’re developing. But it won’t do much for you once your application is being used by someone out in the real world—you won’t have access to their console logs.
To start, let’s add some code to the imports/api/tasks.js file. This file contains the JavaScript that’s executed when we add or remove tasks from the list. In the “tasks.insert” method, add the log.console line shown in this image.
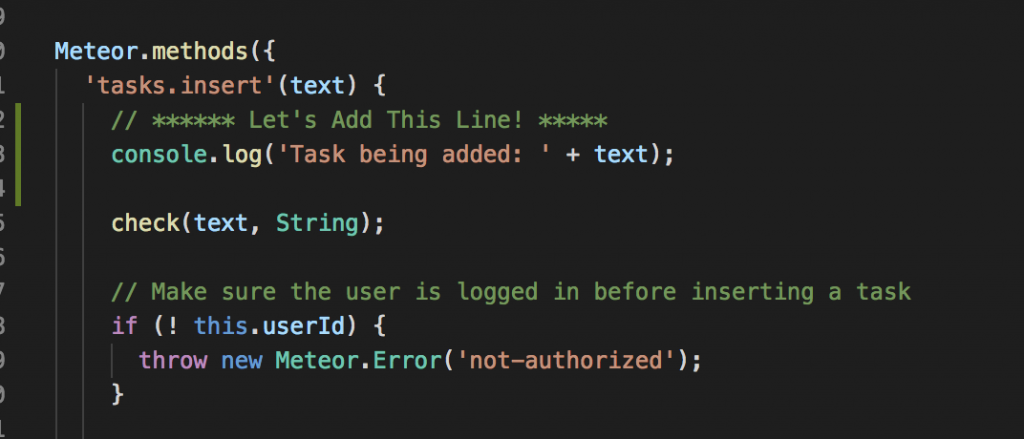
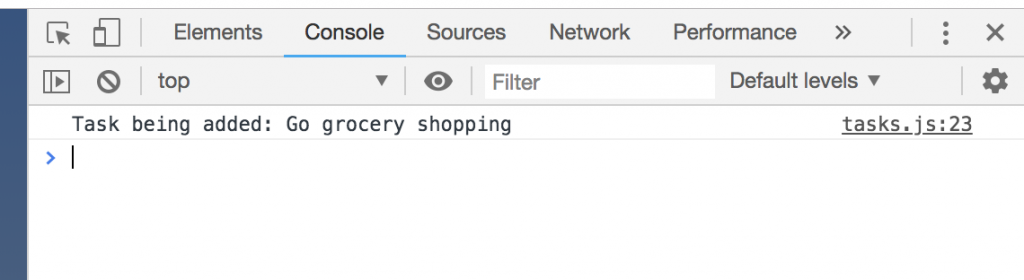
Next, after saving that file, head over to your browser window. It should have updated automatically, so you don’t have to restart the app. When you add a new task, you should see the output in your browser console.
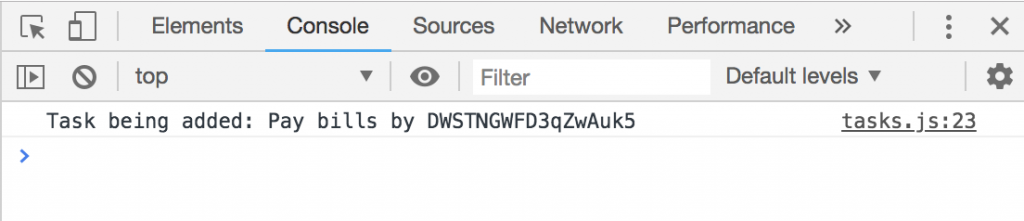
Looks great, right? What if we also want to add some user context? Modify the line in the “tasks.insert” method to also print out the userId object that this application has defined.
console.log('Task being added: ' + text + ' by ' + this.userId);
After that, you should see something like this.
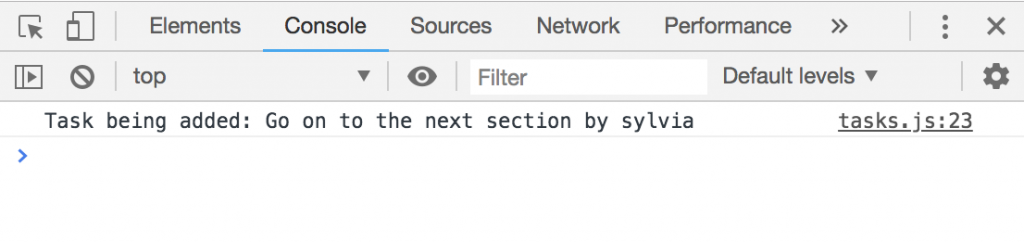
Not super helpful, is it? Let’s make it a little more useful by asking Meteor to find the username associated with this ID instead.
console.log('Task being added: ' + text + ' by ' + Meteor.users.findOne(this.userId).username);
Yes, that looks much better!
 OK, now that we’ve done some simple console logging, we can move on to the next section. However, I have one thing I’d like you to do first.
Now that you have a Meteor application up and running, take some time to explore its various functionalities by adding your own console logging throughout the code. It really helps you understand the application by seeing data flow through the system as you use it. And though these may not be logs you want to keep around forever, they’ll help you gain a sense of what goes into a good Meteor application.
Where to Log
Let’s return to something I mentioned at the beginning of the console logging section: You won’t be able to view your customer’s console.log files. Let’s discuss what you should do instead.
Send Logs to the Server
As discussed, if your application is being used by actual customers, you won’t have access to their console logs. Sure, you could have them open their browser console and send you what’s there every time there’s an issue. But you’re assuming that people will know how to do that. And even if they do know, it doesn’t provide a great user experience for them.
So what can we do instead? Well, instead of just writing to a console, we could send logs back to the server. But then what?
Save Logs for Later Use
With Meteor, one option could be to set up a logging table in MongoDB. So instead of just inserting tasks as our example above shows, we could insert logging or error messages. However, storing logs in a database typically doesn’t make sense. You want to store them somewhere easily accessible by tools like Scalyr so you can start harvesting some analytics.
Let’s consider another option. How about taking a look at some of Scalyr’s APIs? There are a lot of goodies there. And two of them let us add events to our Scalyr logs, either one at a time or by batch. So instead of logging to the console, or saving the logs to our database, we can send events that require logging right back to Scalyr.
In this situation, I would send the logs over to the server side of my Meteor application and then call the Scalyr APIs with the token tied to my account. Let’s go over this in greater detail.
First, adding simple HTTP functionality to your Meteor app requires running the following command within your Meteor directory.
meteor add http
That will let you make HTTP calls to remote servers easily.
Then we can use the following syntax to send an event to Scalyr’s addEvents API.
HTTP.call('POST', 'https://www.scalyr.com/addEvents',
{
  "token": "YOUR_ACCESS_TOKEN",
  "session": "UNIQUE_SESSION_ID",
  "sessionInfo": {
    "serverType": "simple-todo",
    "serverId": "simple-todo-server-1"},
  "events": [
    {
      "thread": "1",
      "ts": "1332851837424000000",
      "type": 0,
      "sev": 3,
      "attrs": {
        "message": "Task being added: stuff",
        "recordId": 39217,
        "latency": 19.4,
        "username": "sylvia"
      }
    }
  ]
);
You may have noticed that I broke out the username from the message I sent. That’s because breaking parts of the log into separate attributes will help with searching later.
What Is Application Logging?
Let’s now take a step back and define what application logging is. We could rely on Wikipedia, but I prefer the definition we gave in our C# logging post. I might be biased, but I think it’s a great definition:
Application logging involves recording information about your application’s runtime behavior to a more persistent medium.
It’s a pretty self-explanatory definition, so there’s no need to dwell on it. Let’s keep moving.
Why Do We Log?
If the “what” out of the way, we should now turn our focus to the “why.” Why do people log? What’s the motivation behind wanting to record “information about your application’s runtime behavior to a more persistent medium?”
The short answer is: software is a really, really, really complicated thing. Now for the less-short version.
An application in production is a complex thing, and it often runs in a totally non-controlled environment. You test it extensively before deploying it—you do test it, right!?—, you create all kinds of approaches in order to keep the quality of the application high.
But you can’t know for sure that everything will work as intended. Well, actually, you can pretty much know for sure that, at some point, something will definitely break, because that’s just how software is. So, when—and not if—things do go sour, how are you supposed to know what happened?
That’s when logging comes in handy.
In short, you log—primarily—so you can “time travel” and investigate your application after the fact. You read the log entries and by doing that you can gain an understanding of how it behaved in the past, and even figure out the complete sequence of steps a user has taken. That will not only help you detect and fix issues, but it can also help you obtain insights about your application and user behavior that you wouldn’t otherwise have access to. Those insights could assist you on your decision-making process and even prevent future problems before they happen.

What to Log When It Comes to Meteor Logging
With great logging comes great responsibility. So what should we log in our applications?
Well, that depends—not only on what your application does, but also on whether you’re logging on the client side or the server side. You also want to make sure that what you log adds value. Logging every little action is usually a bad idea.
In fact, the example above doesn’t represent something I’d want to be logged in my system. I don’t care what my customers add to their to-do lists. I care about metrics, performance, and errors. And I want specific information that can help debug issues.
So what sort of data can we log?
- Errors—If something goes wrong, we want to know about it.
- Usage—Let’s see how often various parts of our application are used. If we have features no one uses, we can deprecate them or make them better.
- Performance—We want to know what the customer experiences regarding latency. If the application slows down too much for them, we need to investigate.

Specifically for error logging, what information do we need?
- Timestamps that tell exactly when an error occurred
- User ID or context, so we know who was affected
- Relevant parameters to help recreate the problem and find a solution
- Unique and specific error messages to help pinpoint the problem
Meteor Logging – You’re on Your Way
You’re in a great place. You’ve got a sample Meteor app to experiment with, as well as some guidance on how to log information in it. Once you’ve logged data from your application, remember to review the logs from time to time. Iterate on what’s being logged and the format until you have a useful set of data that will help you debug and optimize your application. And now you can rest easy knowing you’ll be able to support your Meteor application in production.

