SIM Supplier Onboarding
An overview of our onboarding process: how to set up supplier accounts and provide the information required to become a SentinelOne supplier

Process Overview
What is Coupa SIM (Supplier Intake Module)?
Coupa SIM is SentinelOne's platform for onboarding new suppliers — and keeping their information up to date over time.
Coupa's Supplier Information Management (SIM) streamlines how supplier information is requested, reviewed, and approved, while keeping everything synced with our ERP.
SIM centralizes banking details, tax documentation, quality and insurance certifications, and contact information, routing each through the right approval channels automatically.
By keeping supplier data accurate and current, SIM helps ensure on-time payments and reduces the need for manual data management.
Overview of SentinelOne’s Infosec Vendor Risk Assessment:
Introduction to Vendor Risk Assessment (VRA)
The Vendor Risk Assessment (VRA) team evaluates the security, privacy, and compliance risk of third-party vendors that process SentinelOne data or integrate with SentinelOne systems and applications. VRA manages the assessment lifecycle from security review through risk rating, remediation tracking, and approval.
Objectives: VRA applies a risk-based due diligence process to identify security, privacy, and compliance gaps early, so the business can make informed procurement decisions with a clear view of the risk.
The Onboarding Experience
Vendors in scope for VRA review will receive an assessment request through the OneTrust portal.
Assessments typically ask for a security questionnaire and supporting evidence, such as SOC 2 or ISO 27001 reports, penetration test summaries, and data privacy documentation (e.g., DPA, subprocessor list).
Information submitted is used only for SentinelOne’s internal risk assessment and approval, and is handled in accordance with applicable confidentiality terms and laws.
Prompt, complete responses keep the review on schedule. Missing documentation or delayed answers are the most common cause of onboarding delays.
Key Consideration: Review depth is risk-based: the type of data involved, the level of system access, and the nature of the integration determine the scope of the review. Lower-risk vendors may receive a streamlined assessment, while those with sensitive data or deeper access undergo a more comprehensive one.
Step-by-Step: Create Your Coupa Supplier Account
Step 1 — Create Coupa Supplier Account
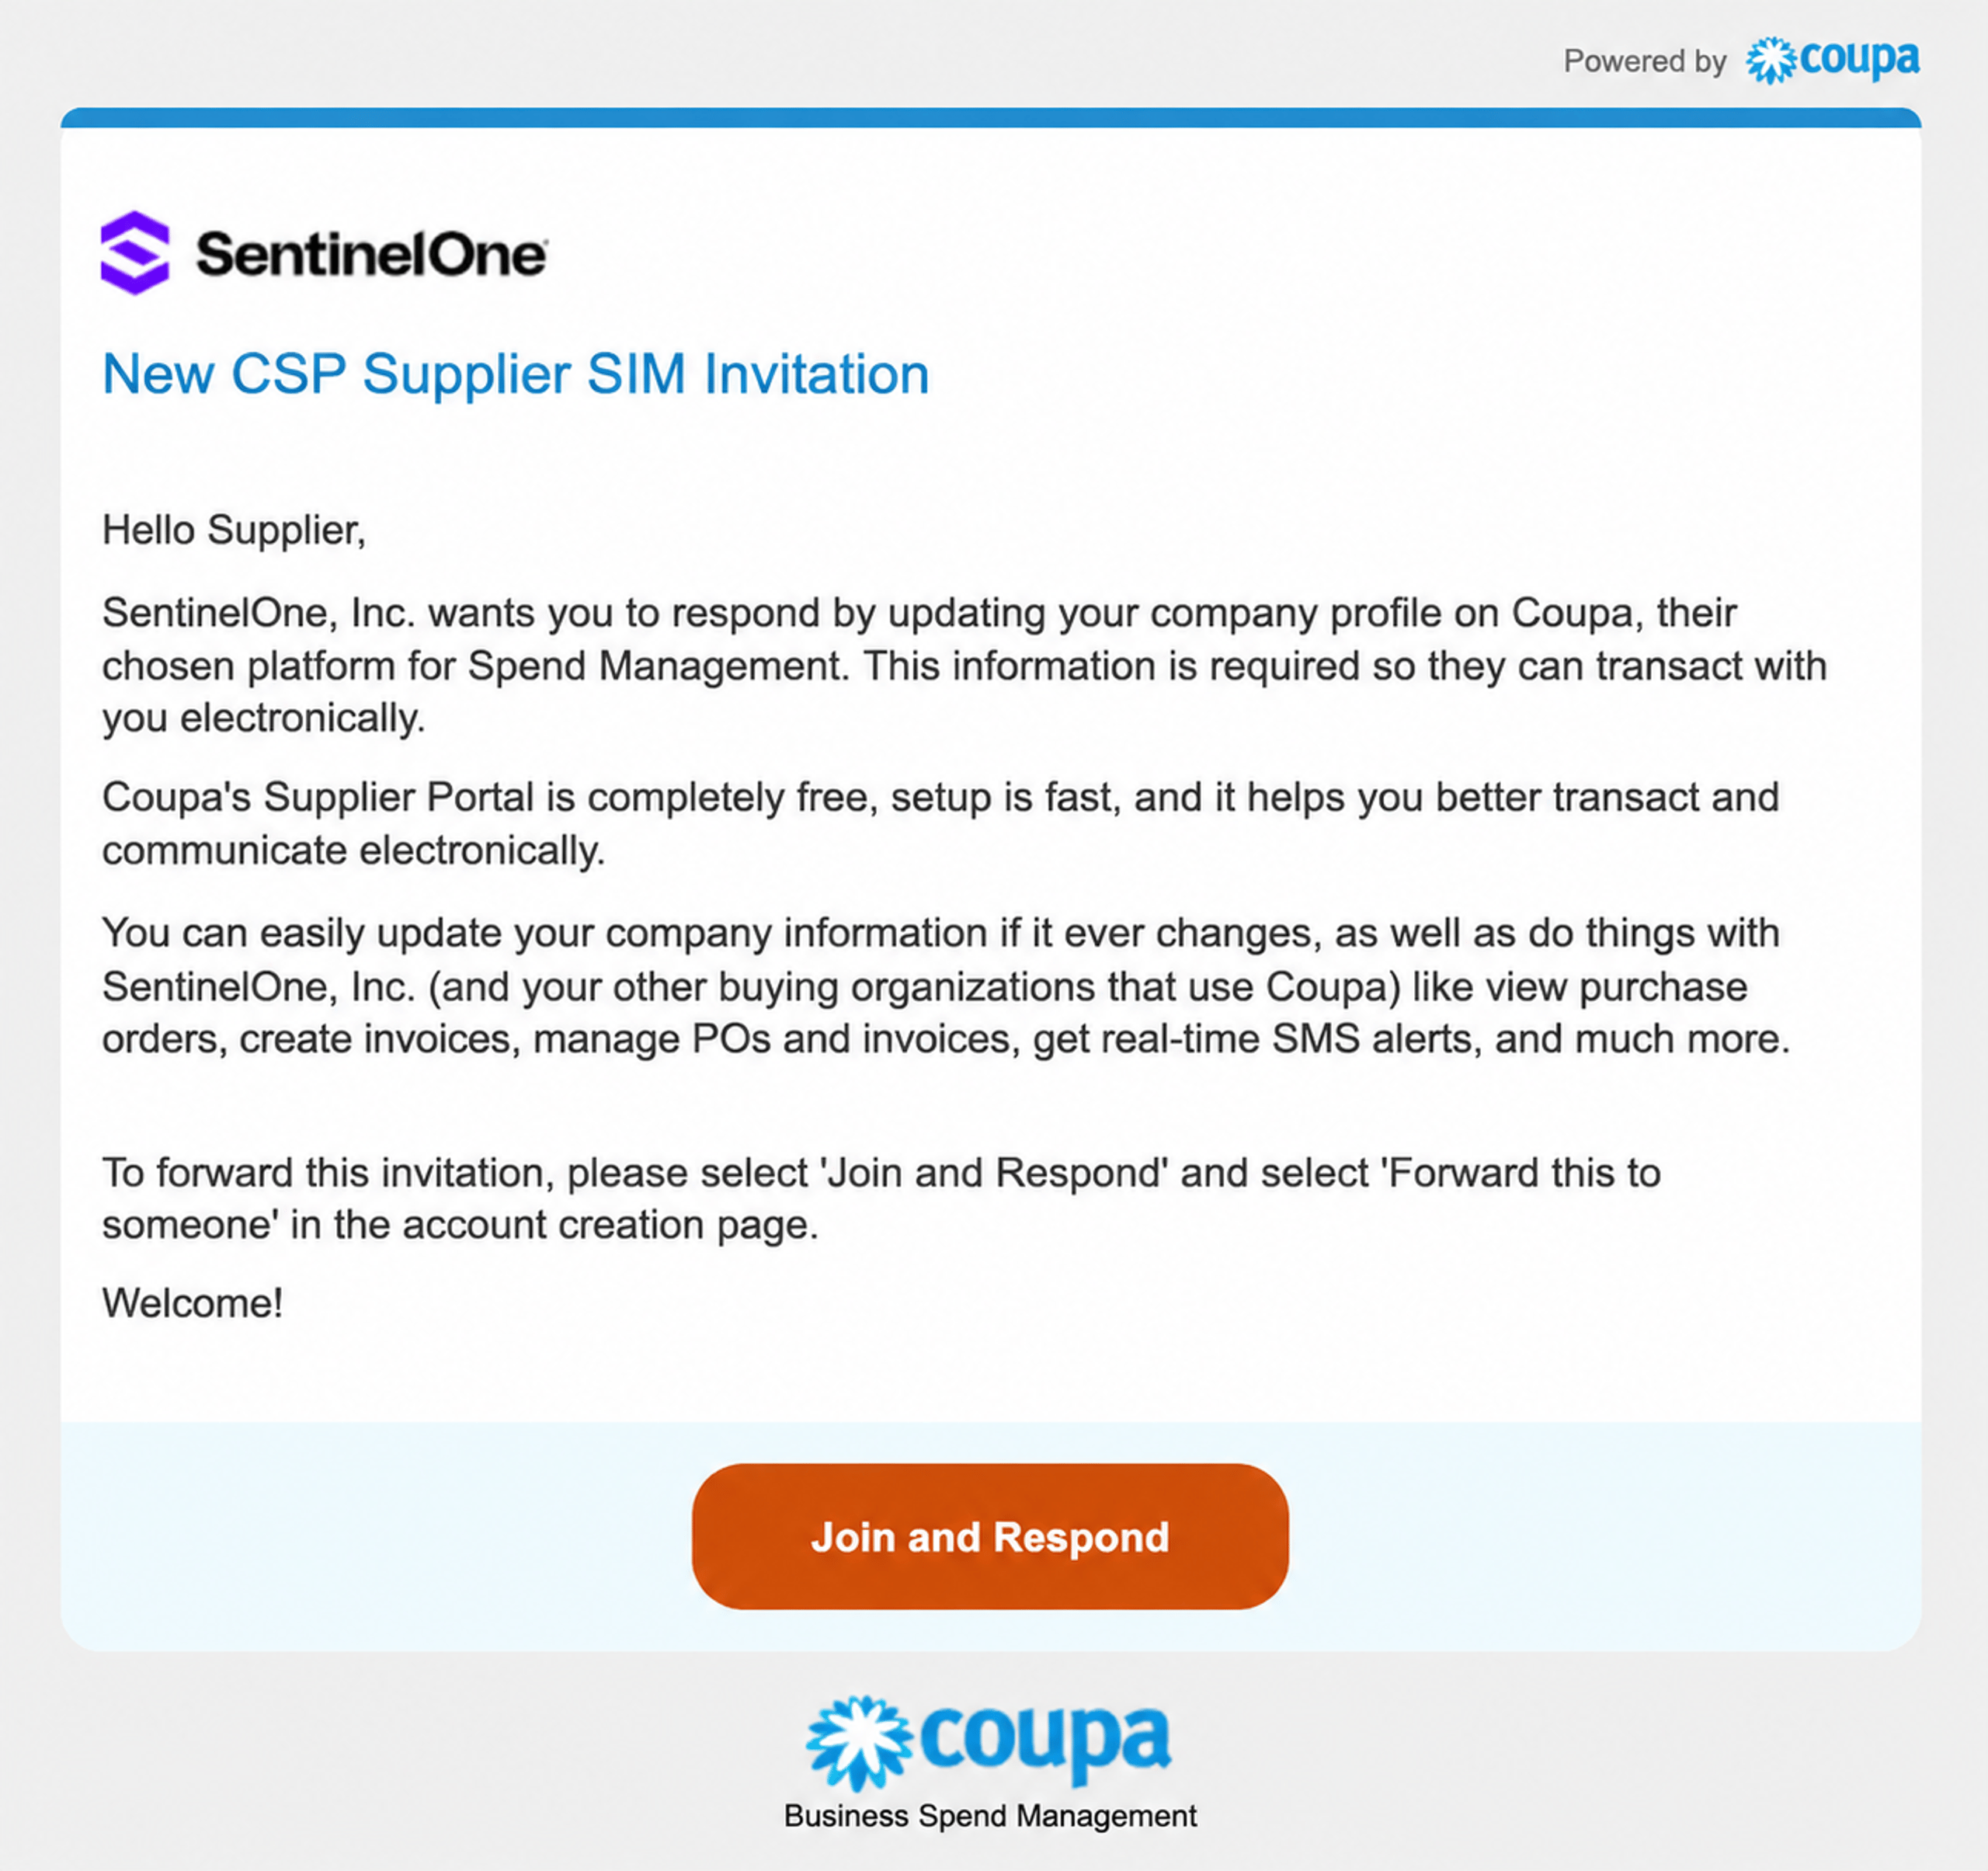
An invitation from SentinelOne is required to start the process.
New suppliers will receive an email like the one shown in the image from Coupa Supplier Portal.
Click "Join and Respond" to be redirected to the account creation page.
- You will receive an email from do_not_reply@supplier.coupahost.com. If you do not receive this email, check your spam folder. If you still can't locate the invitation, please contact s1.vendor.onboarding@sentinelone.com with your vendor name in the subject line for further assistance.
Step 2 — Enter Account Details
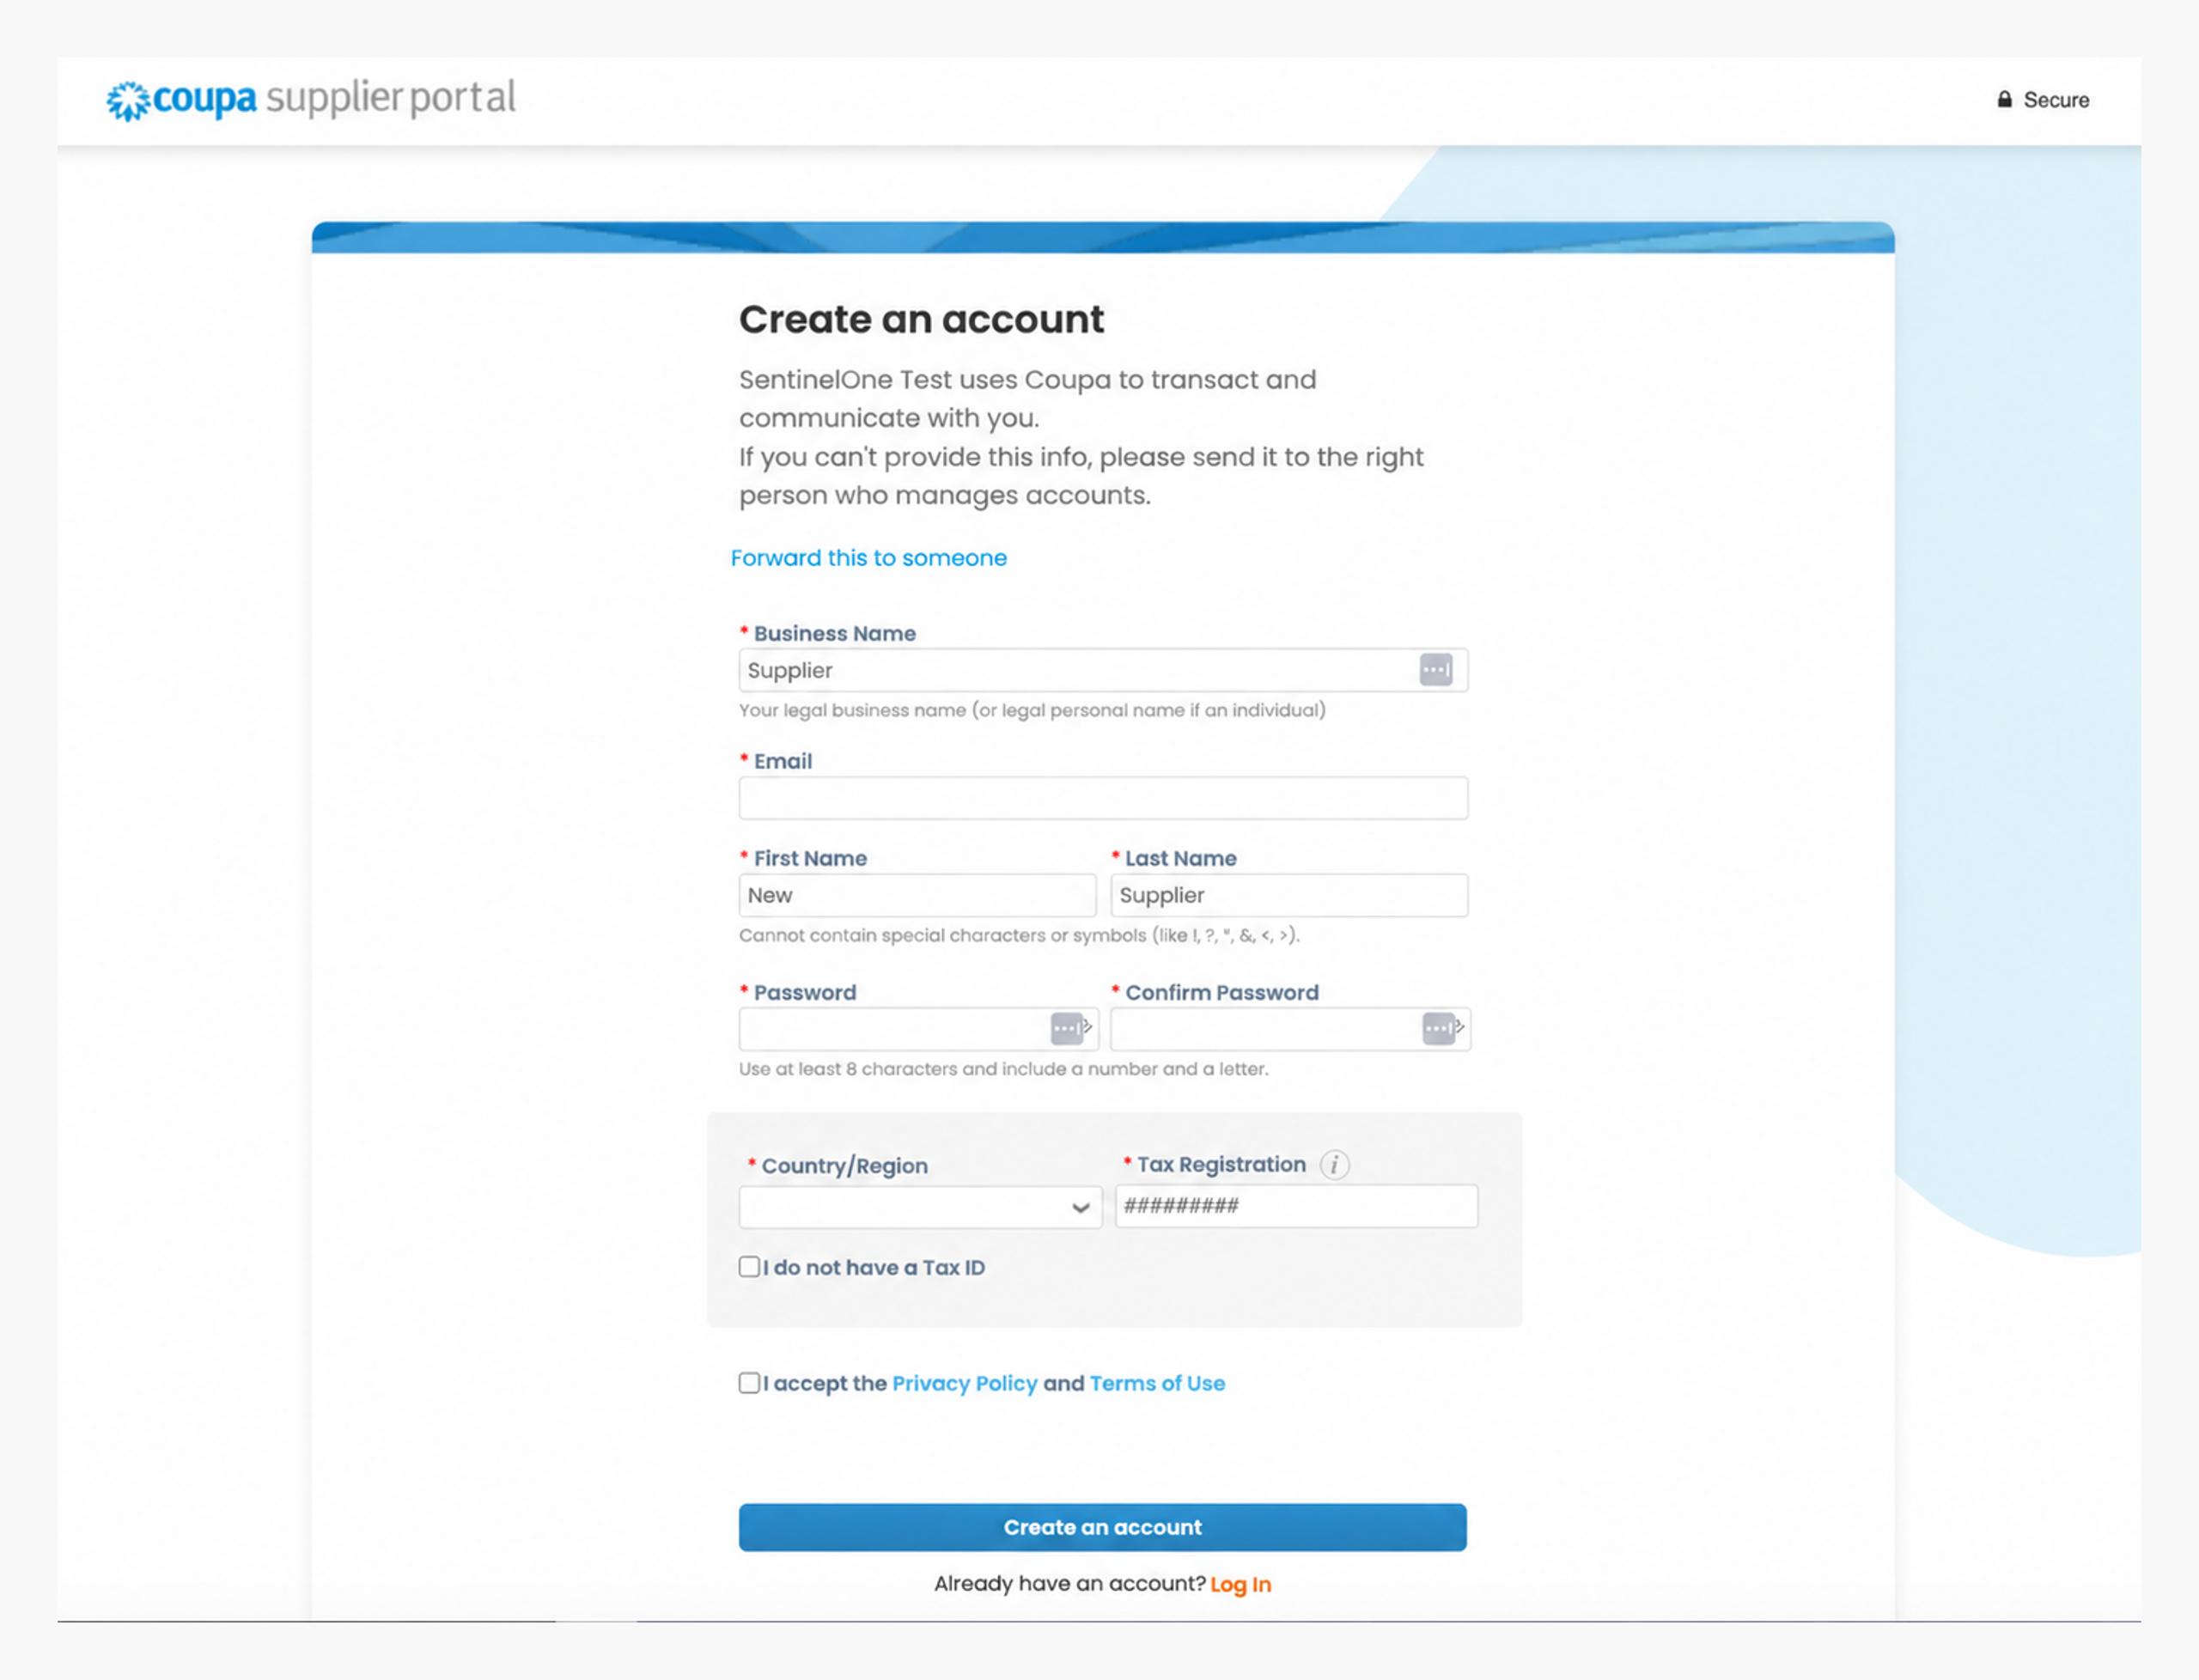
You will be prompted to enter all the required fields to create a Coupa account.
Please be sure to provide the official registered company name in this section - this name will be displayed on your invoices.
Already have a Coupa account?
Please log in with existing user ID and go to Profile > Information Requests > SentinelOne to access our onboarding forms.
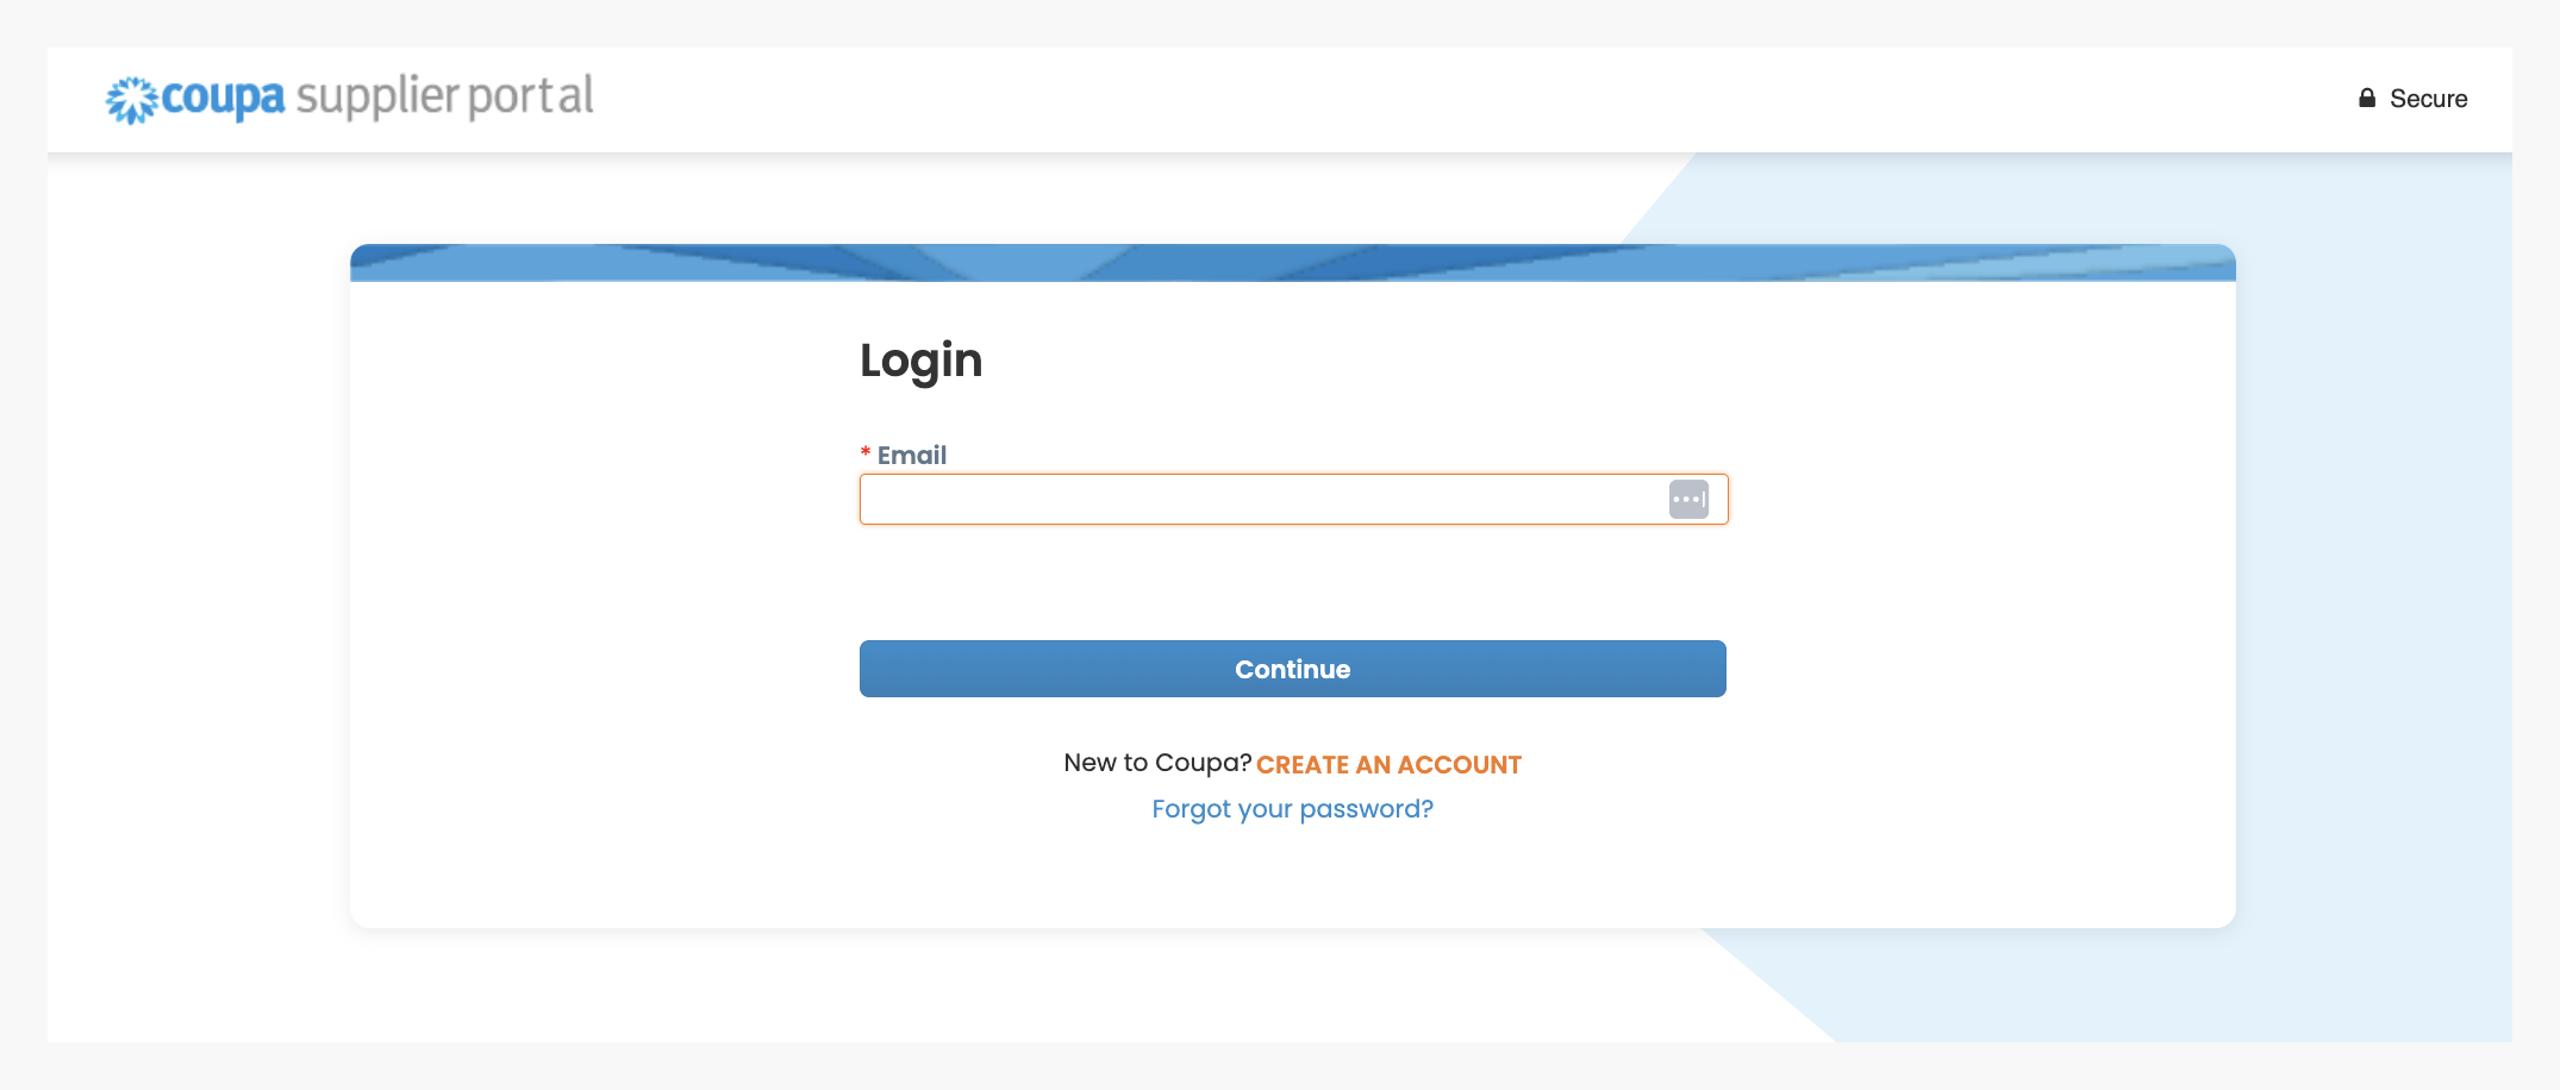
If the Admin user doesn't see SentinelOne under the Information Requests drop down, please reach out to your Sentinelone contact or email s1.vendor.onboarding@sentinelone.com
Step 3 — Contact & Business Info
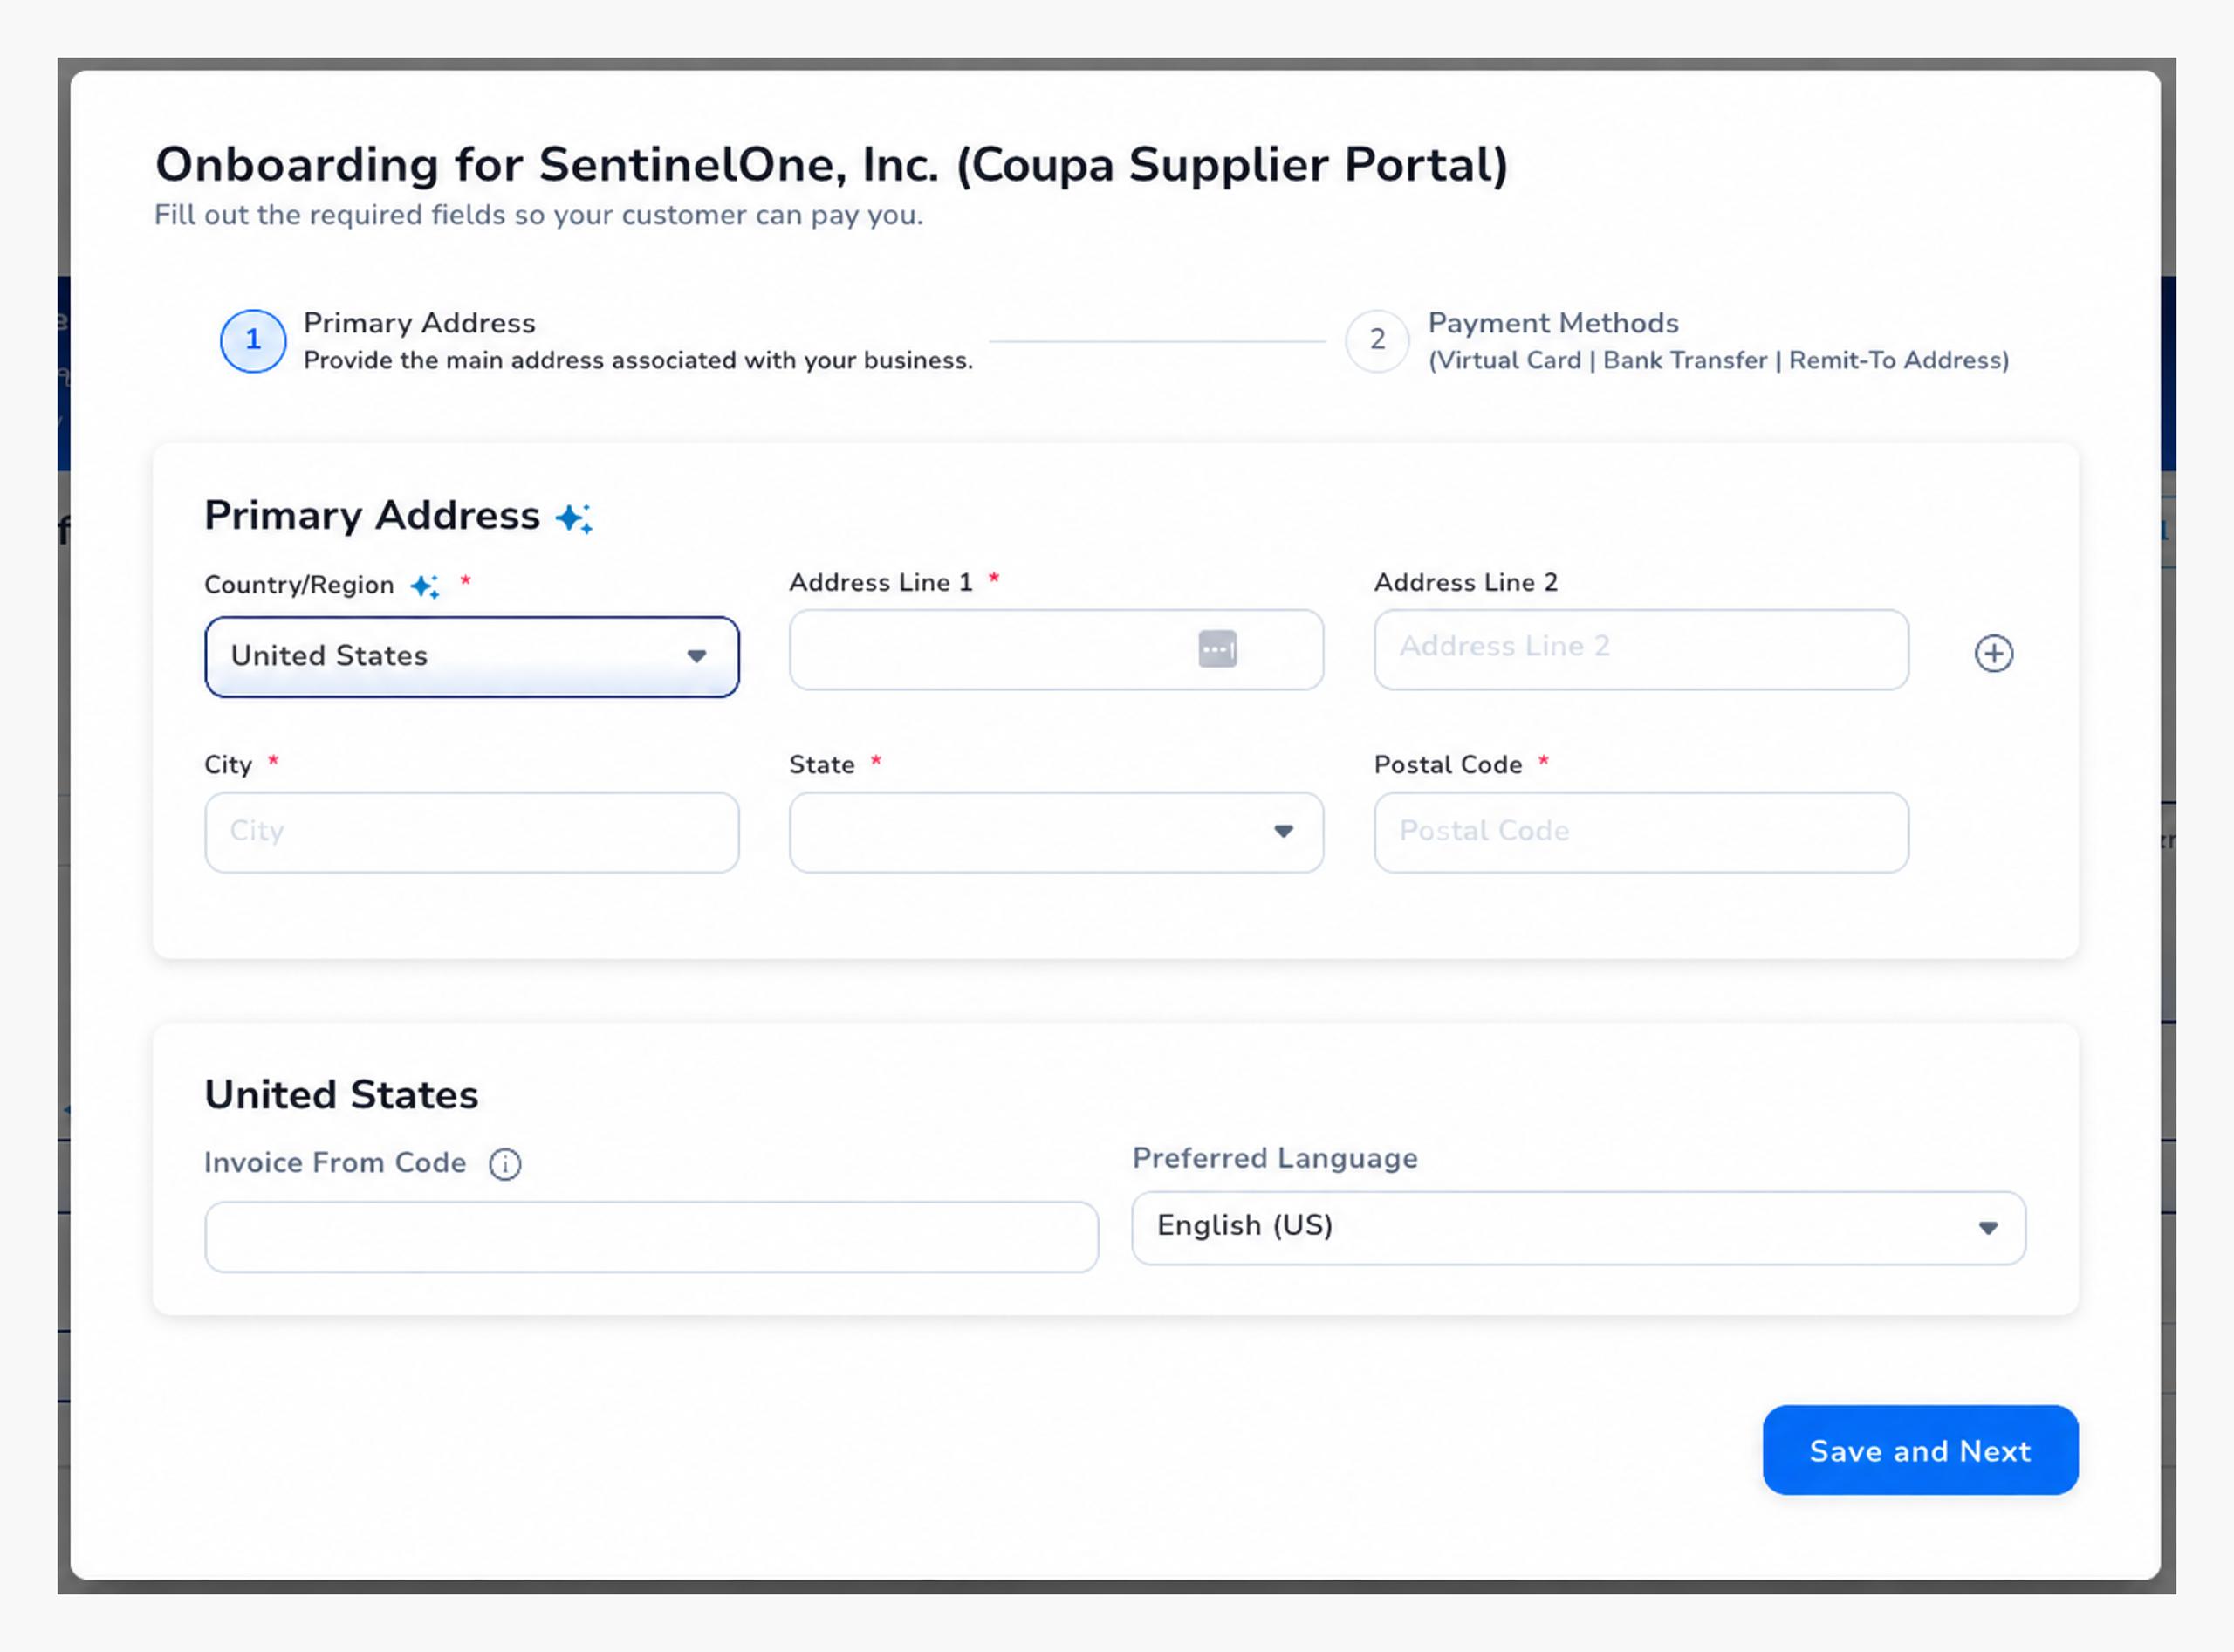
Please fill in your contact information and some more company details.
Primary Address
Country/Region
Address Line 1
City
State
Postal Code
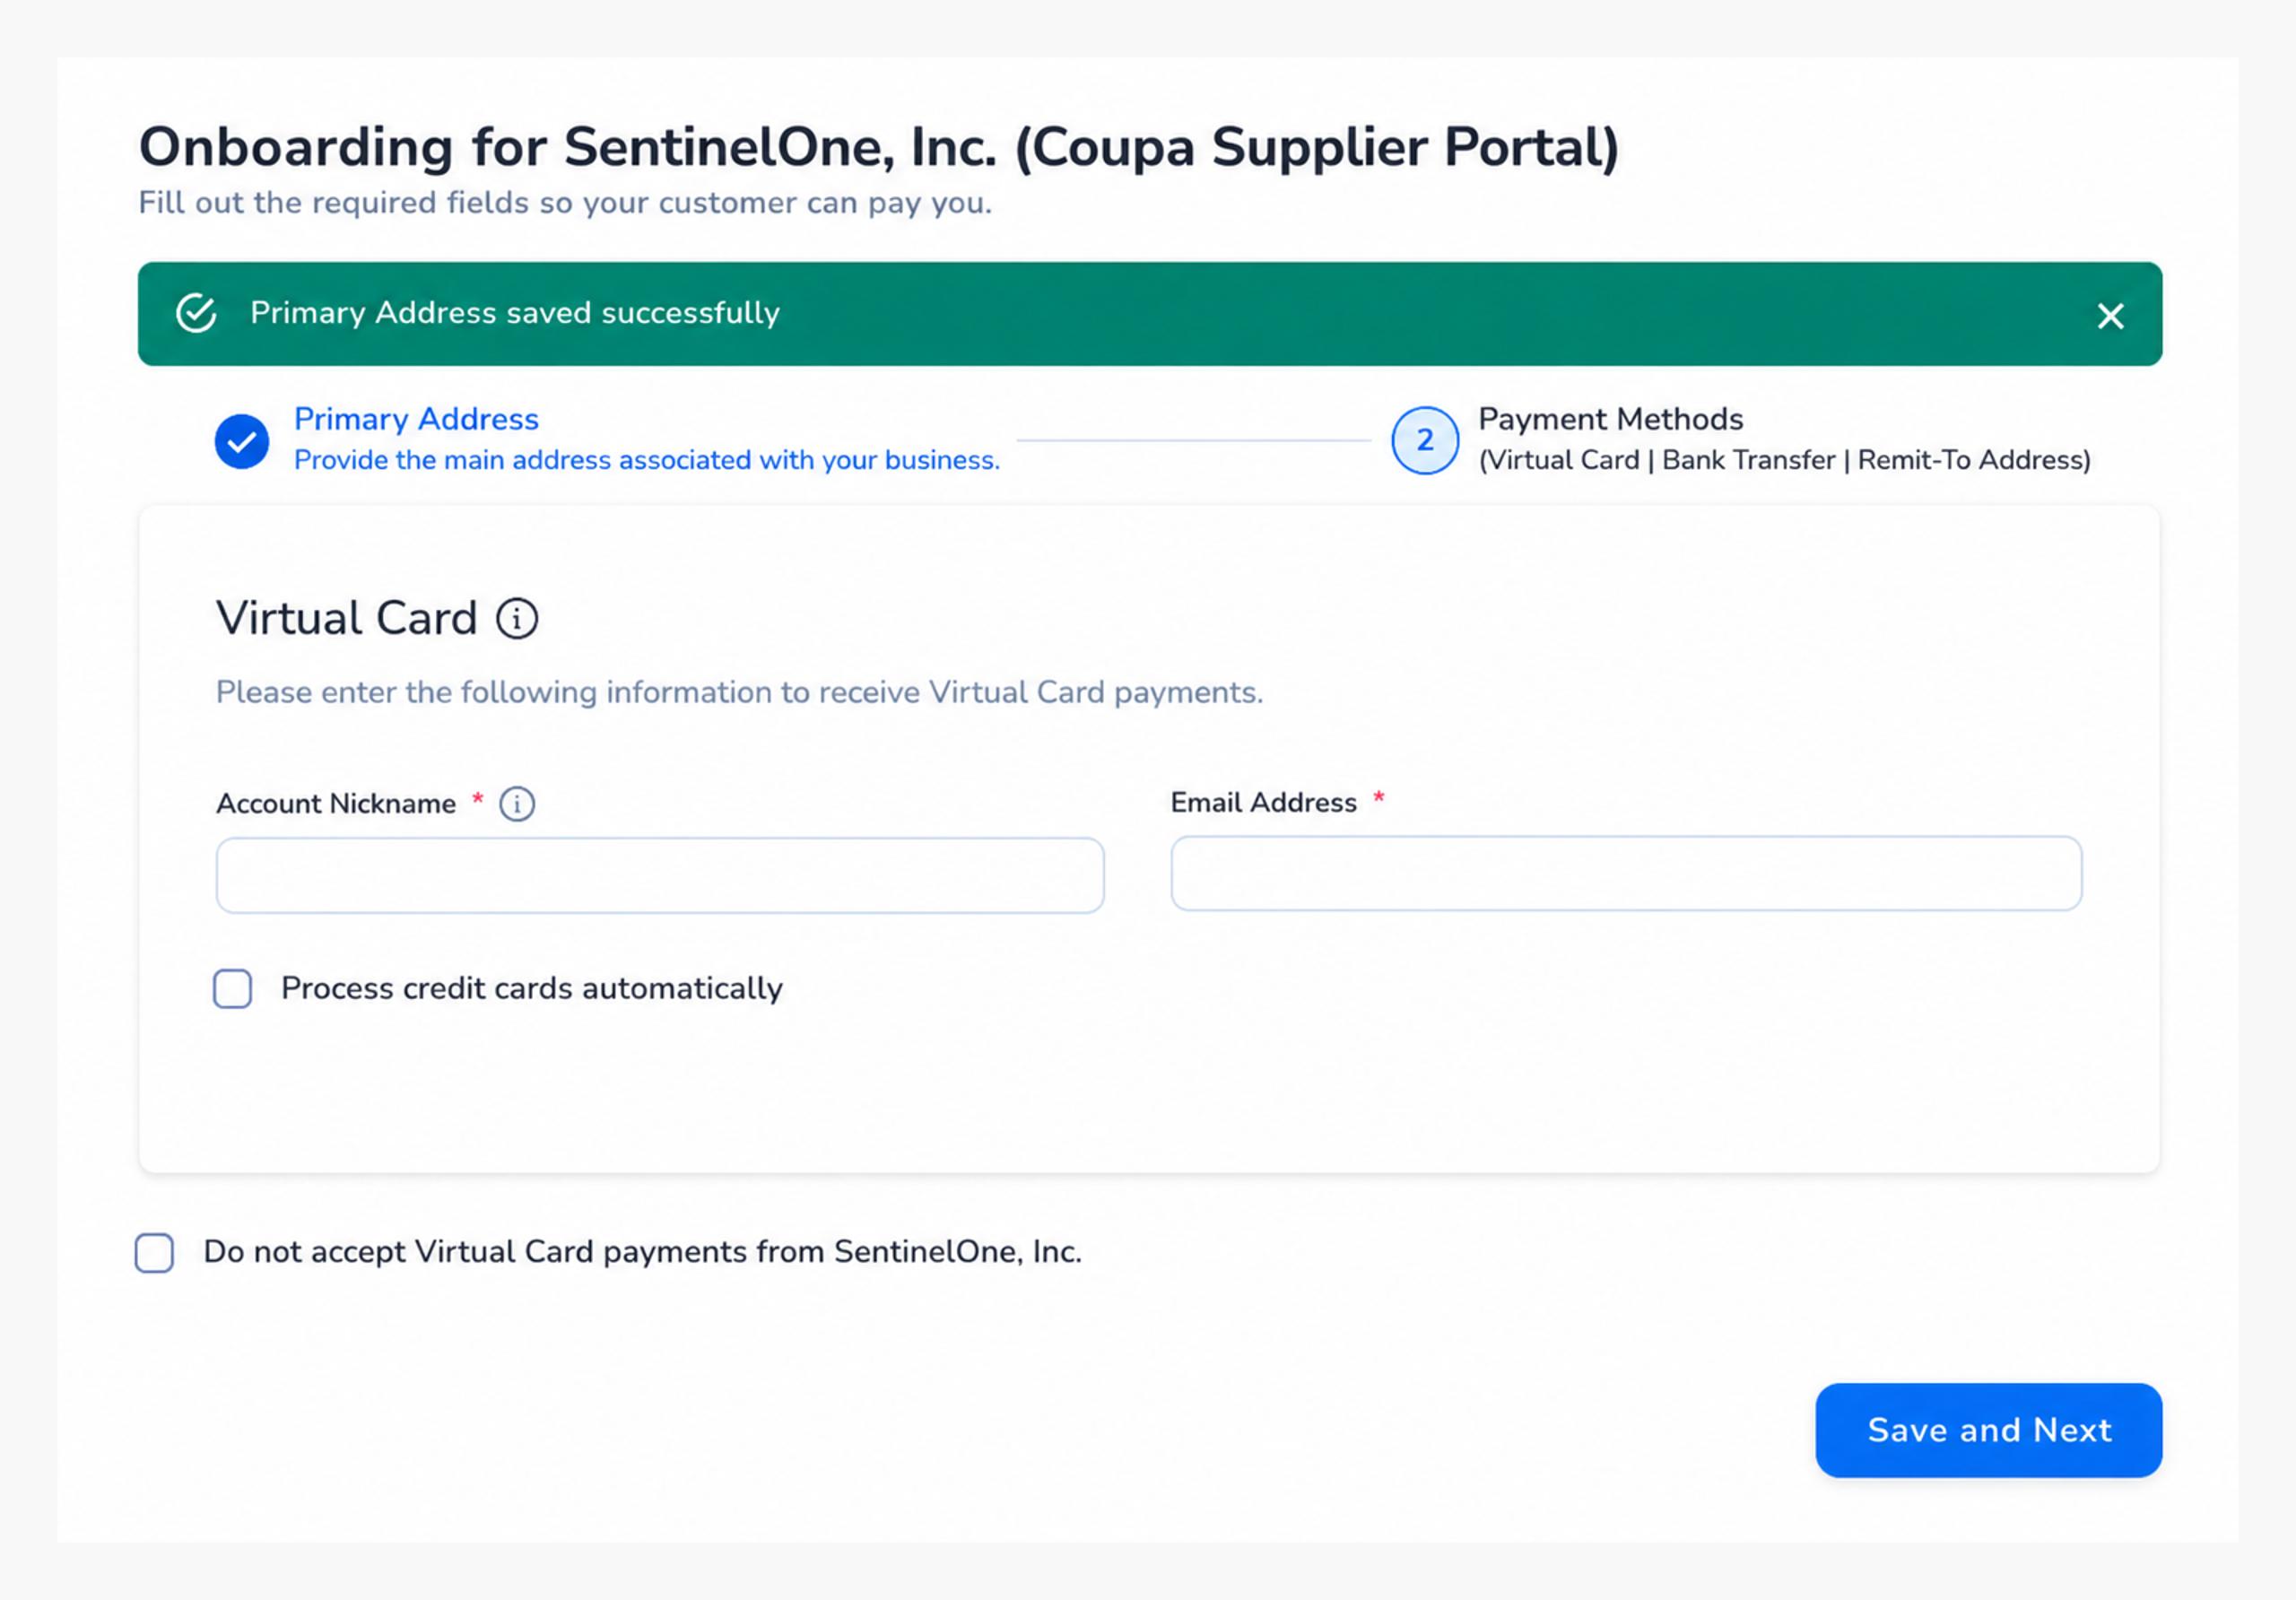
Virtual Card
Account Nickname
- Email address
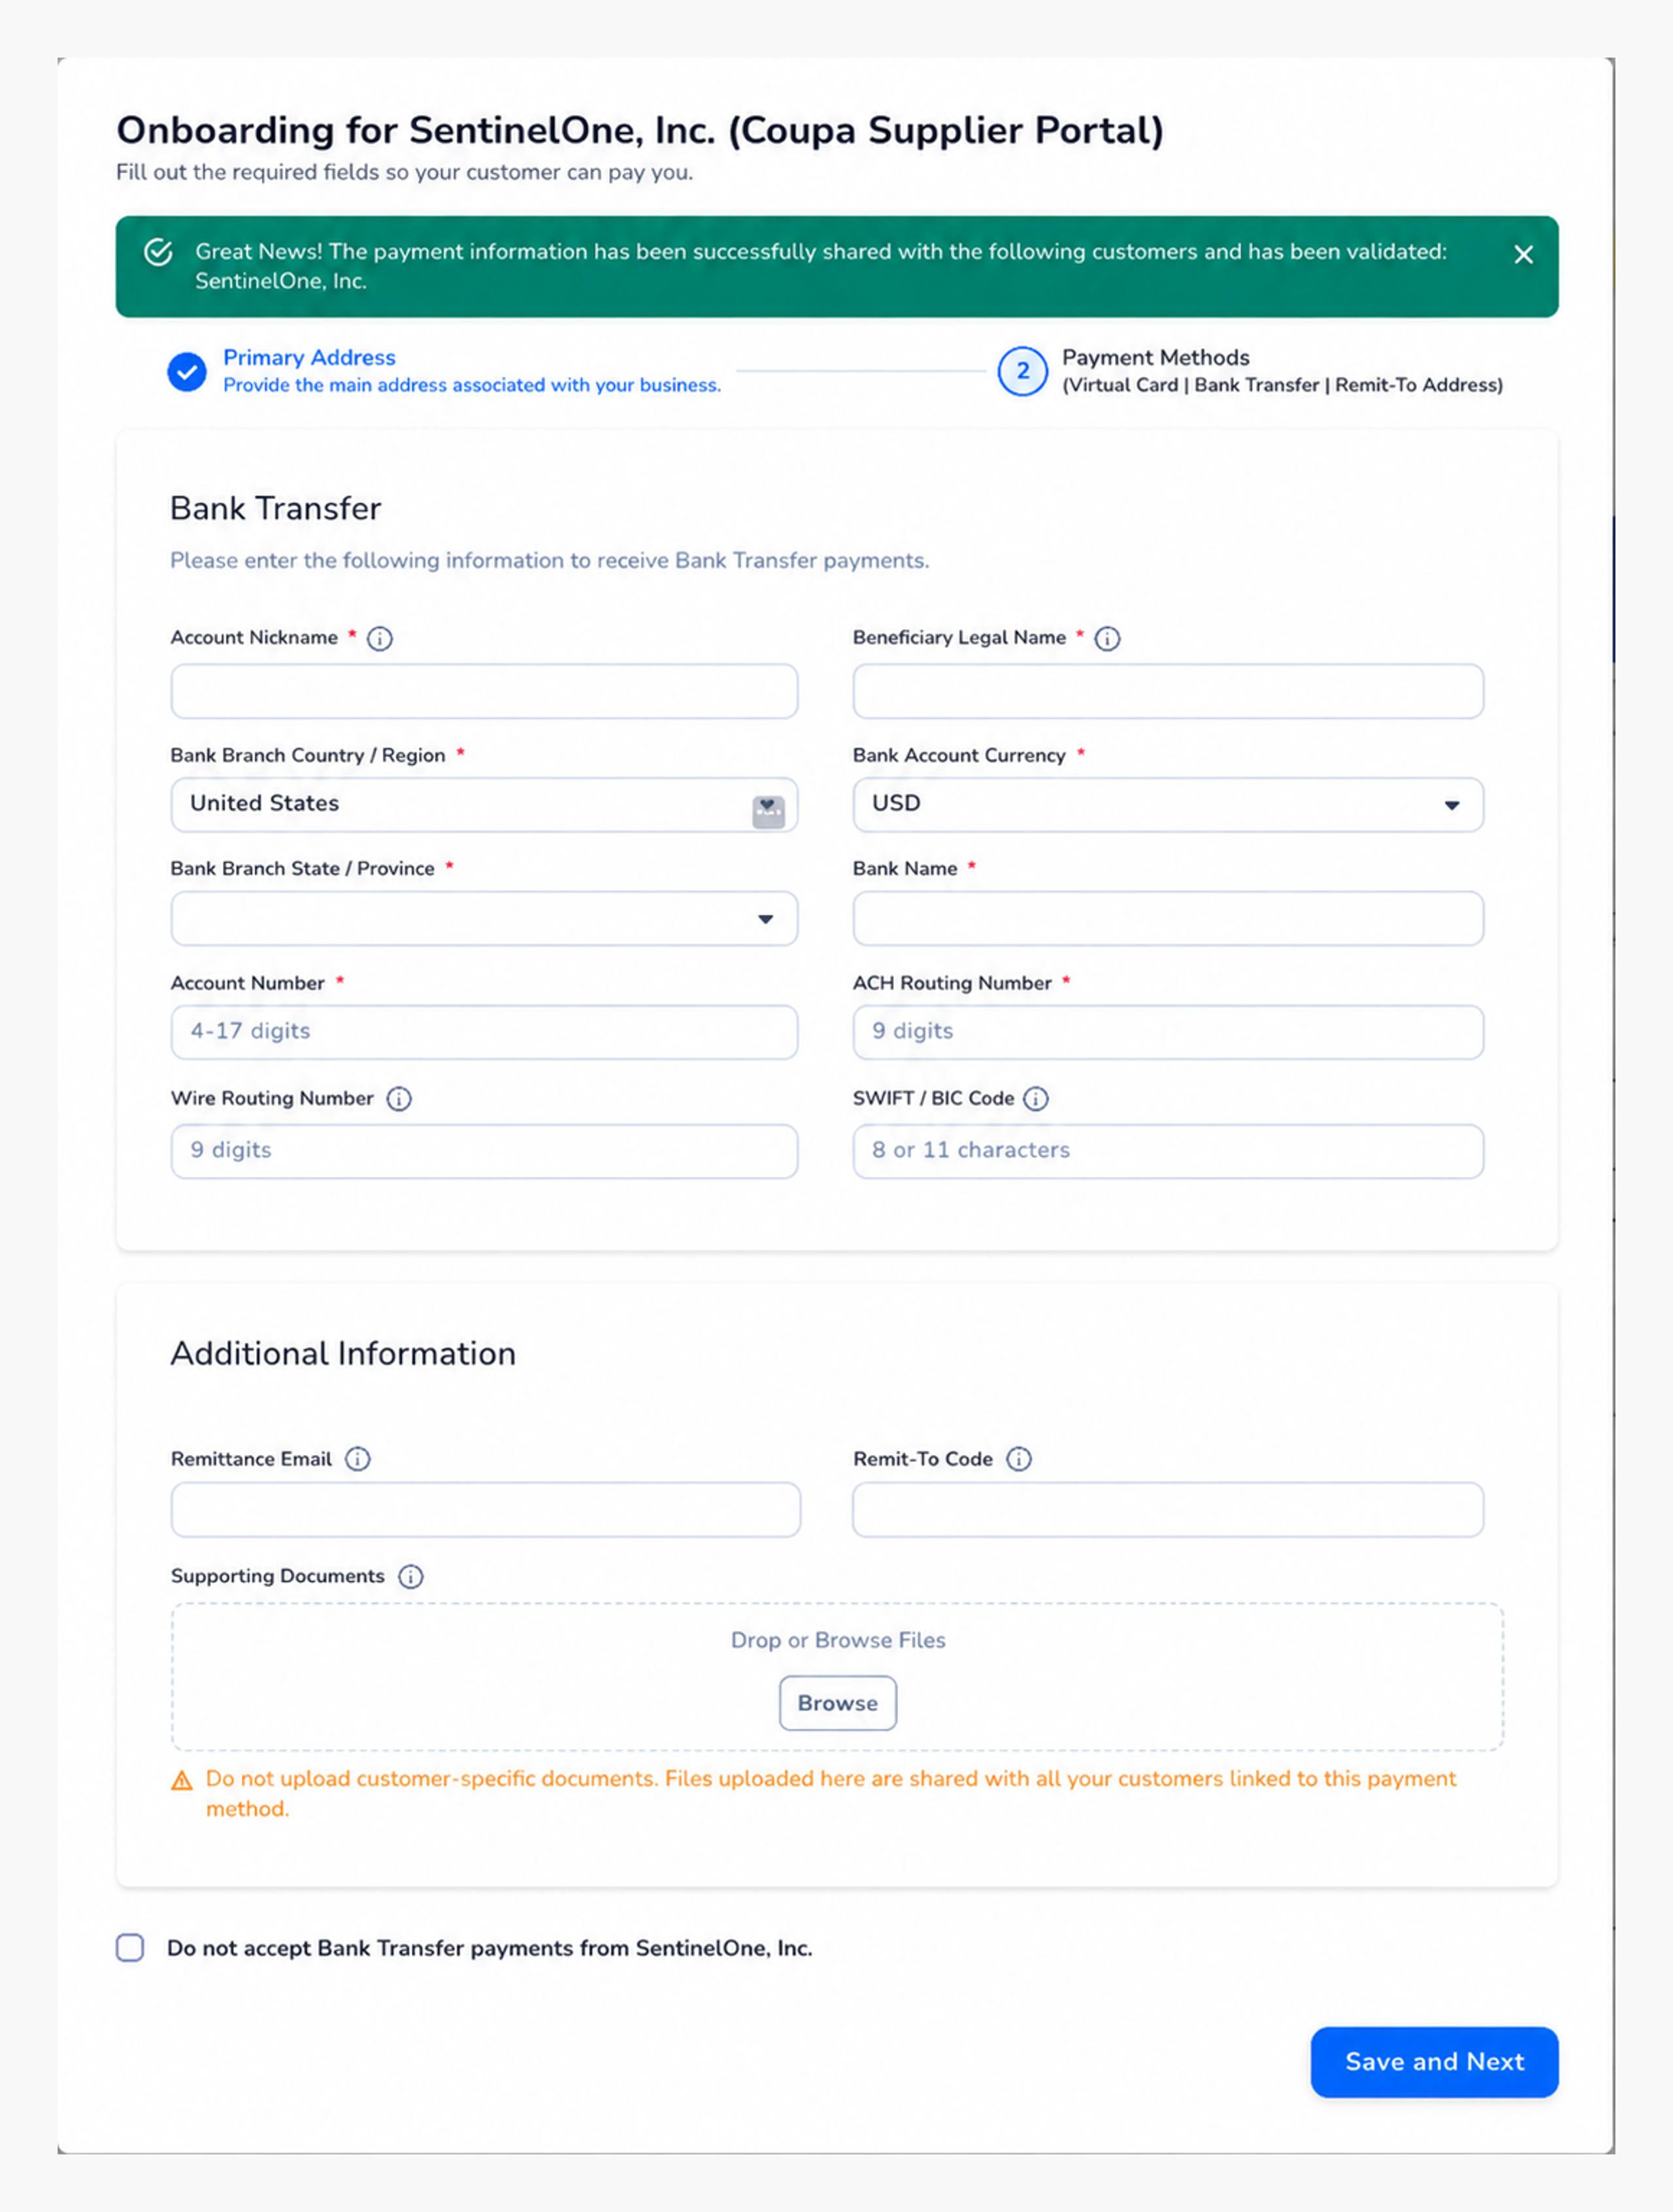
Bank Transfer
Account Nickname
Beneficiary Legal Name
Bank Branch Country/Region
Bank Account Currency
Bank Branch State / Province
Bank Name
Account Number
ACH Routing Number
Street Address
Step 4 — Go to Portal
Basic profile completed - more information will be required to get your account up and running. Once you are in the CSP, you will be prompted to complete the Form: “External Supplier Request”. *form may differ based on Country
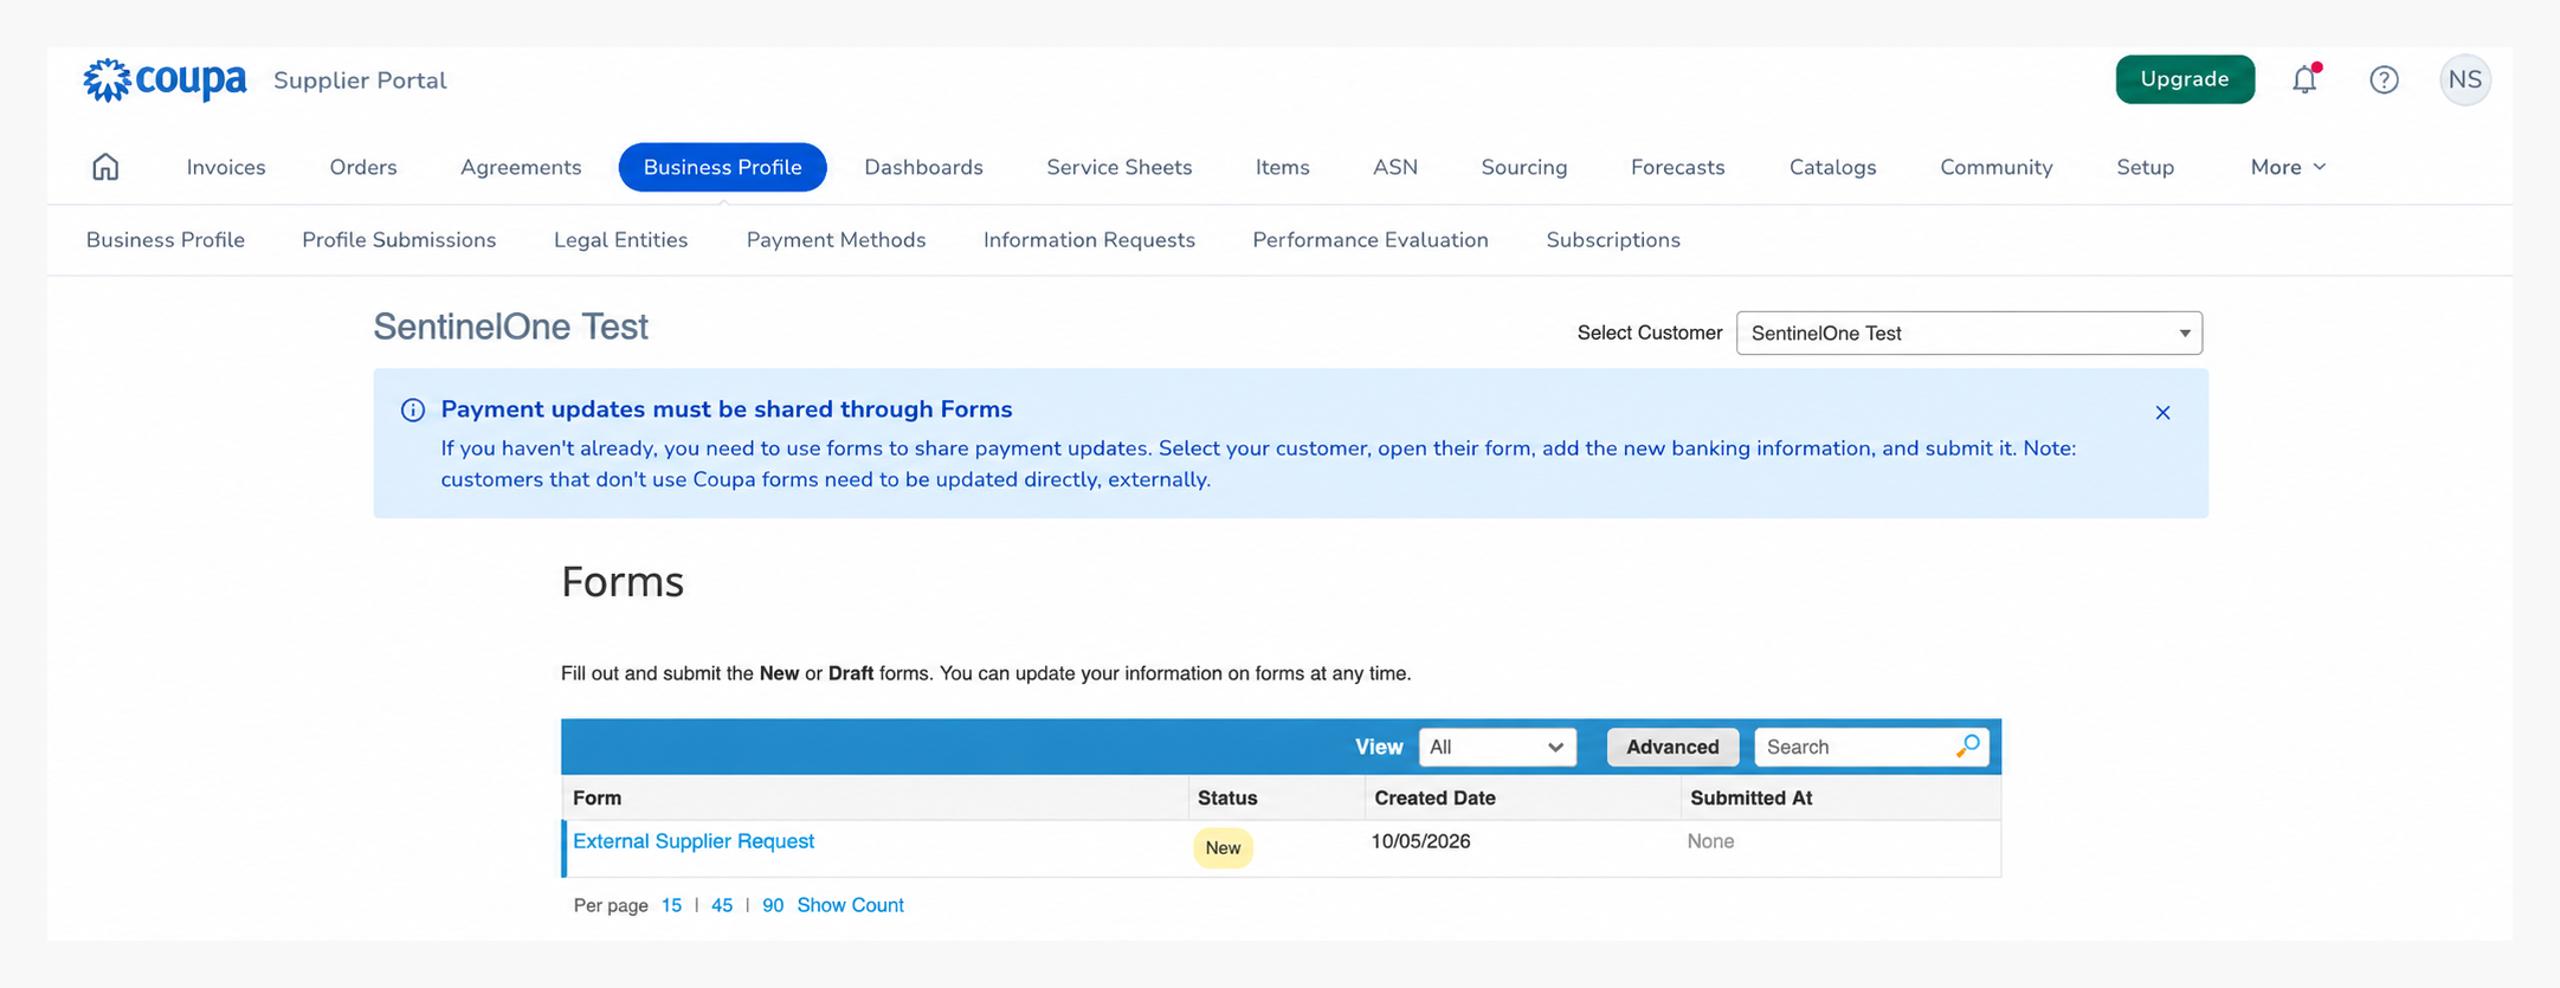
Complete Supplier Onboarding Form
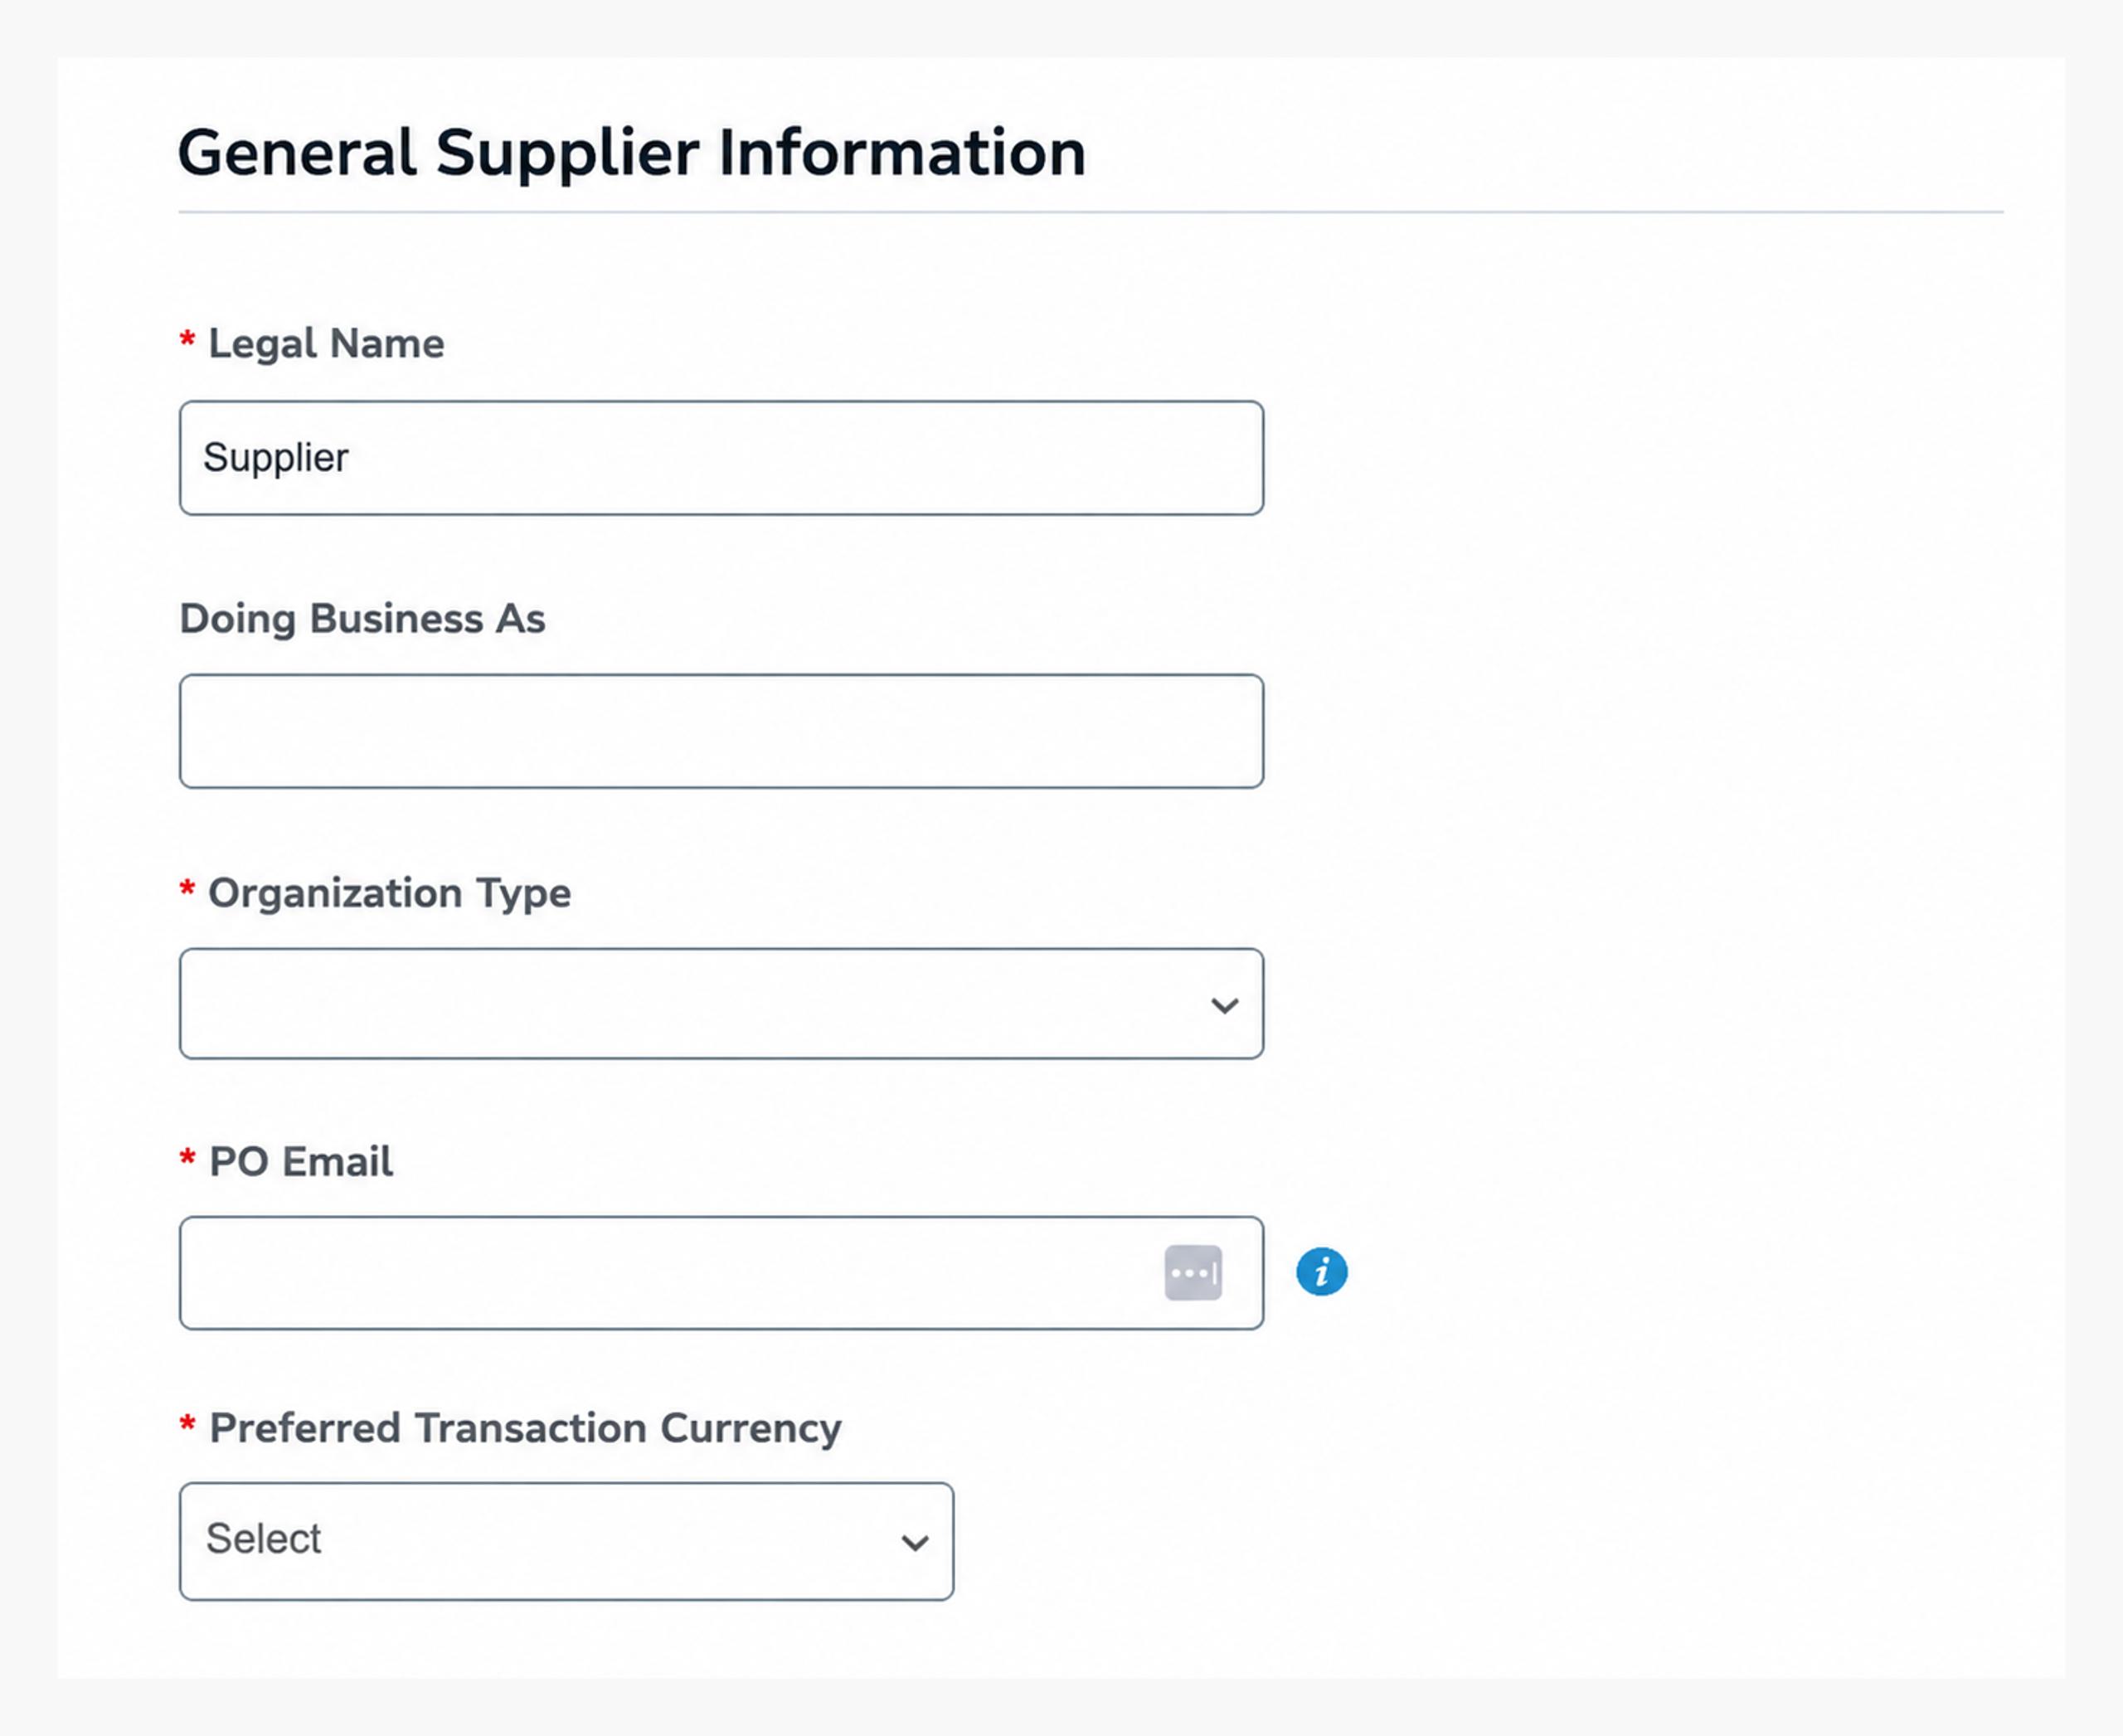
Step 1 — General Supplier Information
Follow the instructions to confirm the auto-filled information and complete all required fields.
Legal Name: legal name of your organization
Doing Business As: If your company goes by a name other than the legal name
Organization Type
PO Email
Preferred Transaction Currency
Step 2 — Primary Contact
Add your primary contact details and PO transmission email.
Primary contact should be the main point of contact.
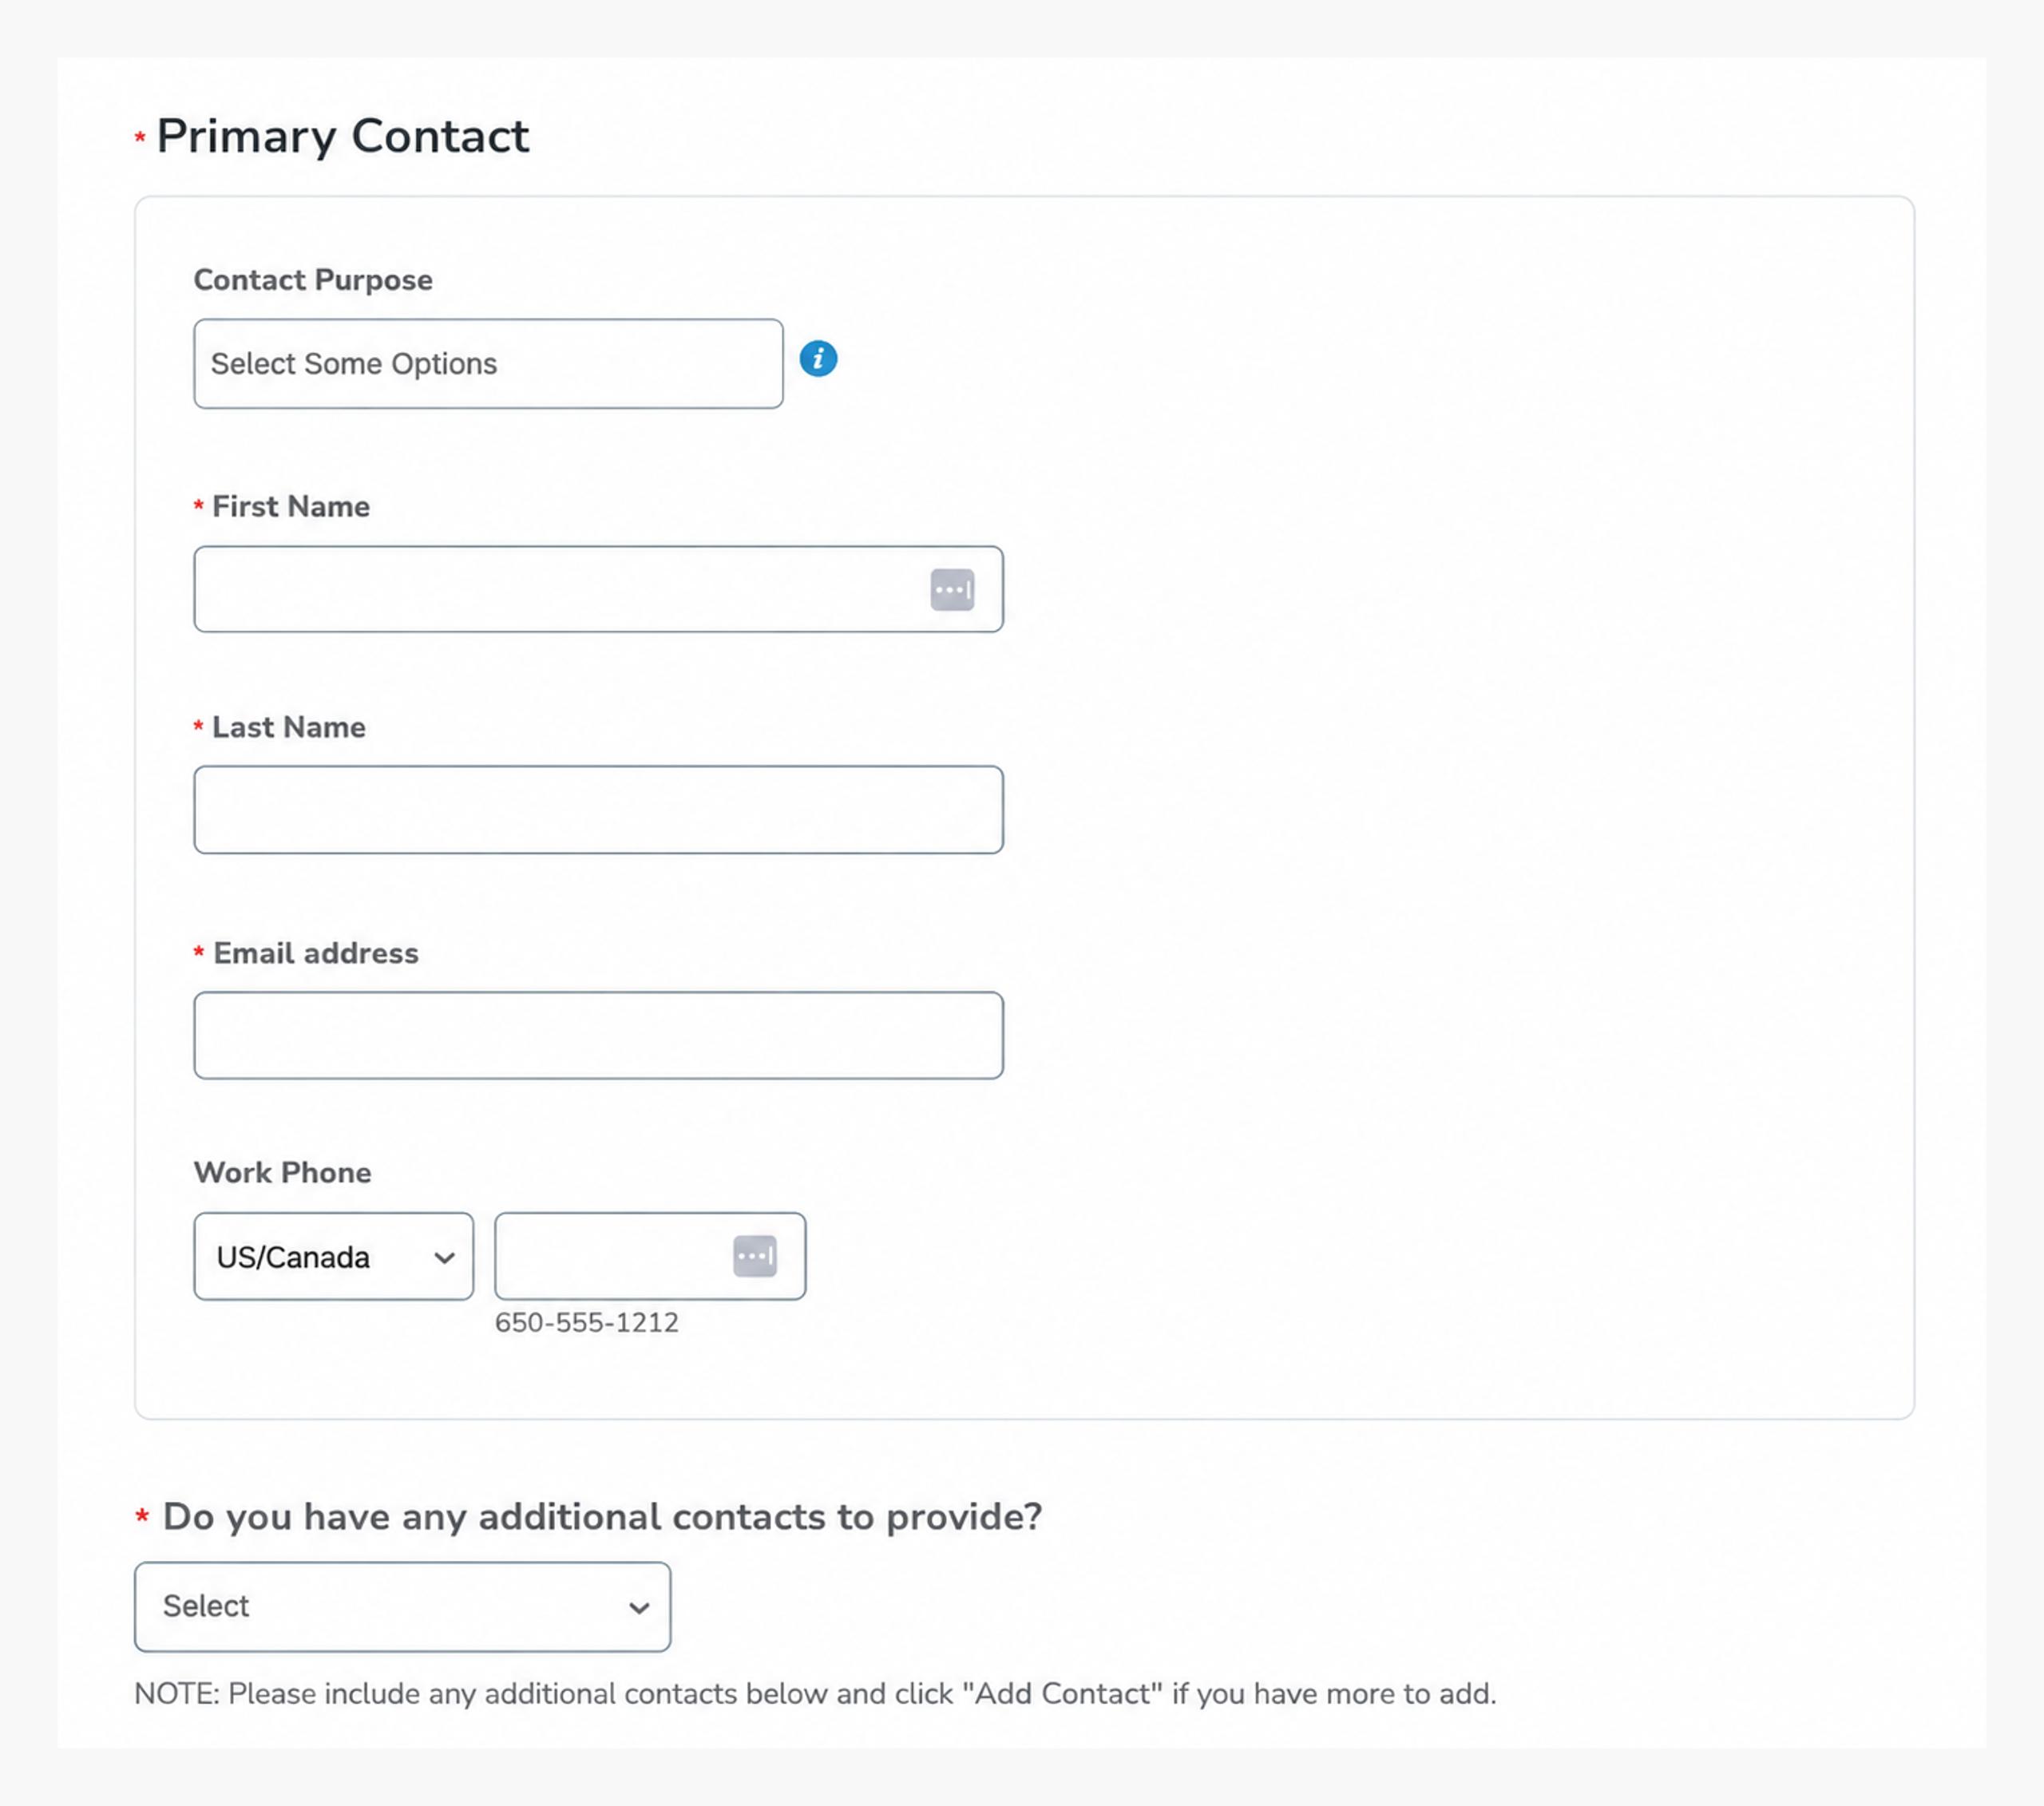
Step 3 — Primary Address
Supplier Primary Address is the physical location.
Required fields: Region/State, Street Address, City, Postal Code.
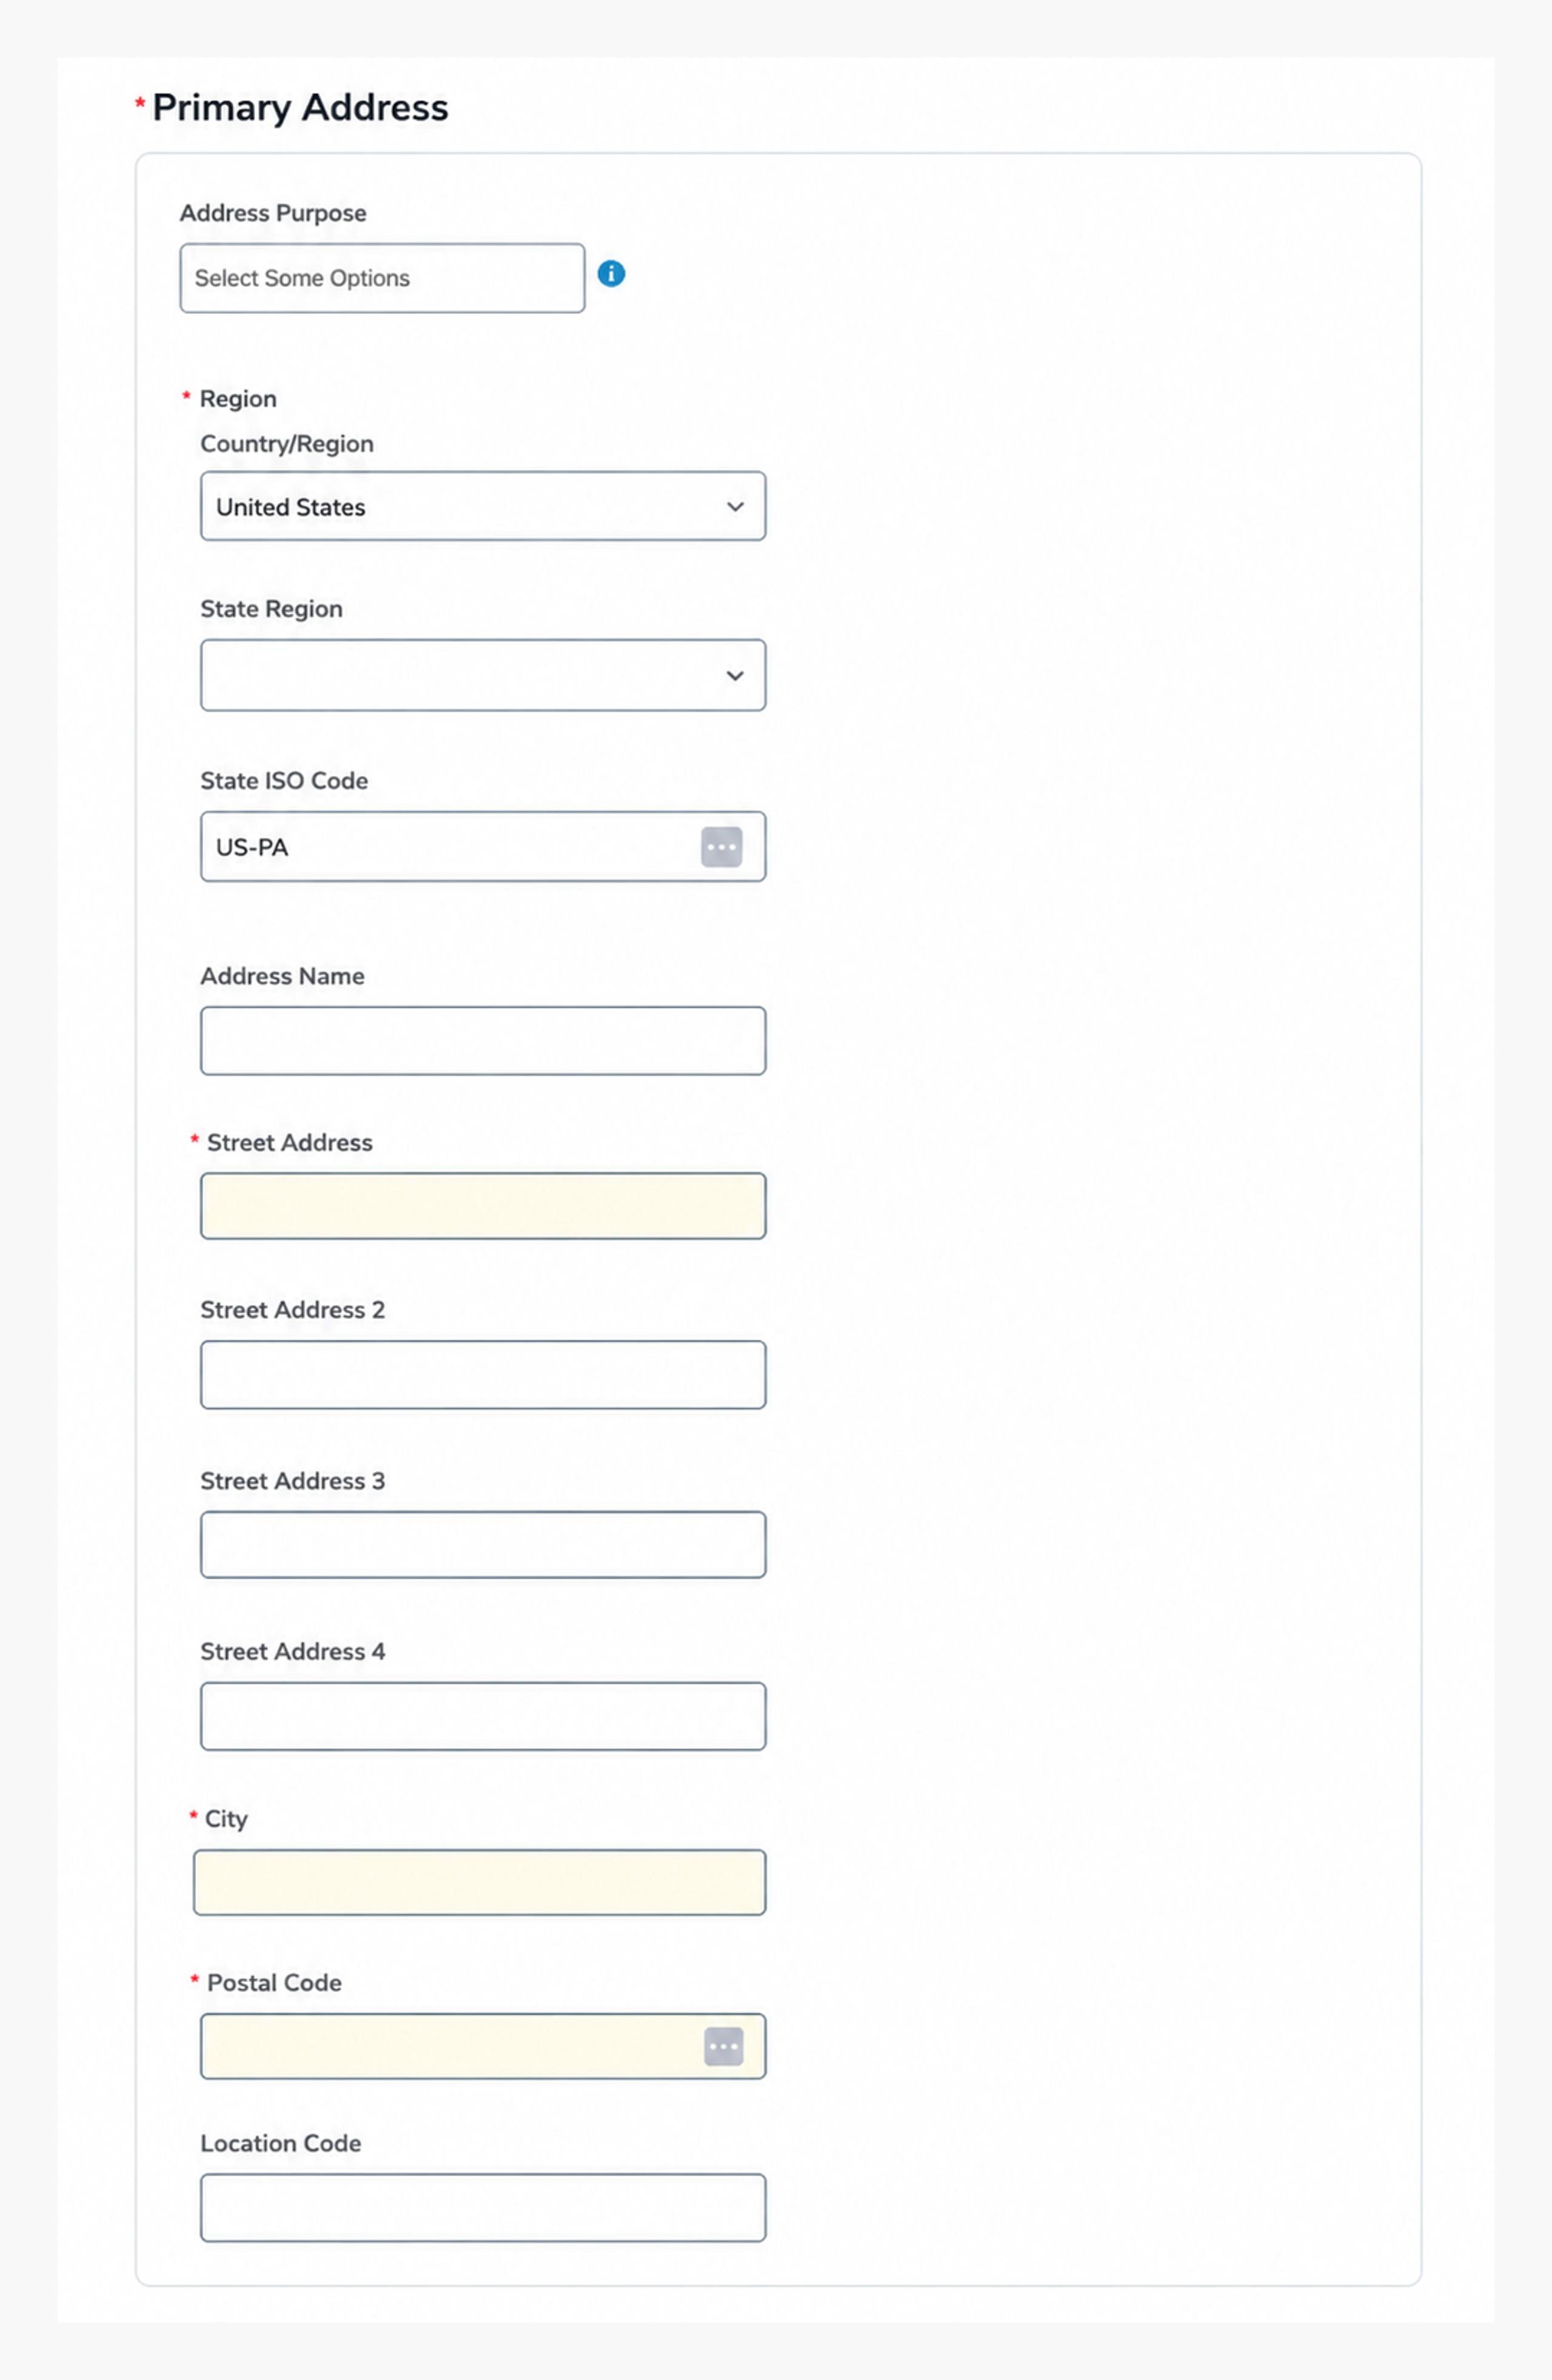
Step 4 — Tax Information
More fields will populate based on your incorporated location.
United States: Federal Tax ID, *W9 Form
International: VAT ID, *W-8 Form
Remit-To Address
*W-8/W-9 Form is only required when work is being performed on US soil. Please attach latest form from IRS.
Step 5 — Banking Information
Providing your company's bank details.
Click on "Add Remit-To" or "Create new Remit-To Address".
Fill out payment information and attach documents.
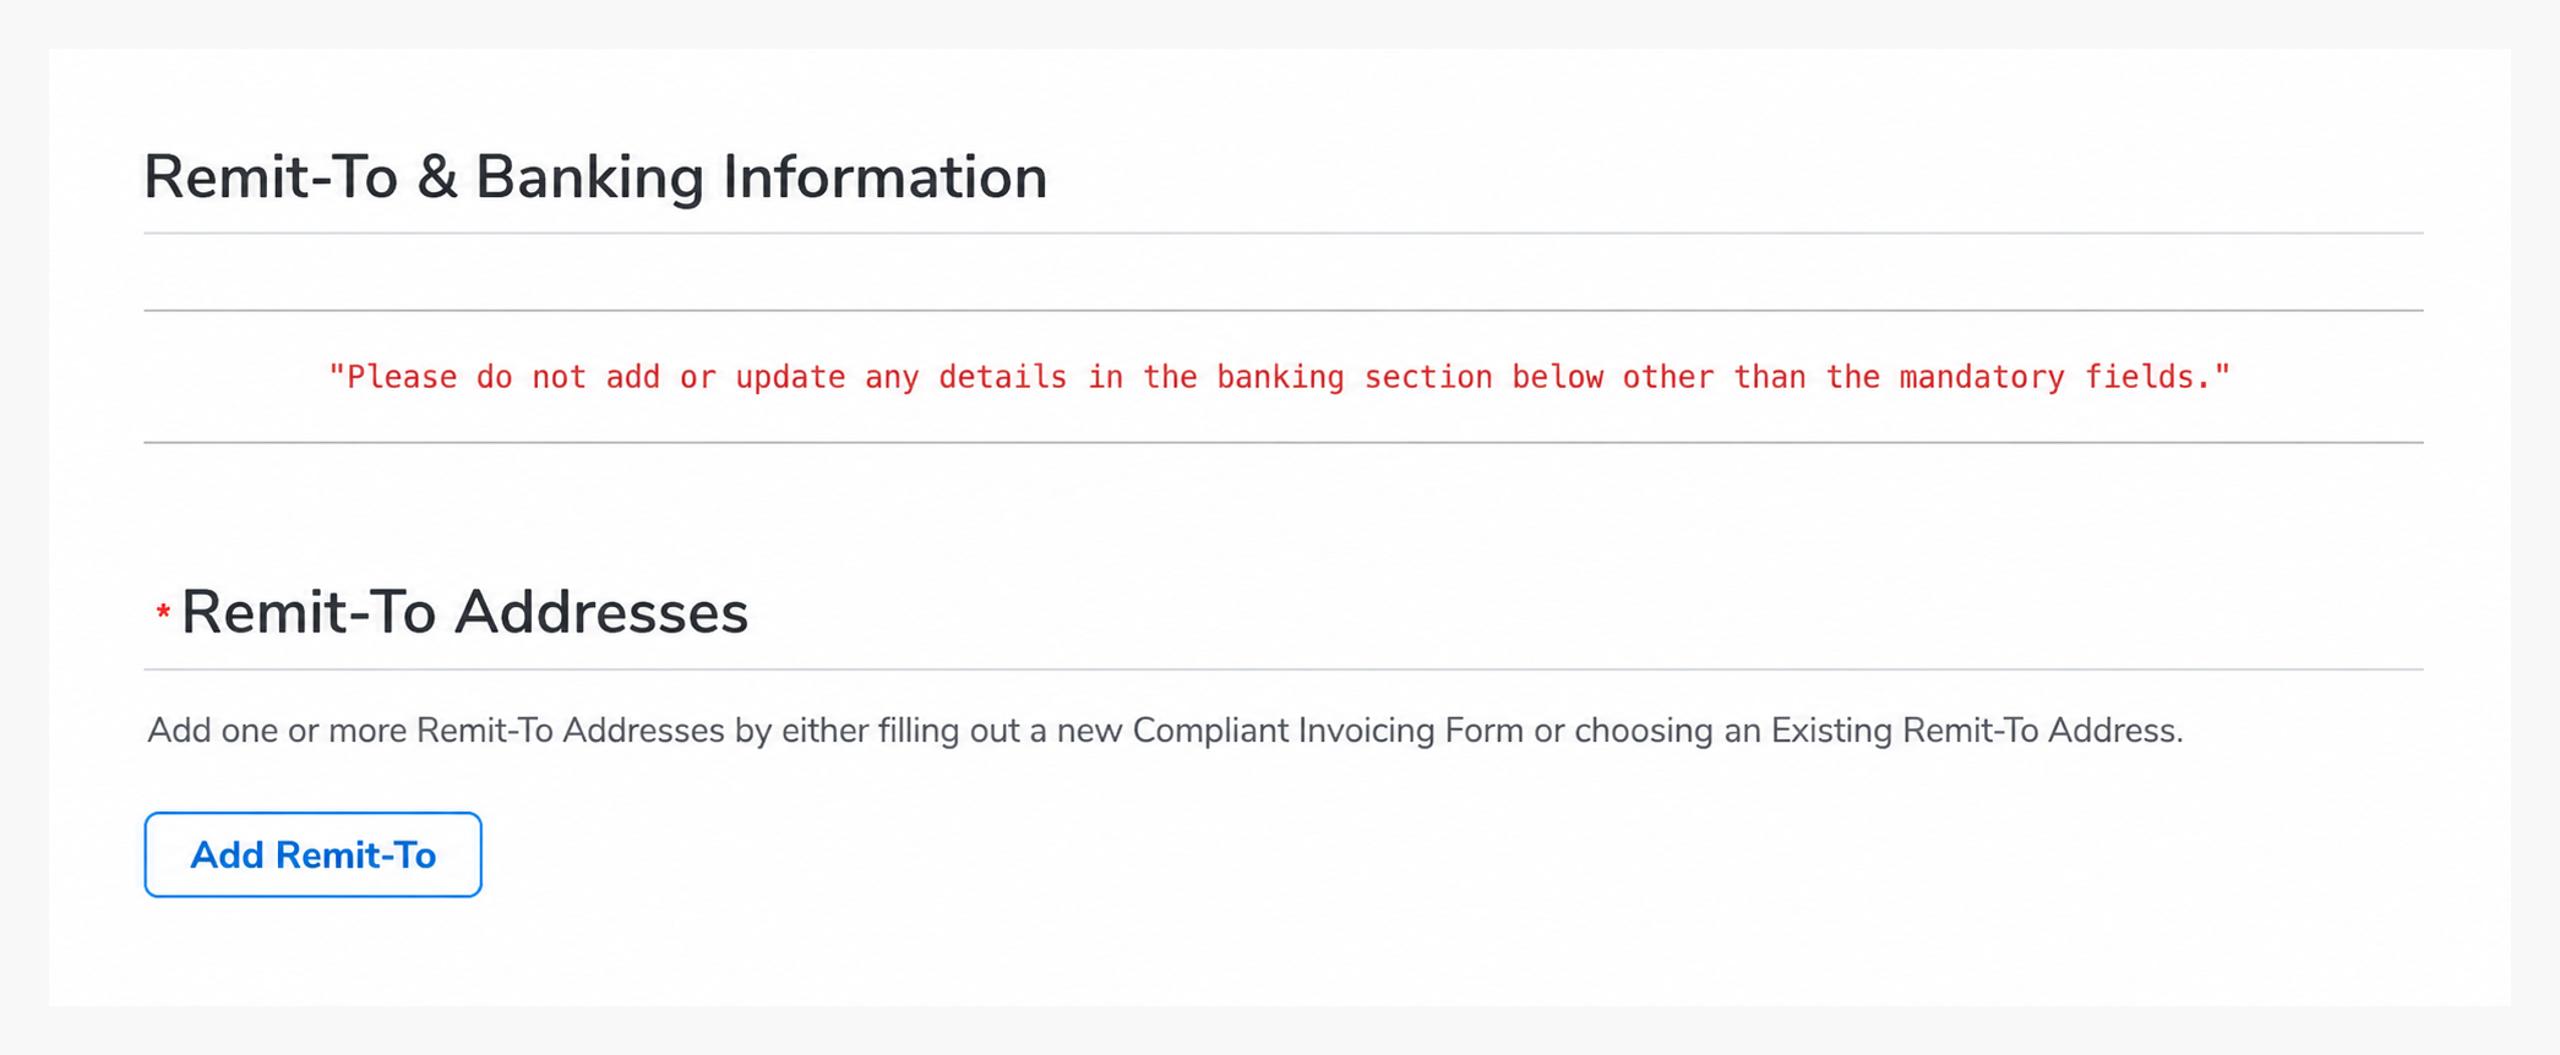
Banking support documents for all Non-US vendors and US vendors preferring electronic payment is required.
Step 6 — Information Security/Risk Contract
Provide first and last name, title and email address
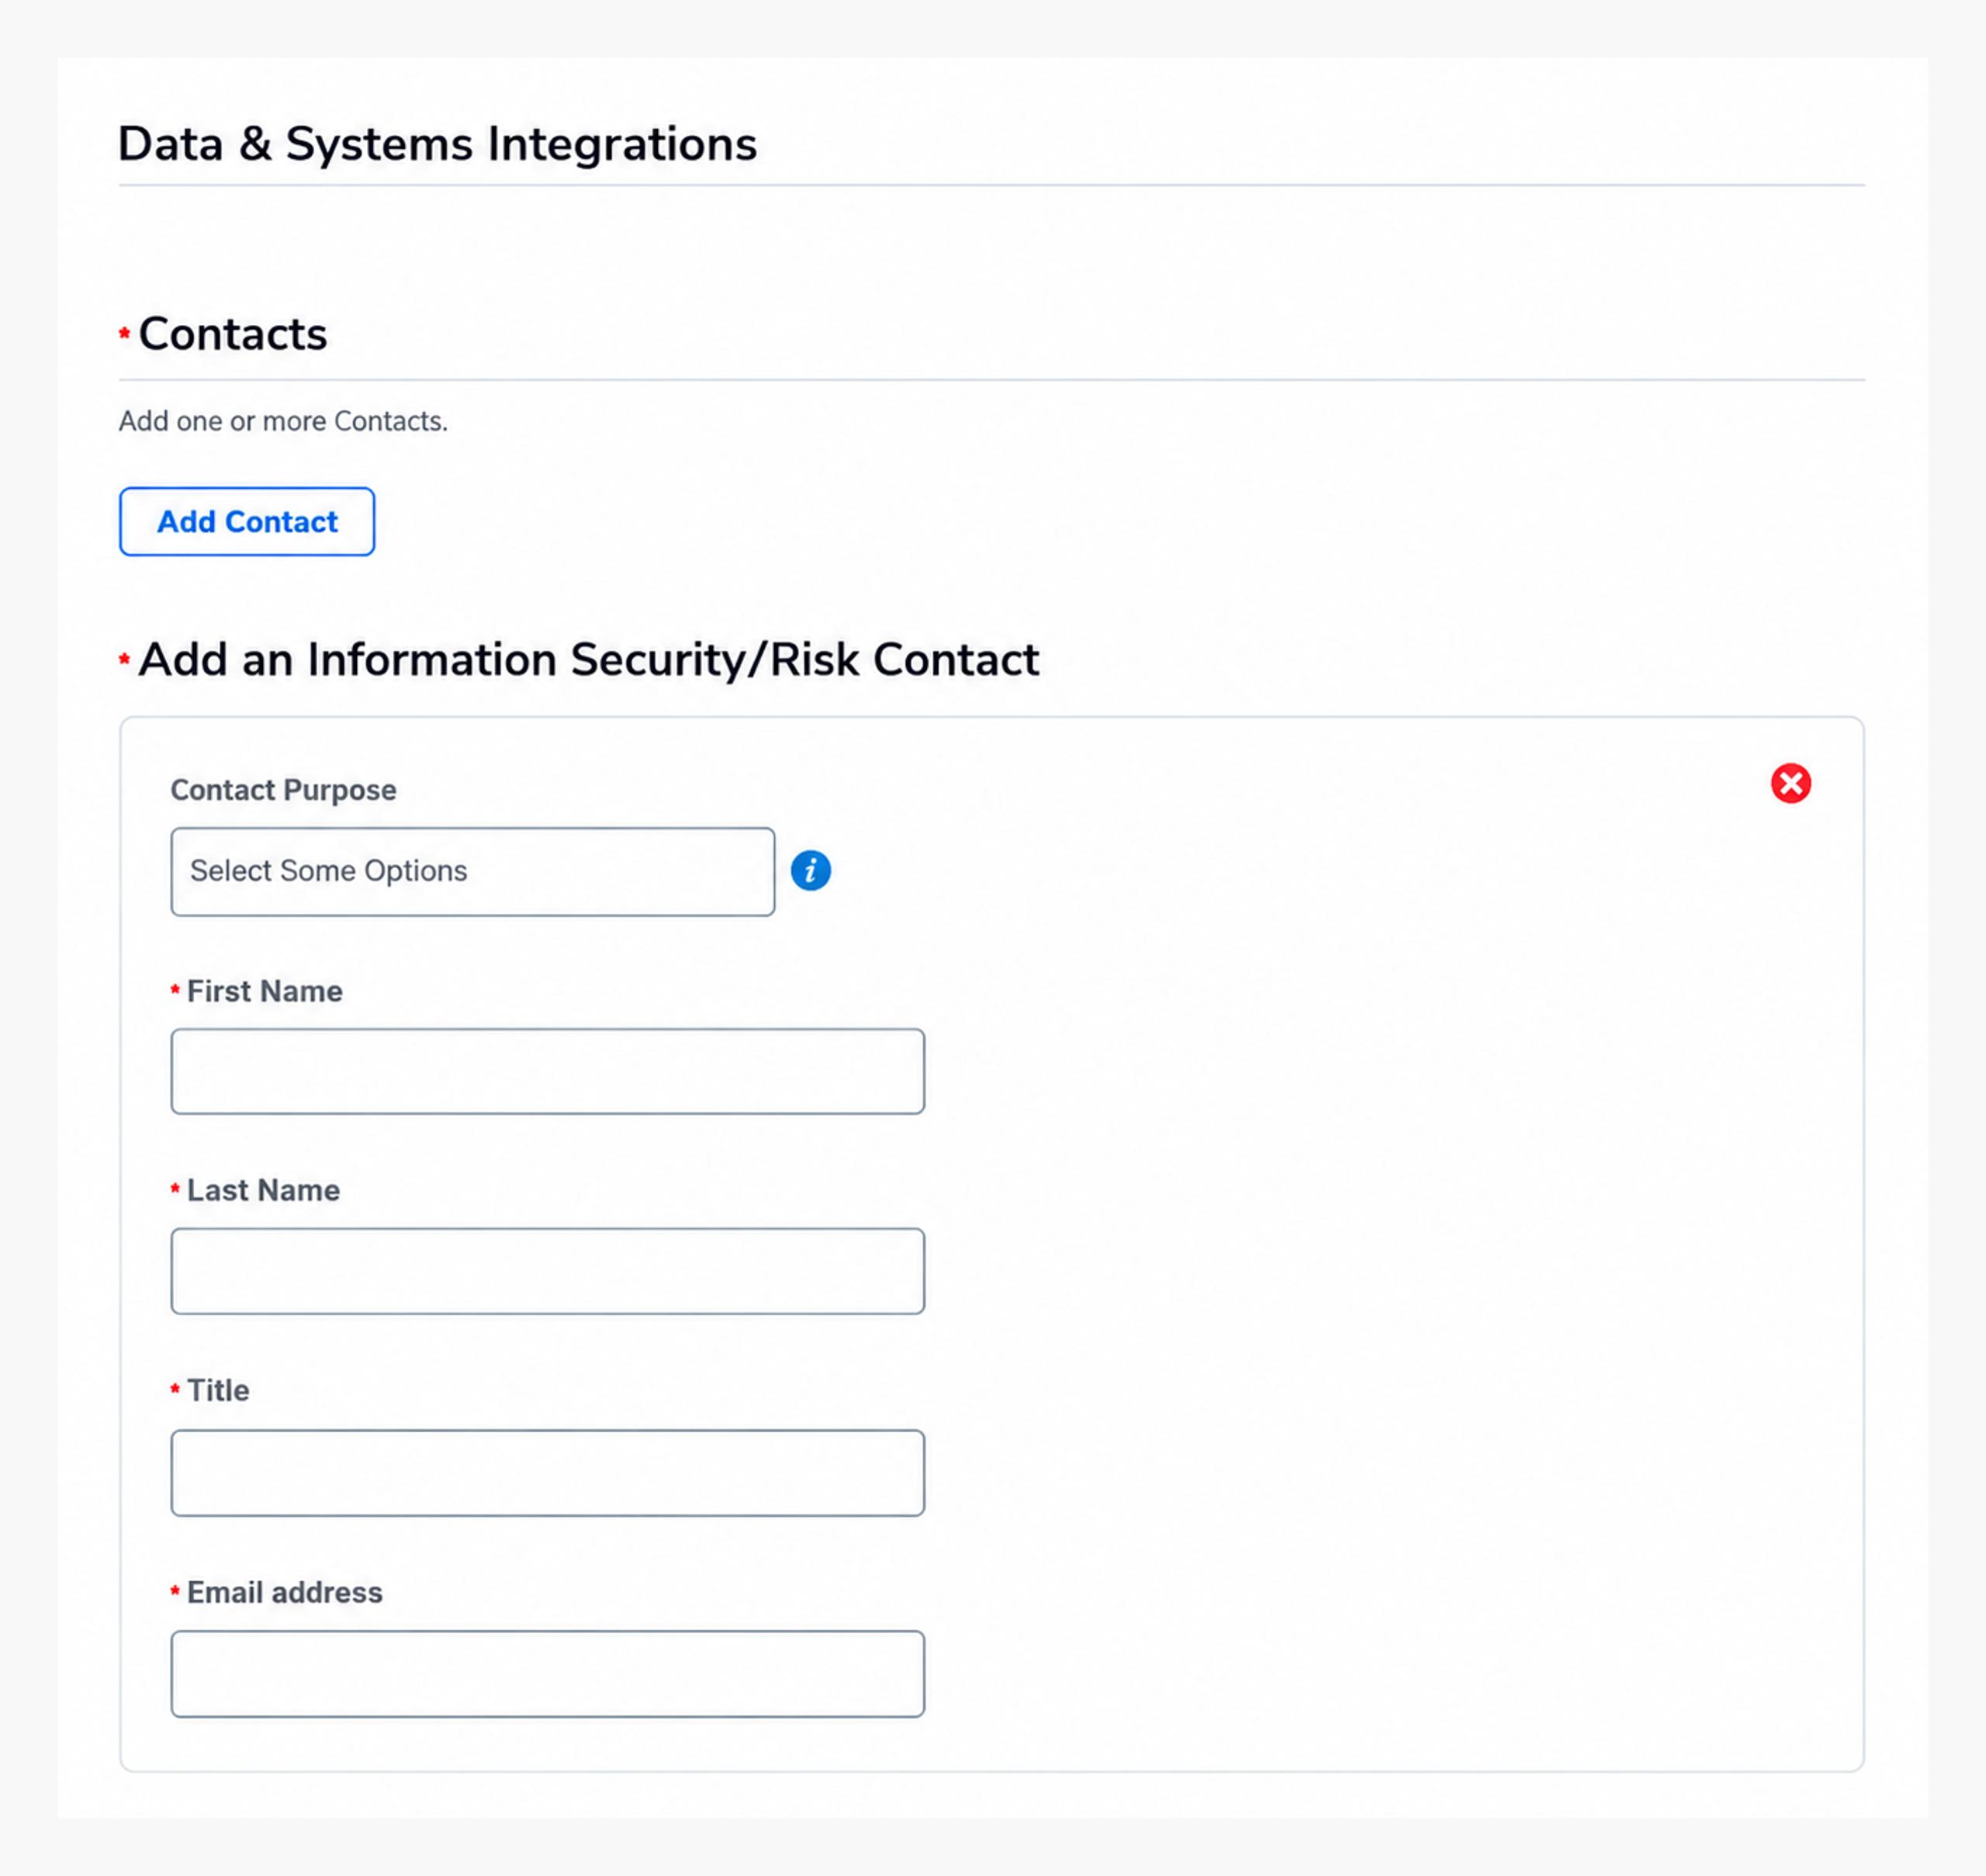
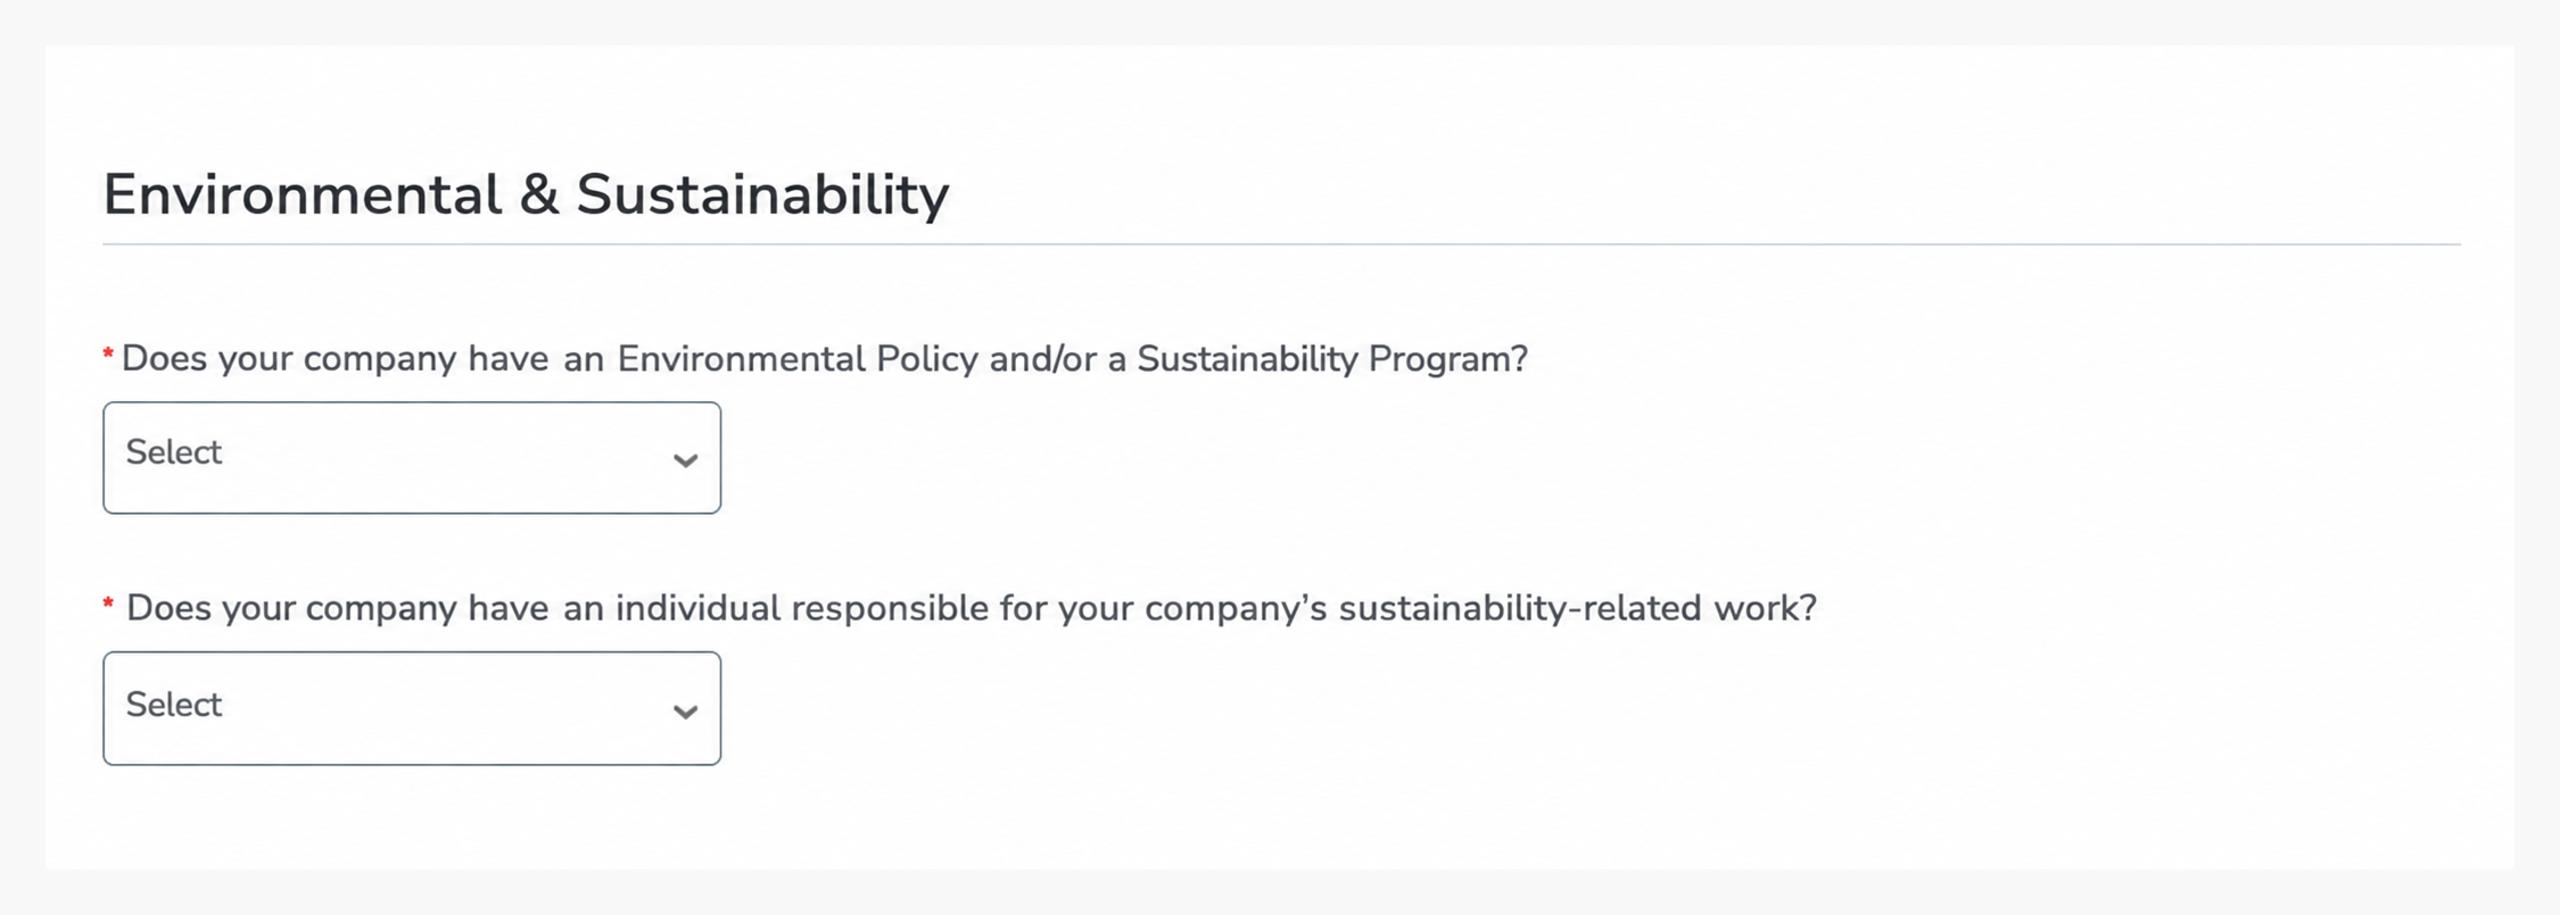
Step 7 — Environmental and Sustainability Information
Complete the two questions and attach supporting documentation if applicable.
Step 8 — Submit for Approval