Invoicing Guidelines
Requirements and procedures for submitting invoices and credit notes.

For suppliers outside the United States and Canada please visit the International version.
General Requirements
To ensure timely payment and prevent rejection, invoices submitted to SentinelOne must meet these core principles:
All invoices must be associated with a valid PO number to be accepted for review.
All SentinelOne POs are issued through Coupa, either through supplier view or through the supplier’s CSP account unless otherwise instructed.
If shipping, handling, and miscellaneous charges are included in the PO, suppliers should bill for these charges against the line item directly. Otherwise, these charges can be included in the bottom section of the invoice, which will be subject to further approvals.
Invoices are paid per the terms on the PO; confirm PO details are correct before submitting an invoice.
Standard terms are net 60 unless explicitly agreed otherwise in writing.
Payment schedule is based on the Invoice Date and PO payment terms listed in Coupa — ensure Invoice Date matches the invoice copy.
Create and Edit Invoices
Unless otherwise instructed, all invoices are submitted through the Coupa Supplier Portal (CSP).
Step 1
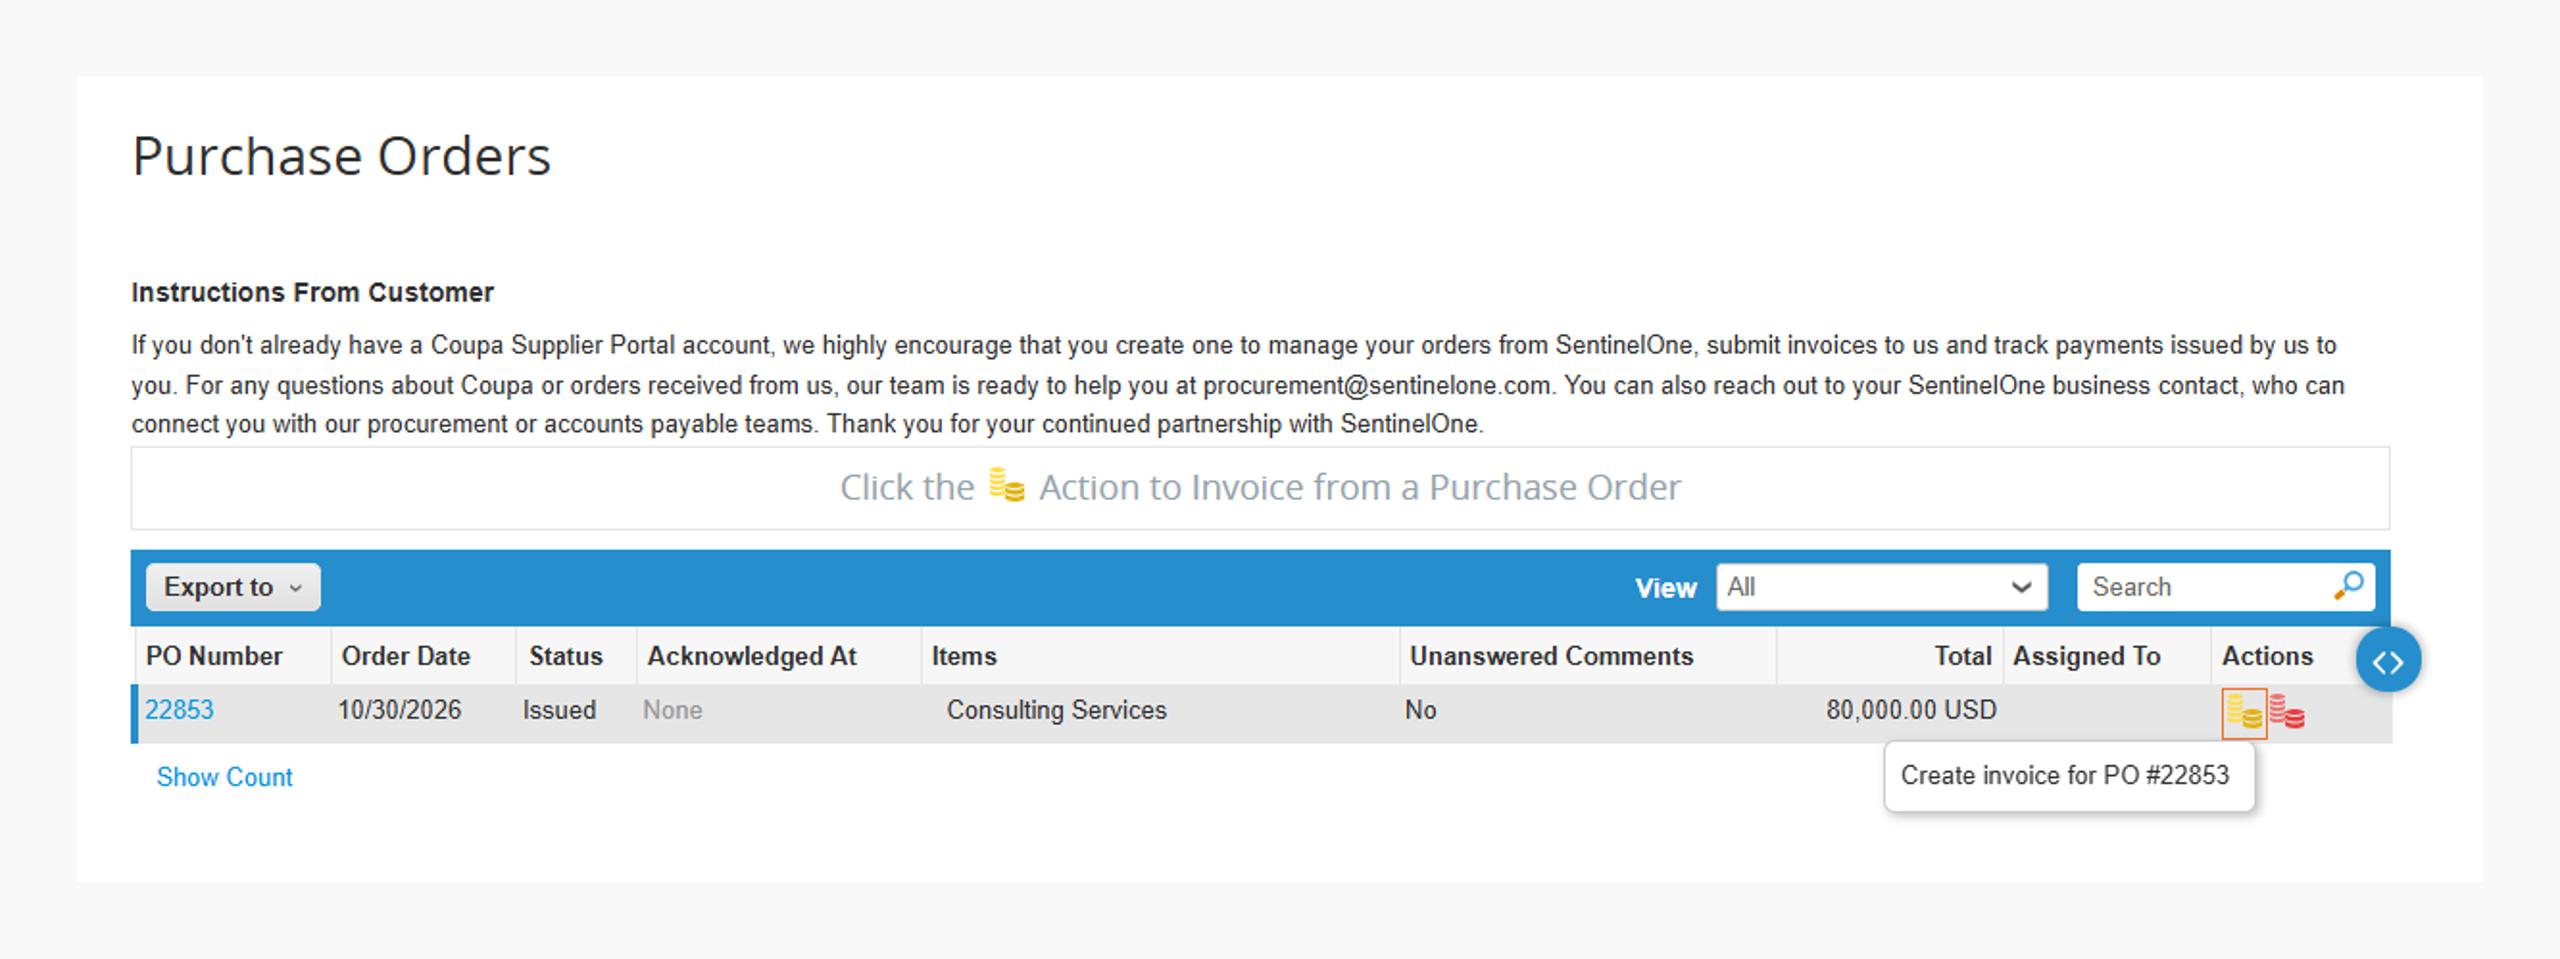
Access the Create Invoice page
Option 1: Navigate to the Orders tab and click the yellow "Create Invoice" icon in the action column.
Use the red delete icon to remove lines not intended for current invoice – do not invoice for zero dollar line items.
Step 2
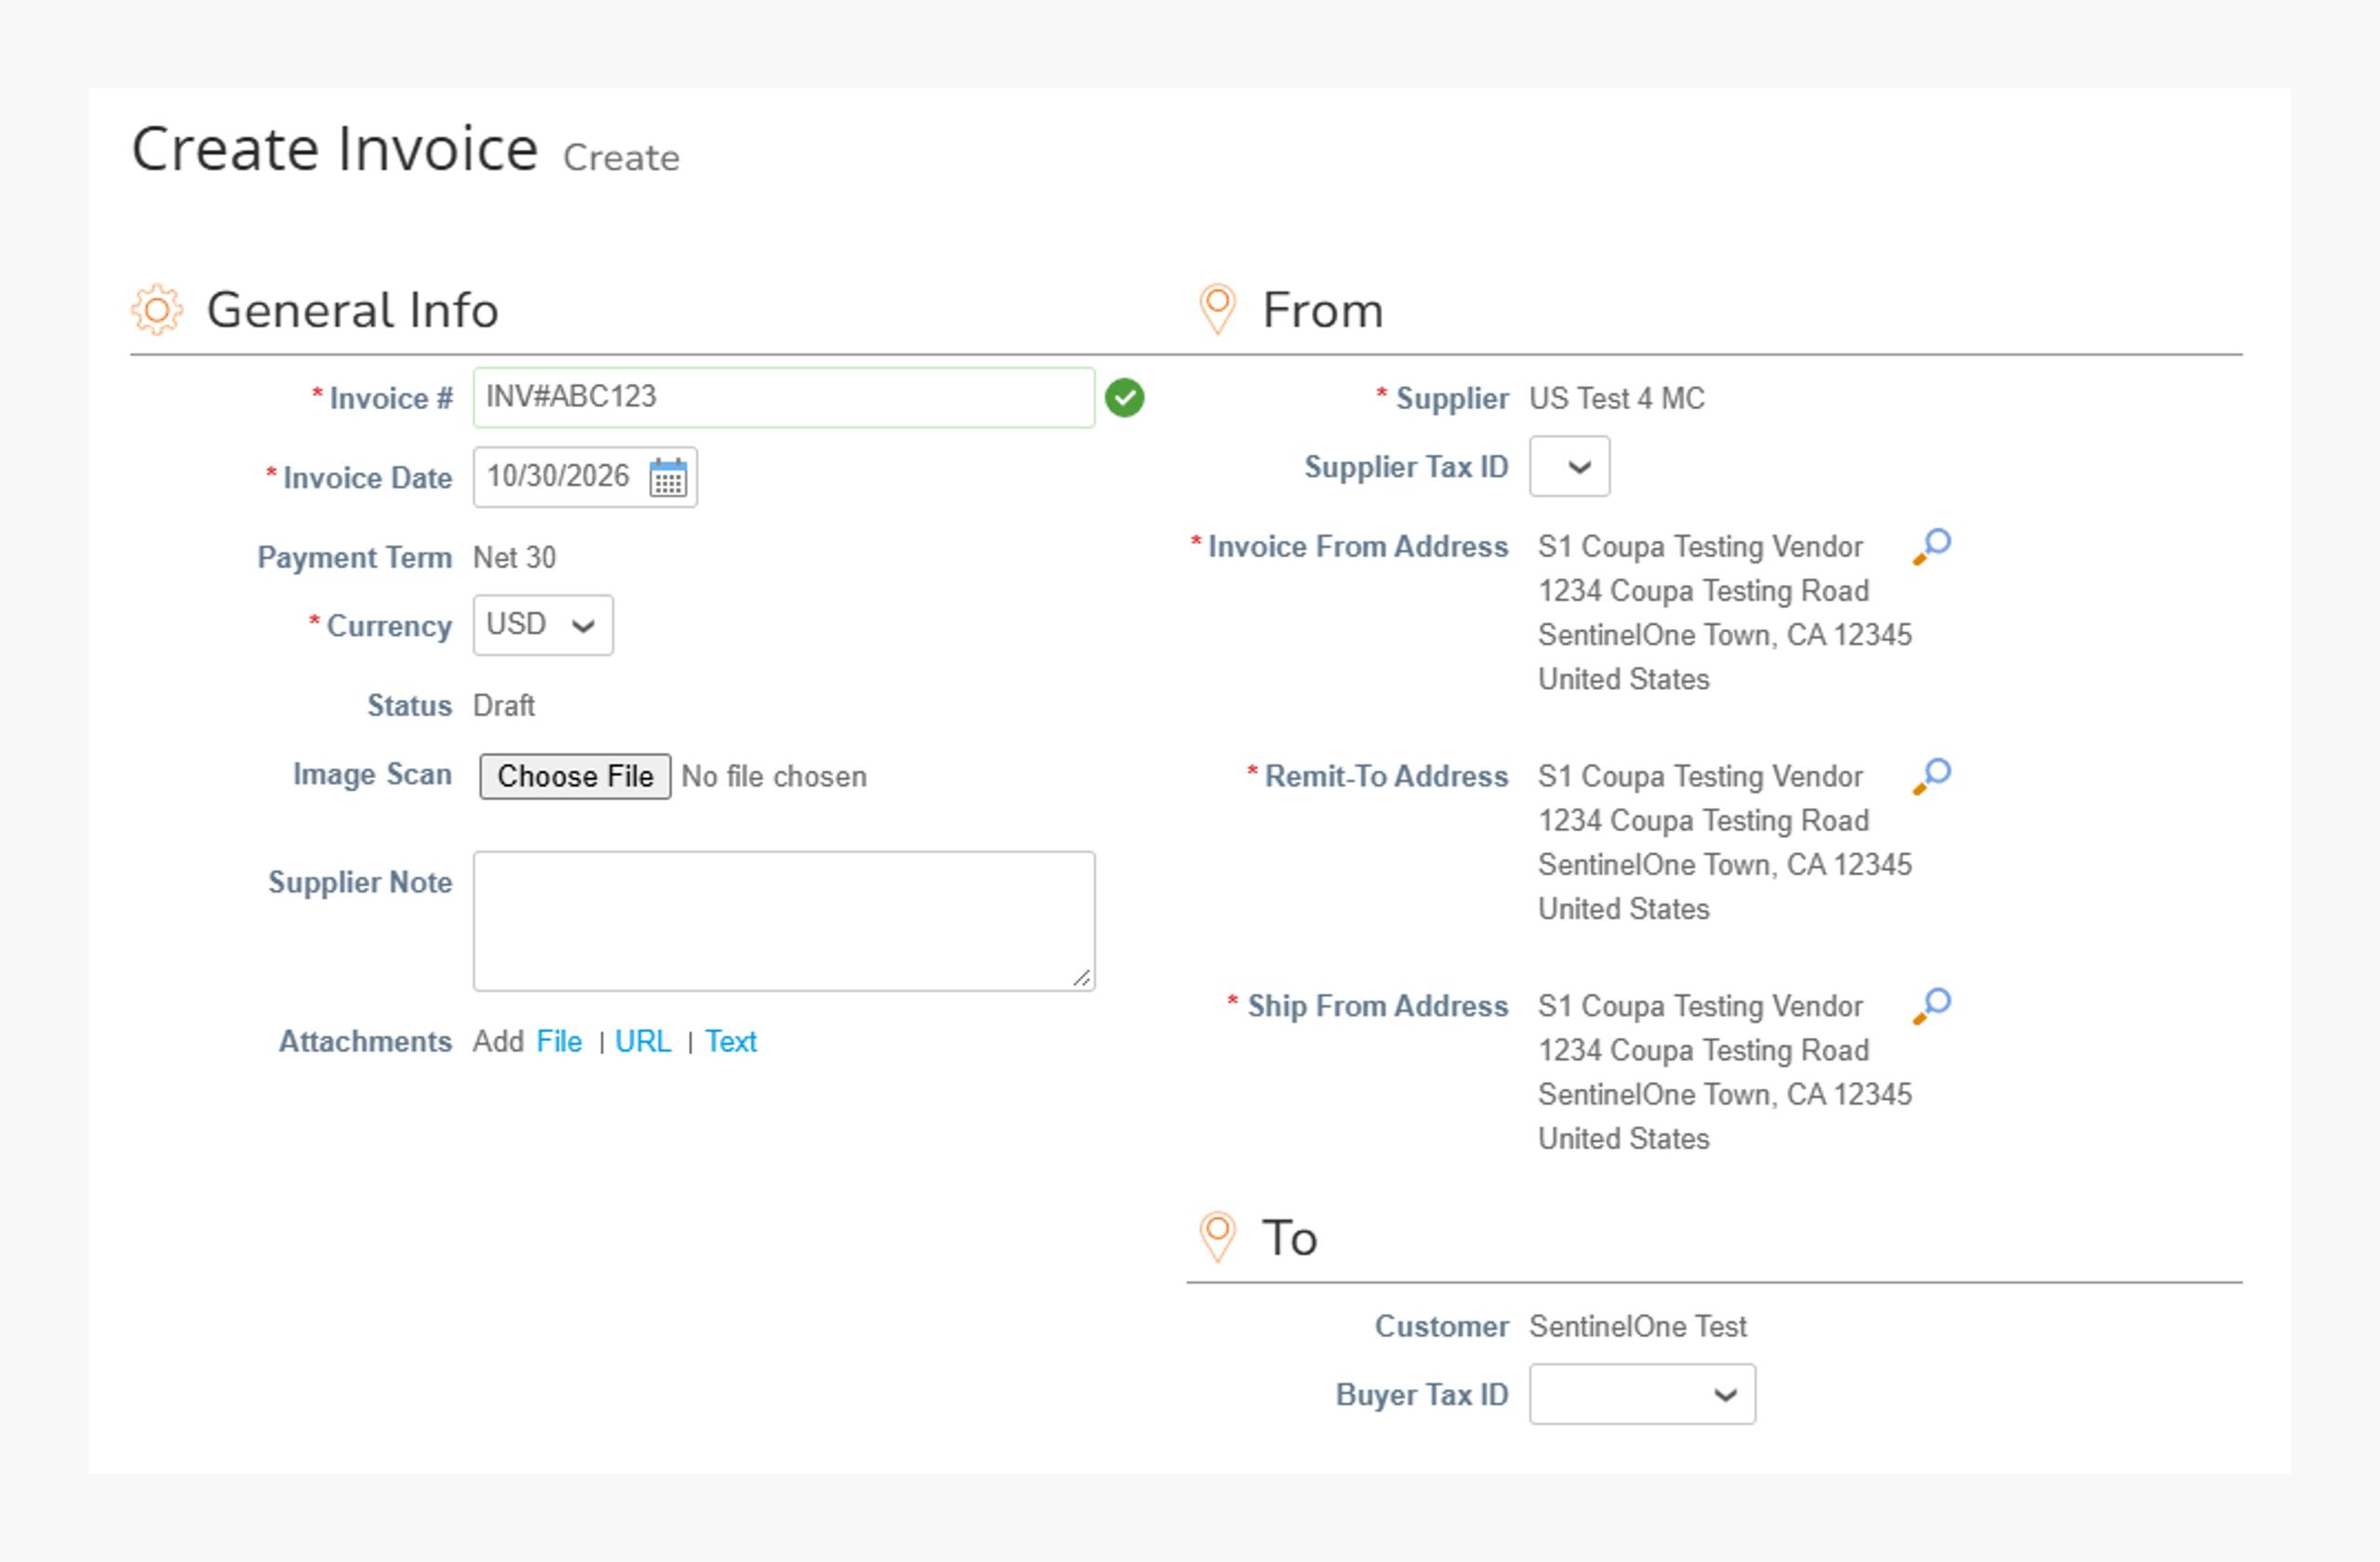
Fill in mandatory fields
Invoice#: Unique supplier invoice number.
Invoice Date: Matches the date services/goods were delivered.
Currency: Auto-matched to the PO.
Attachments: Required — invoices without attachments will be rejected.
Addresses: From, Remit-To, and Ship-From auto-populate.
Note
Contact s1.vendor.onboarding@sentinelone.com if the PO currency is incorrect.
Step 3a
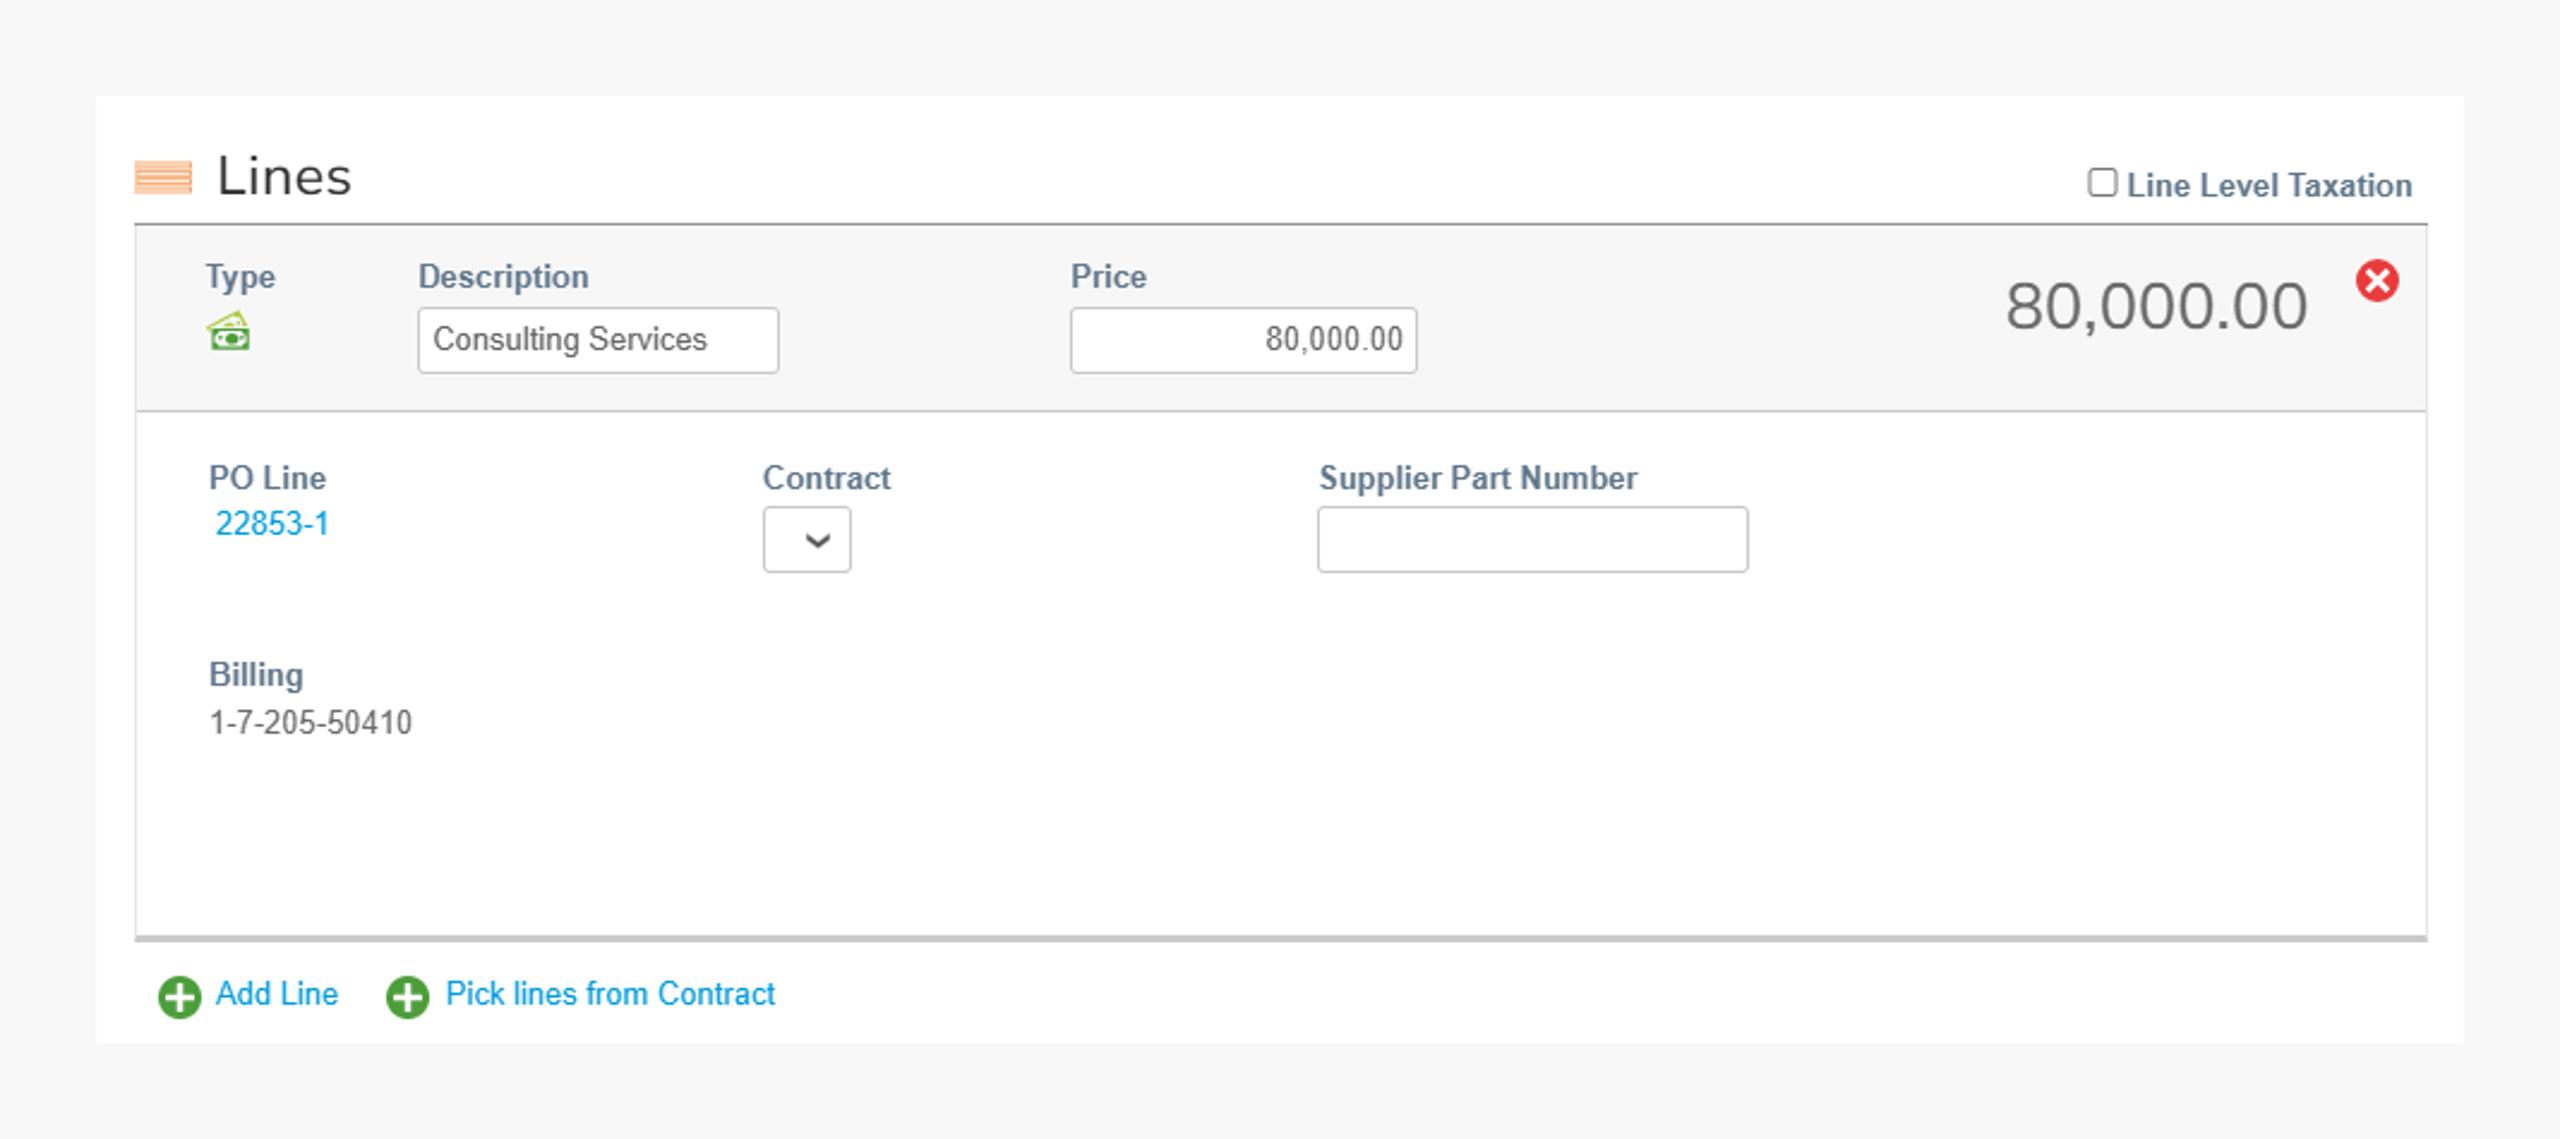
Invoice Line Creation: AMT-Based Lines
Lines with Description and Price.
Price can be modified to create a partial invoice.
For POs with multiple line items, bill against the relevant PO line item.
Use the red delete icon to remove lines not intended for current invoice – do not invoice for zero dollar line items.
Step 3b
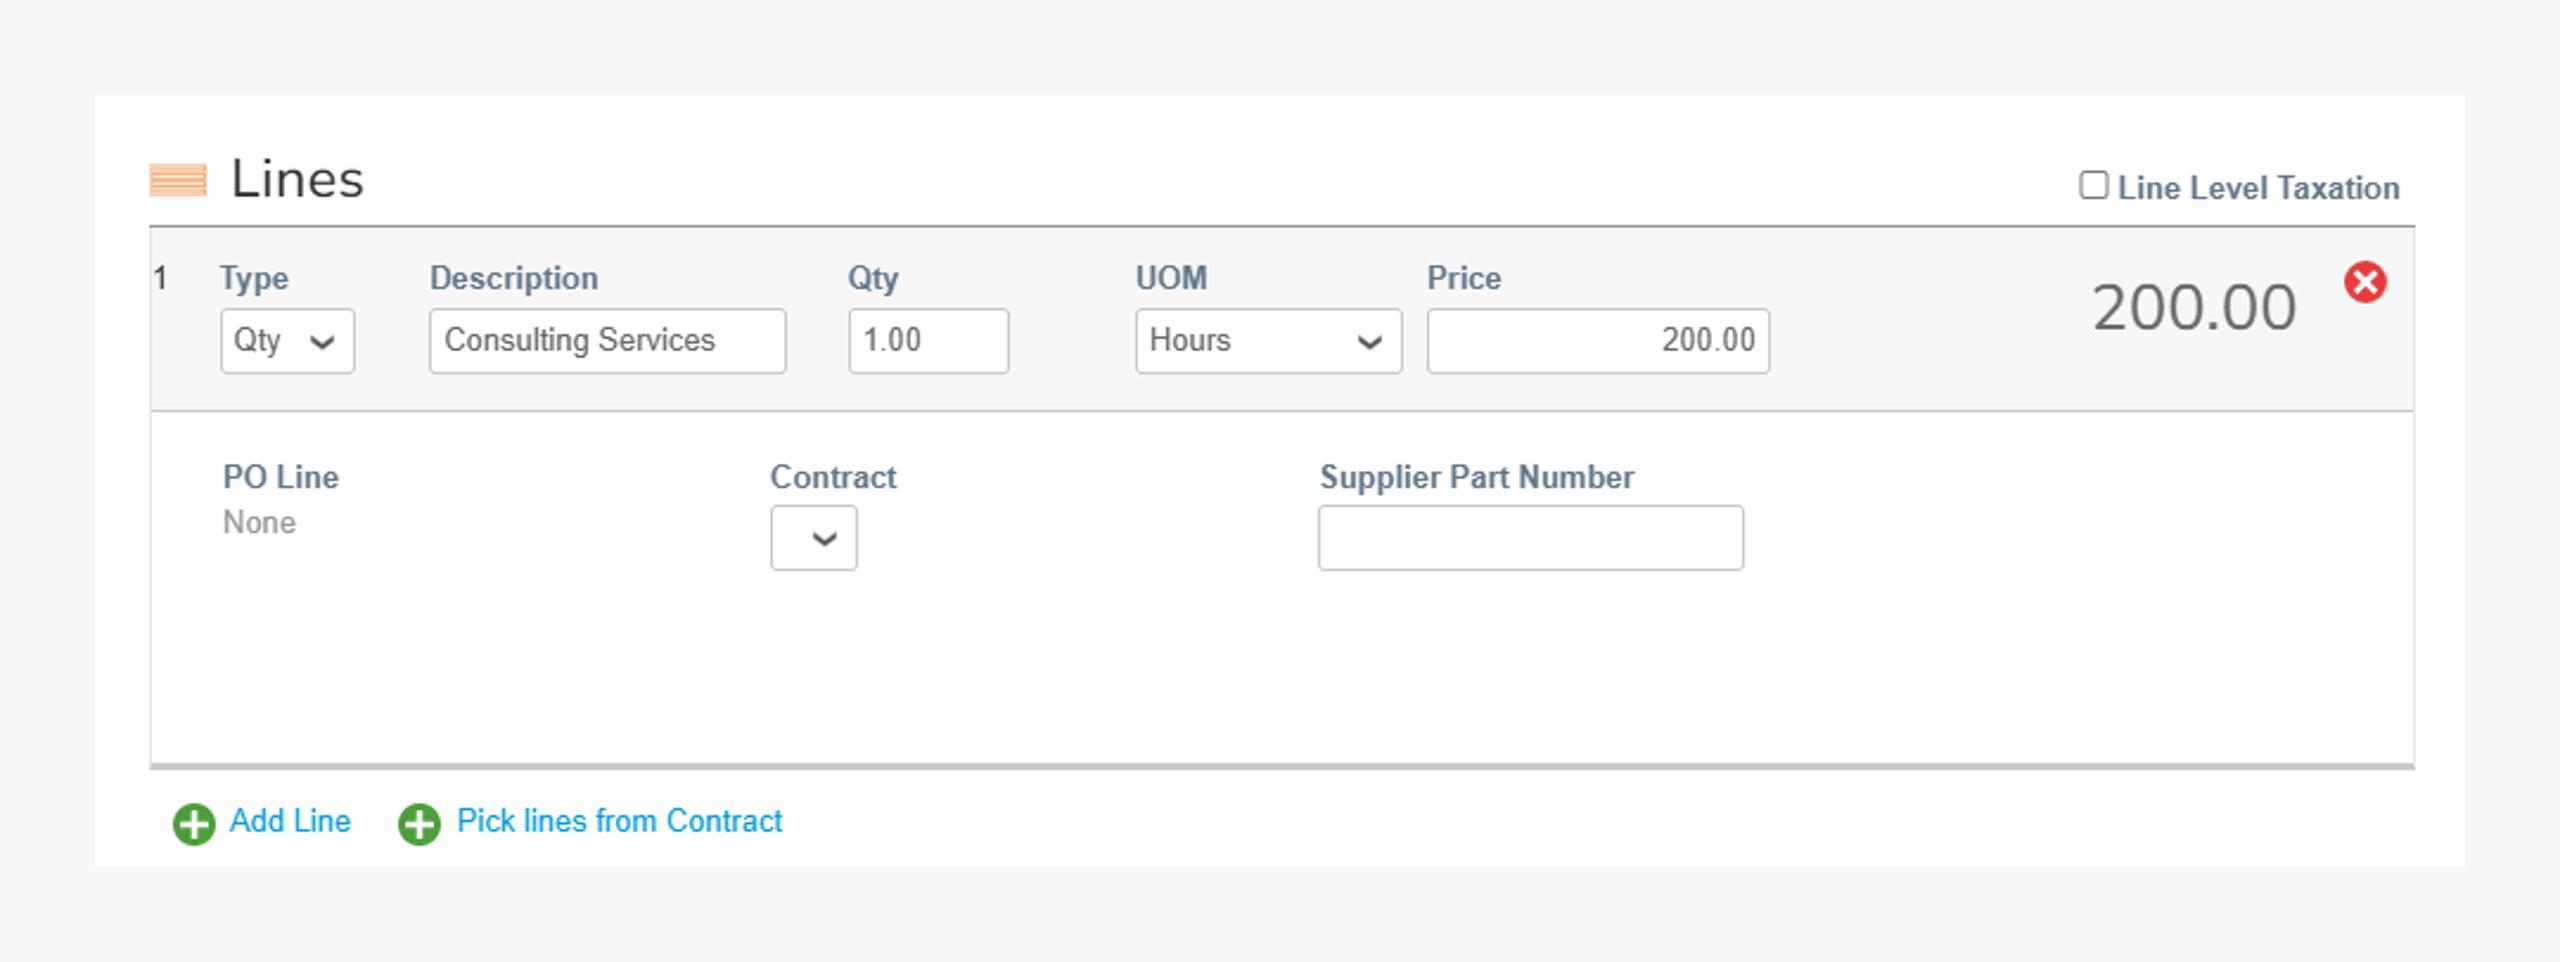
Invoice Line Creation: QTY-Based Lines
Lines with Description, QTY, UOM, and Price.
QTY can be modified for partial invoicing.
If multiple invoices are submitted for one line, modify QTY for each.
Use the red delete icon to remove lines not intended for current invoice – do not invoice for zero dollar line items
Step 4
Total & Taxes
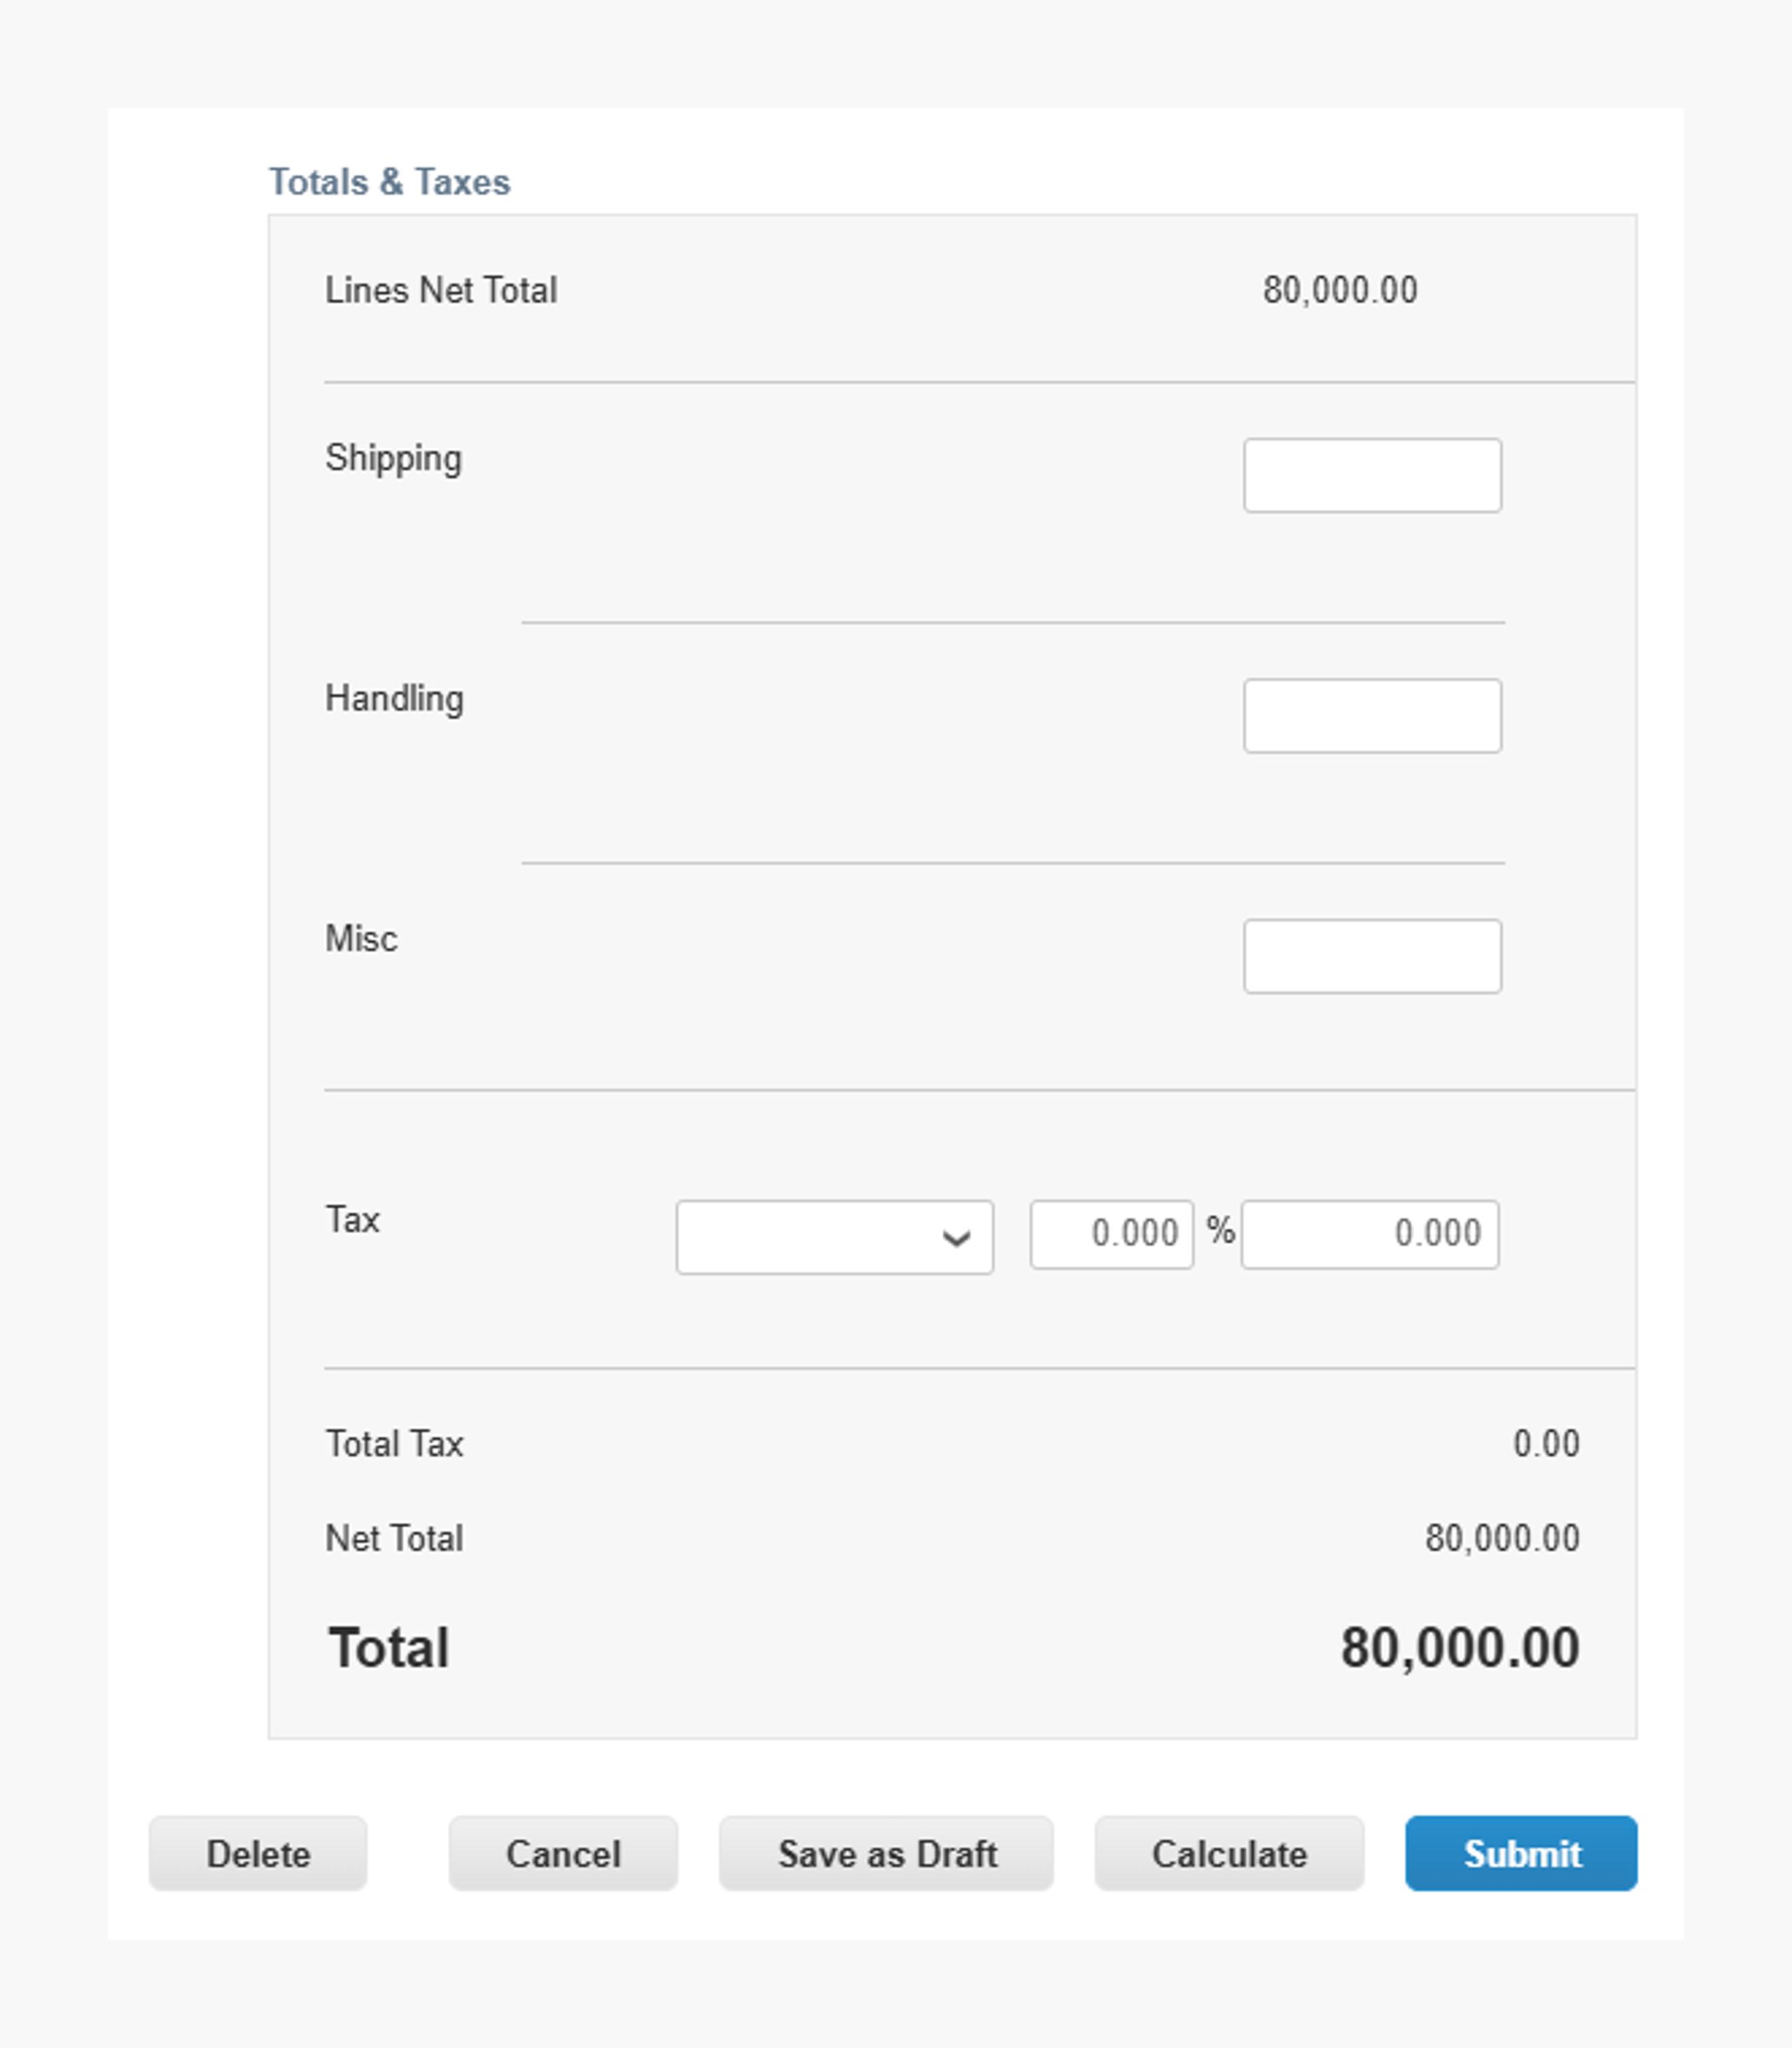
If shipping, handling, and miscellaneous charges are not specifically included in PO line items, enter these at the bottom section of the invoice.
Select applicable tax codes (VAT, GST, etc.) from the dropdown at the bottom section of the invoice.
Verify tax amounts on the designated tax line.
Click Calculate to confirm the total, then Submit.
Note
Once an invoice is submitted, you must contact AP to make changes either by commenting on the invoice directly or emailing ap@sentinelone.com or SentinelOne’s regional accounts payable email (if known).
Disputed Invoices
Status: Disputed
Invoices with information SentinelOne does not agree to, needs clarification on, or finds incorrect.
A supplier will receive an email notification with the dispute reason. Use the Resolve button on the Invoice page to action it.
Void: use if the invoice is a duplicate or already paid.
Correct Invoice: edit details and resubmit using the same invoice#.
Cancel/Adjust: if Void/Correct aren't options, use a Credit Note (see below).
Contact ap@sentinelone.com or SentinelOne’s regional accounts payable email (if known) for assistance. Resubmitting without correction will cause delays.
Create Credit Notes
Credit notes resolve disputes, correct errors, or record miscellaneous credits like returns.
Step 1
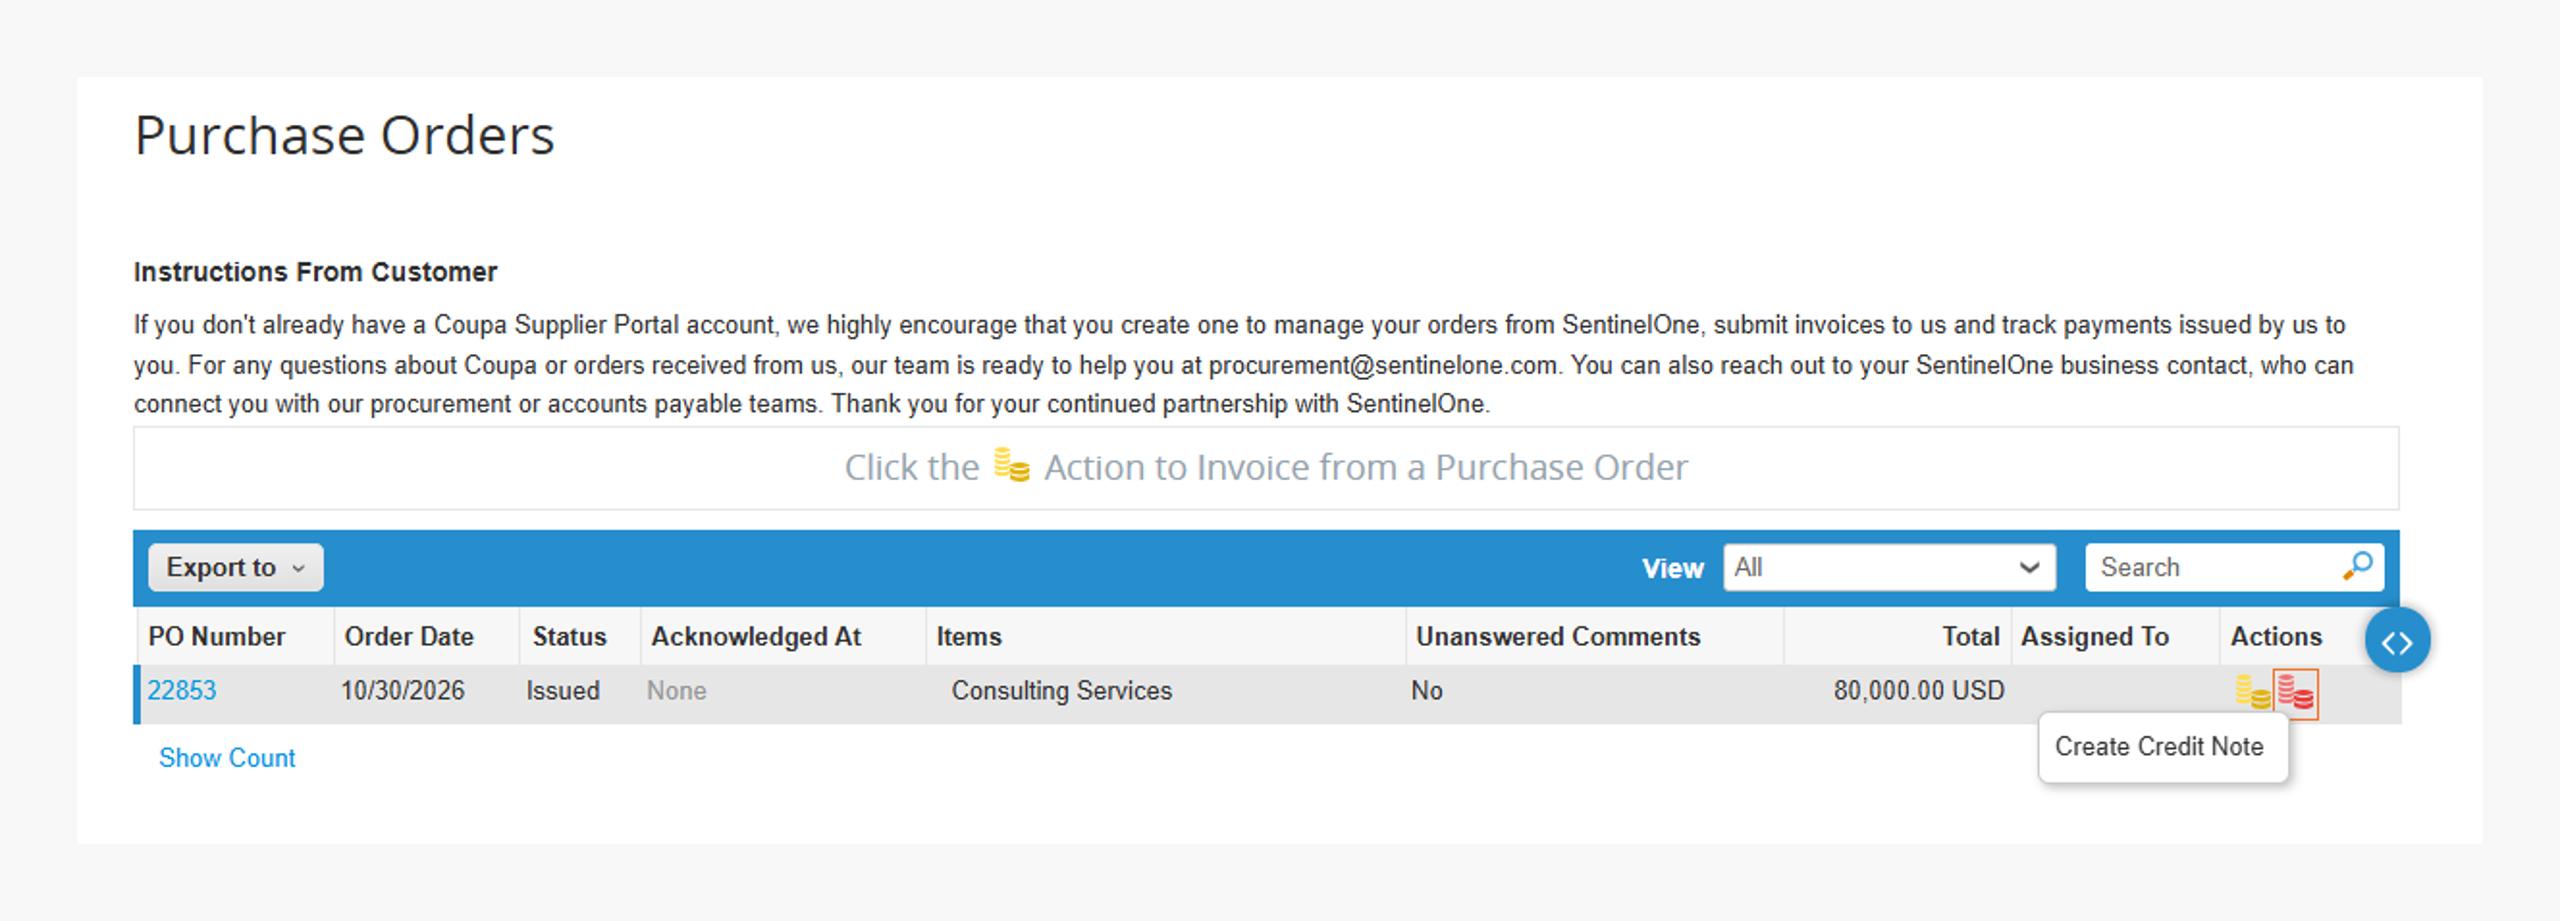
Go to the Orders page and click the red "Create Credit Note" icon in the actions column of the relevant PO.
Step 2
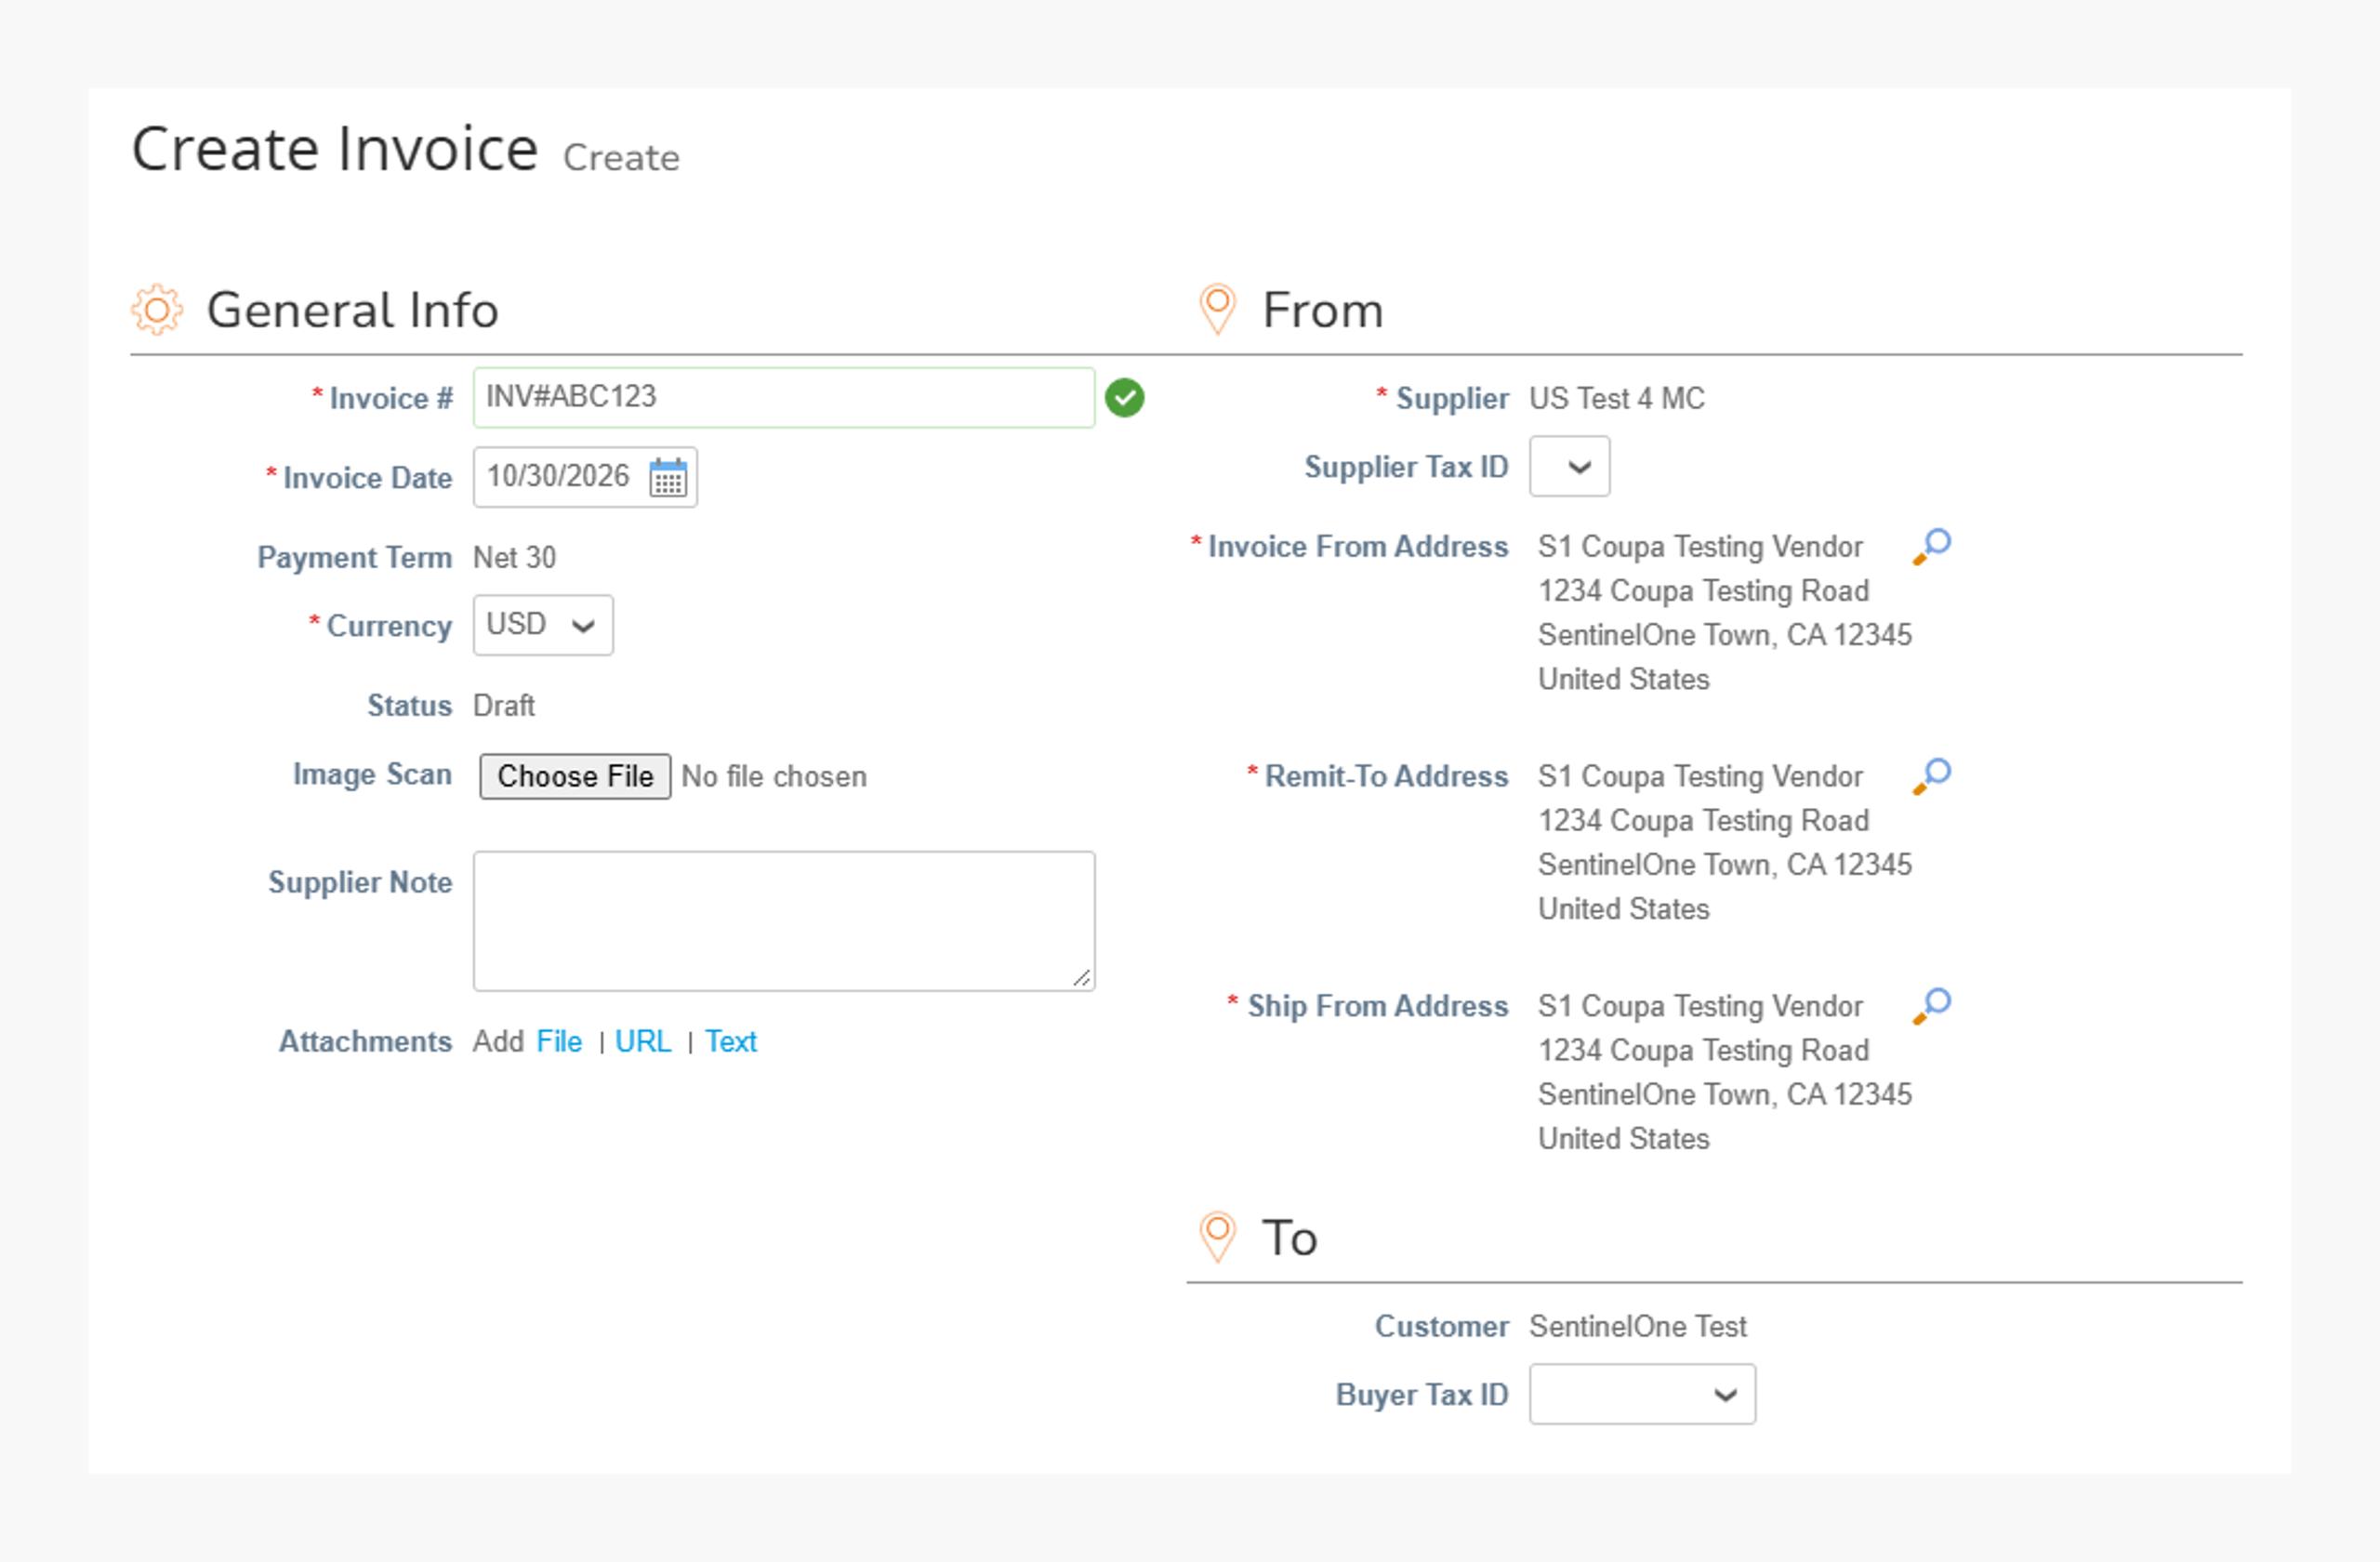
Fill in
Credit Note# (unique)
Original Invoice# & Date
- Attachments for support
Step 3
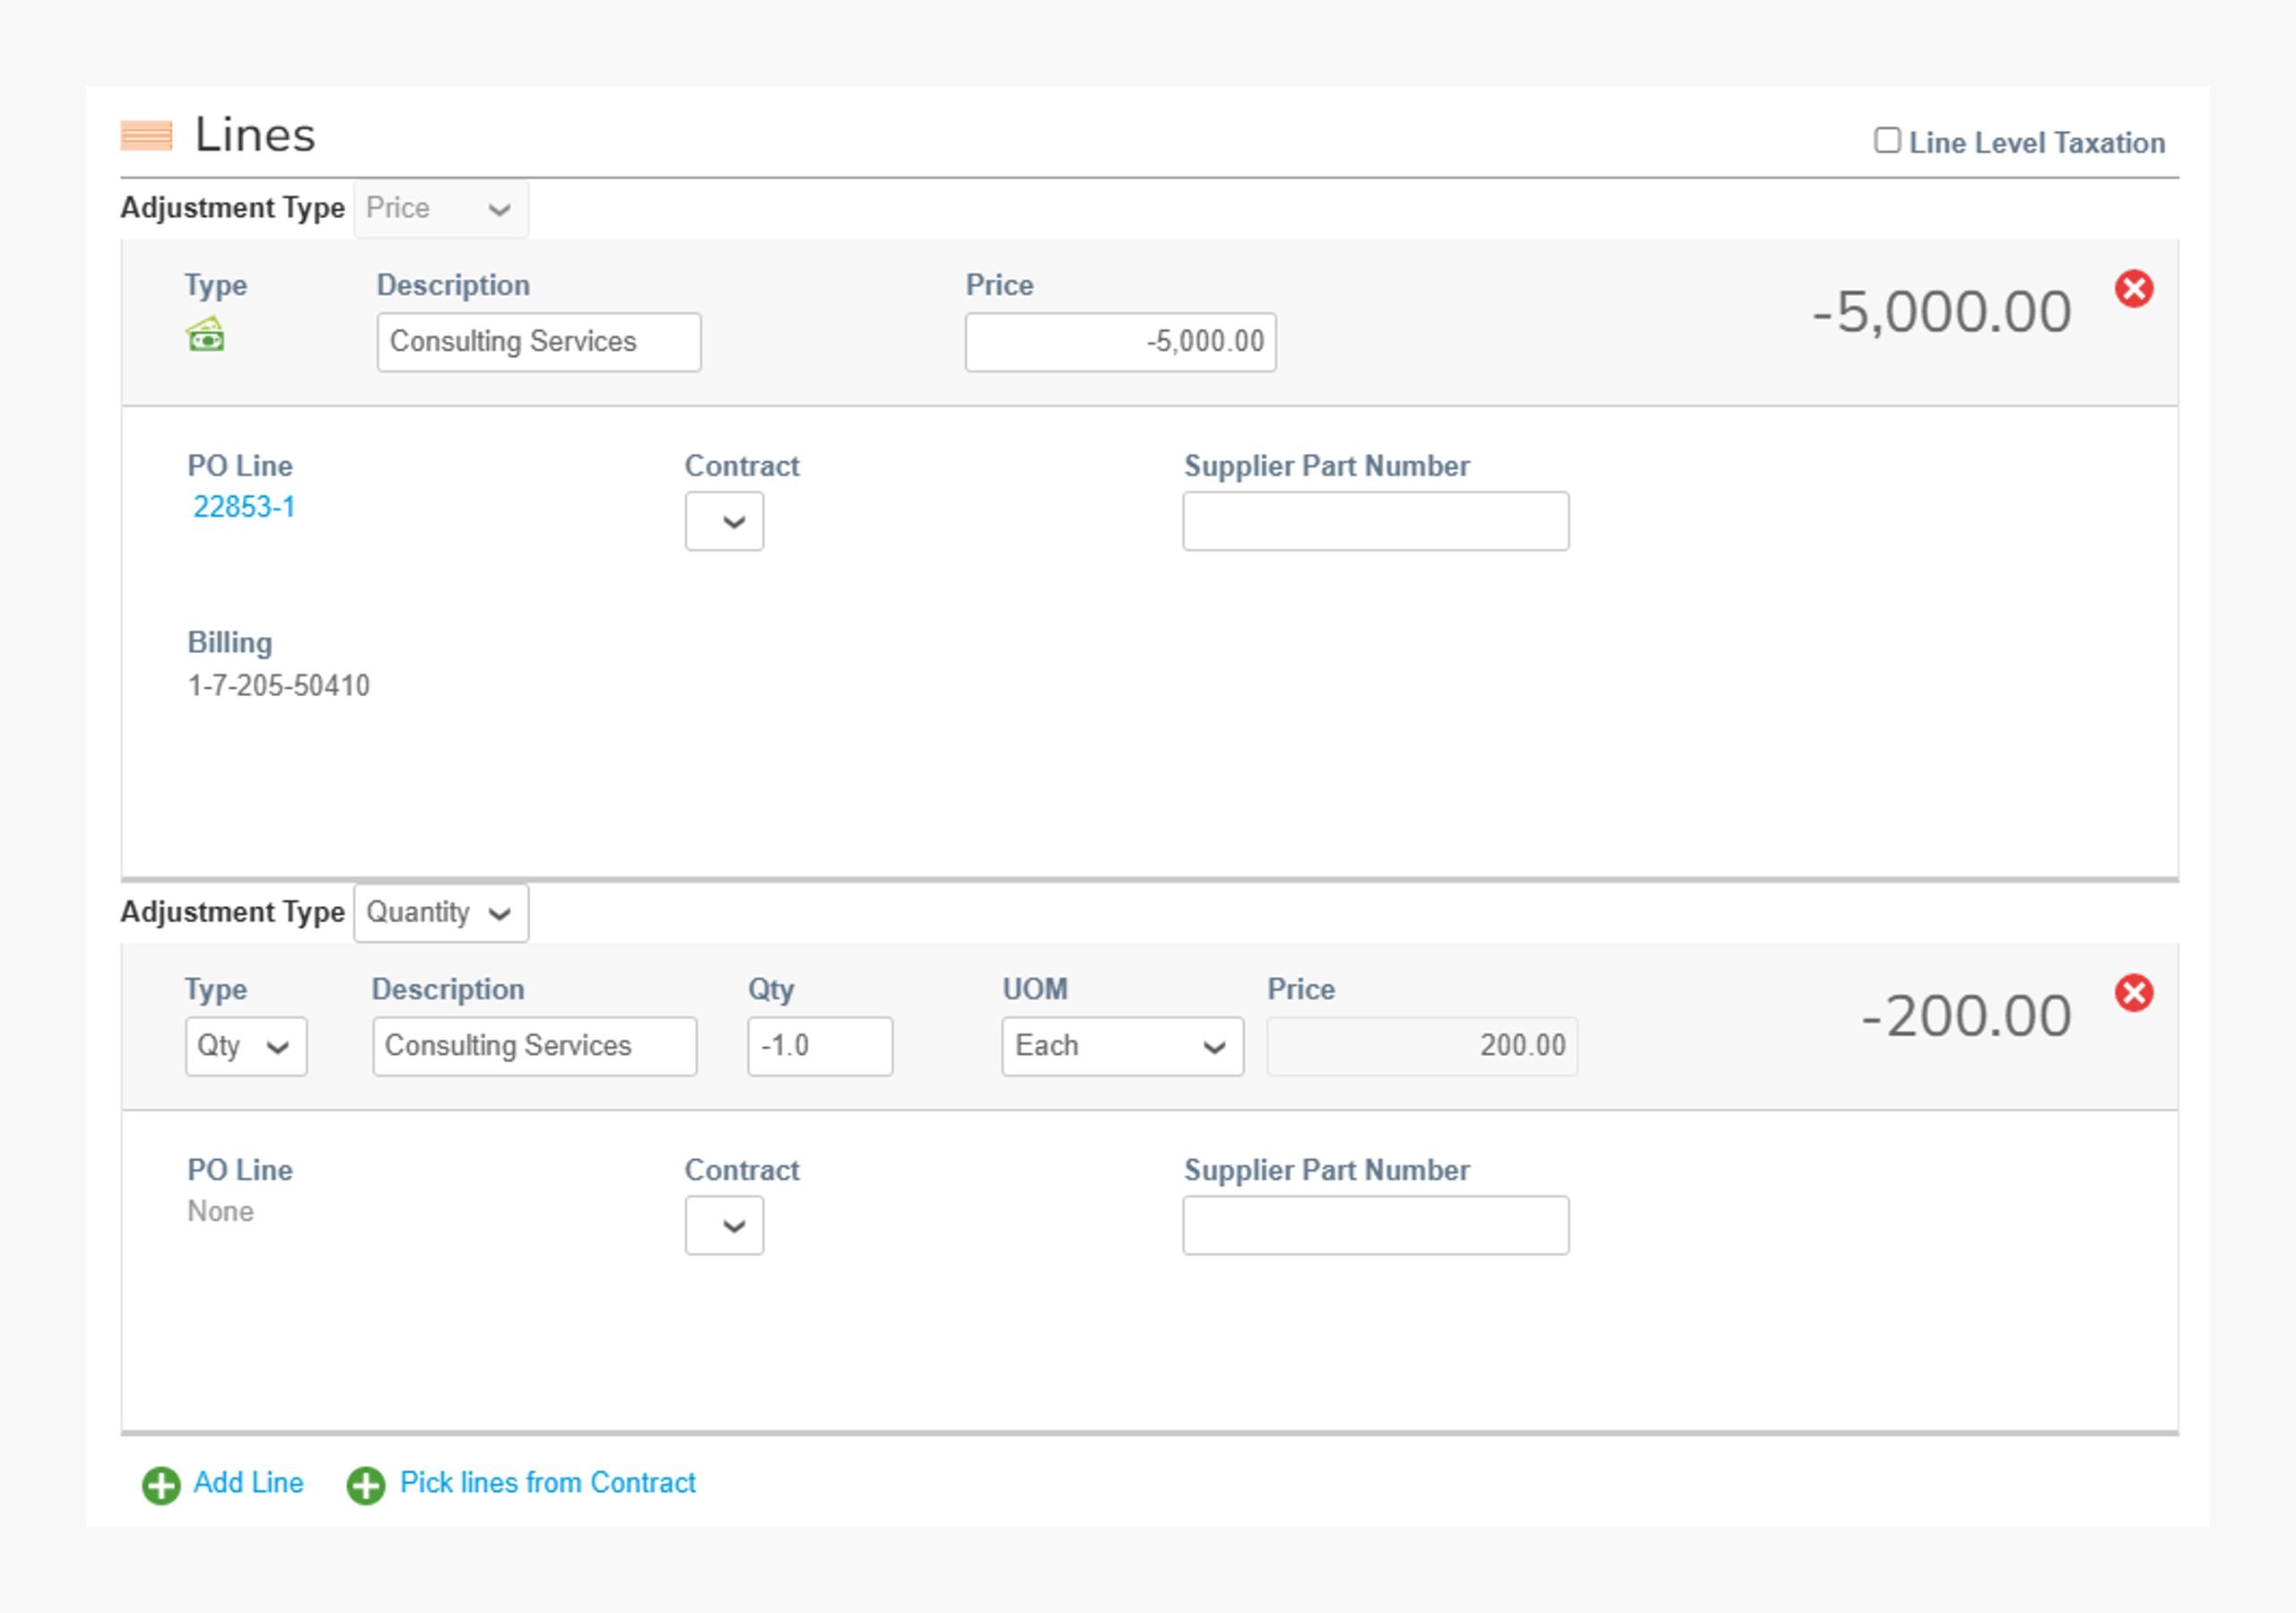
Lines & Adjustment Types
AMT Based: Price can be modified directly.
QTY Based: choose Quantity (QTY negative), Price (Price positive), or Other (both editable).
Note
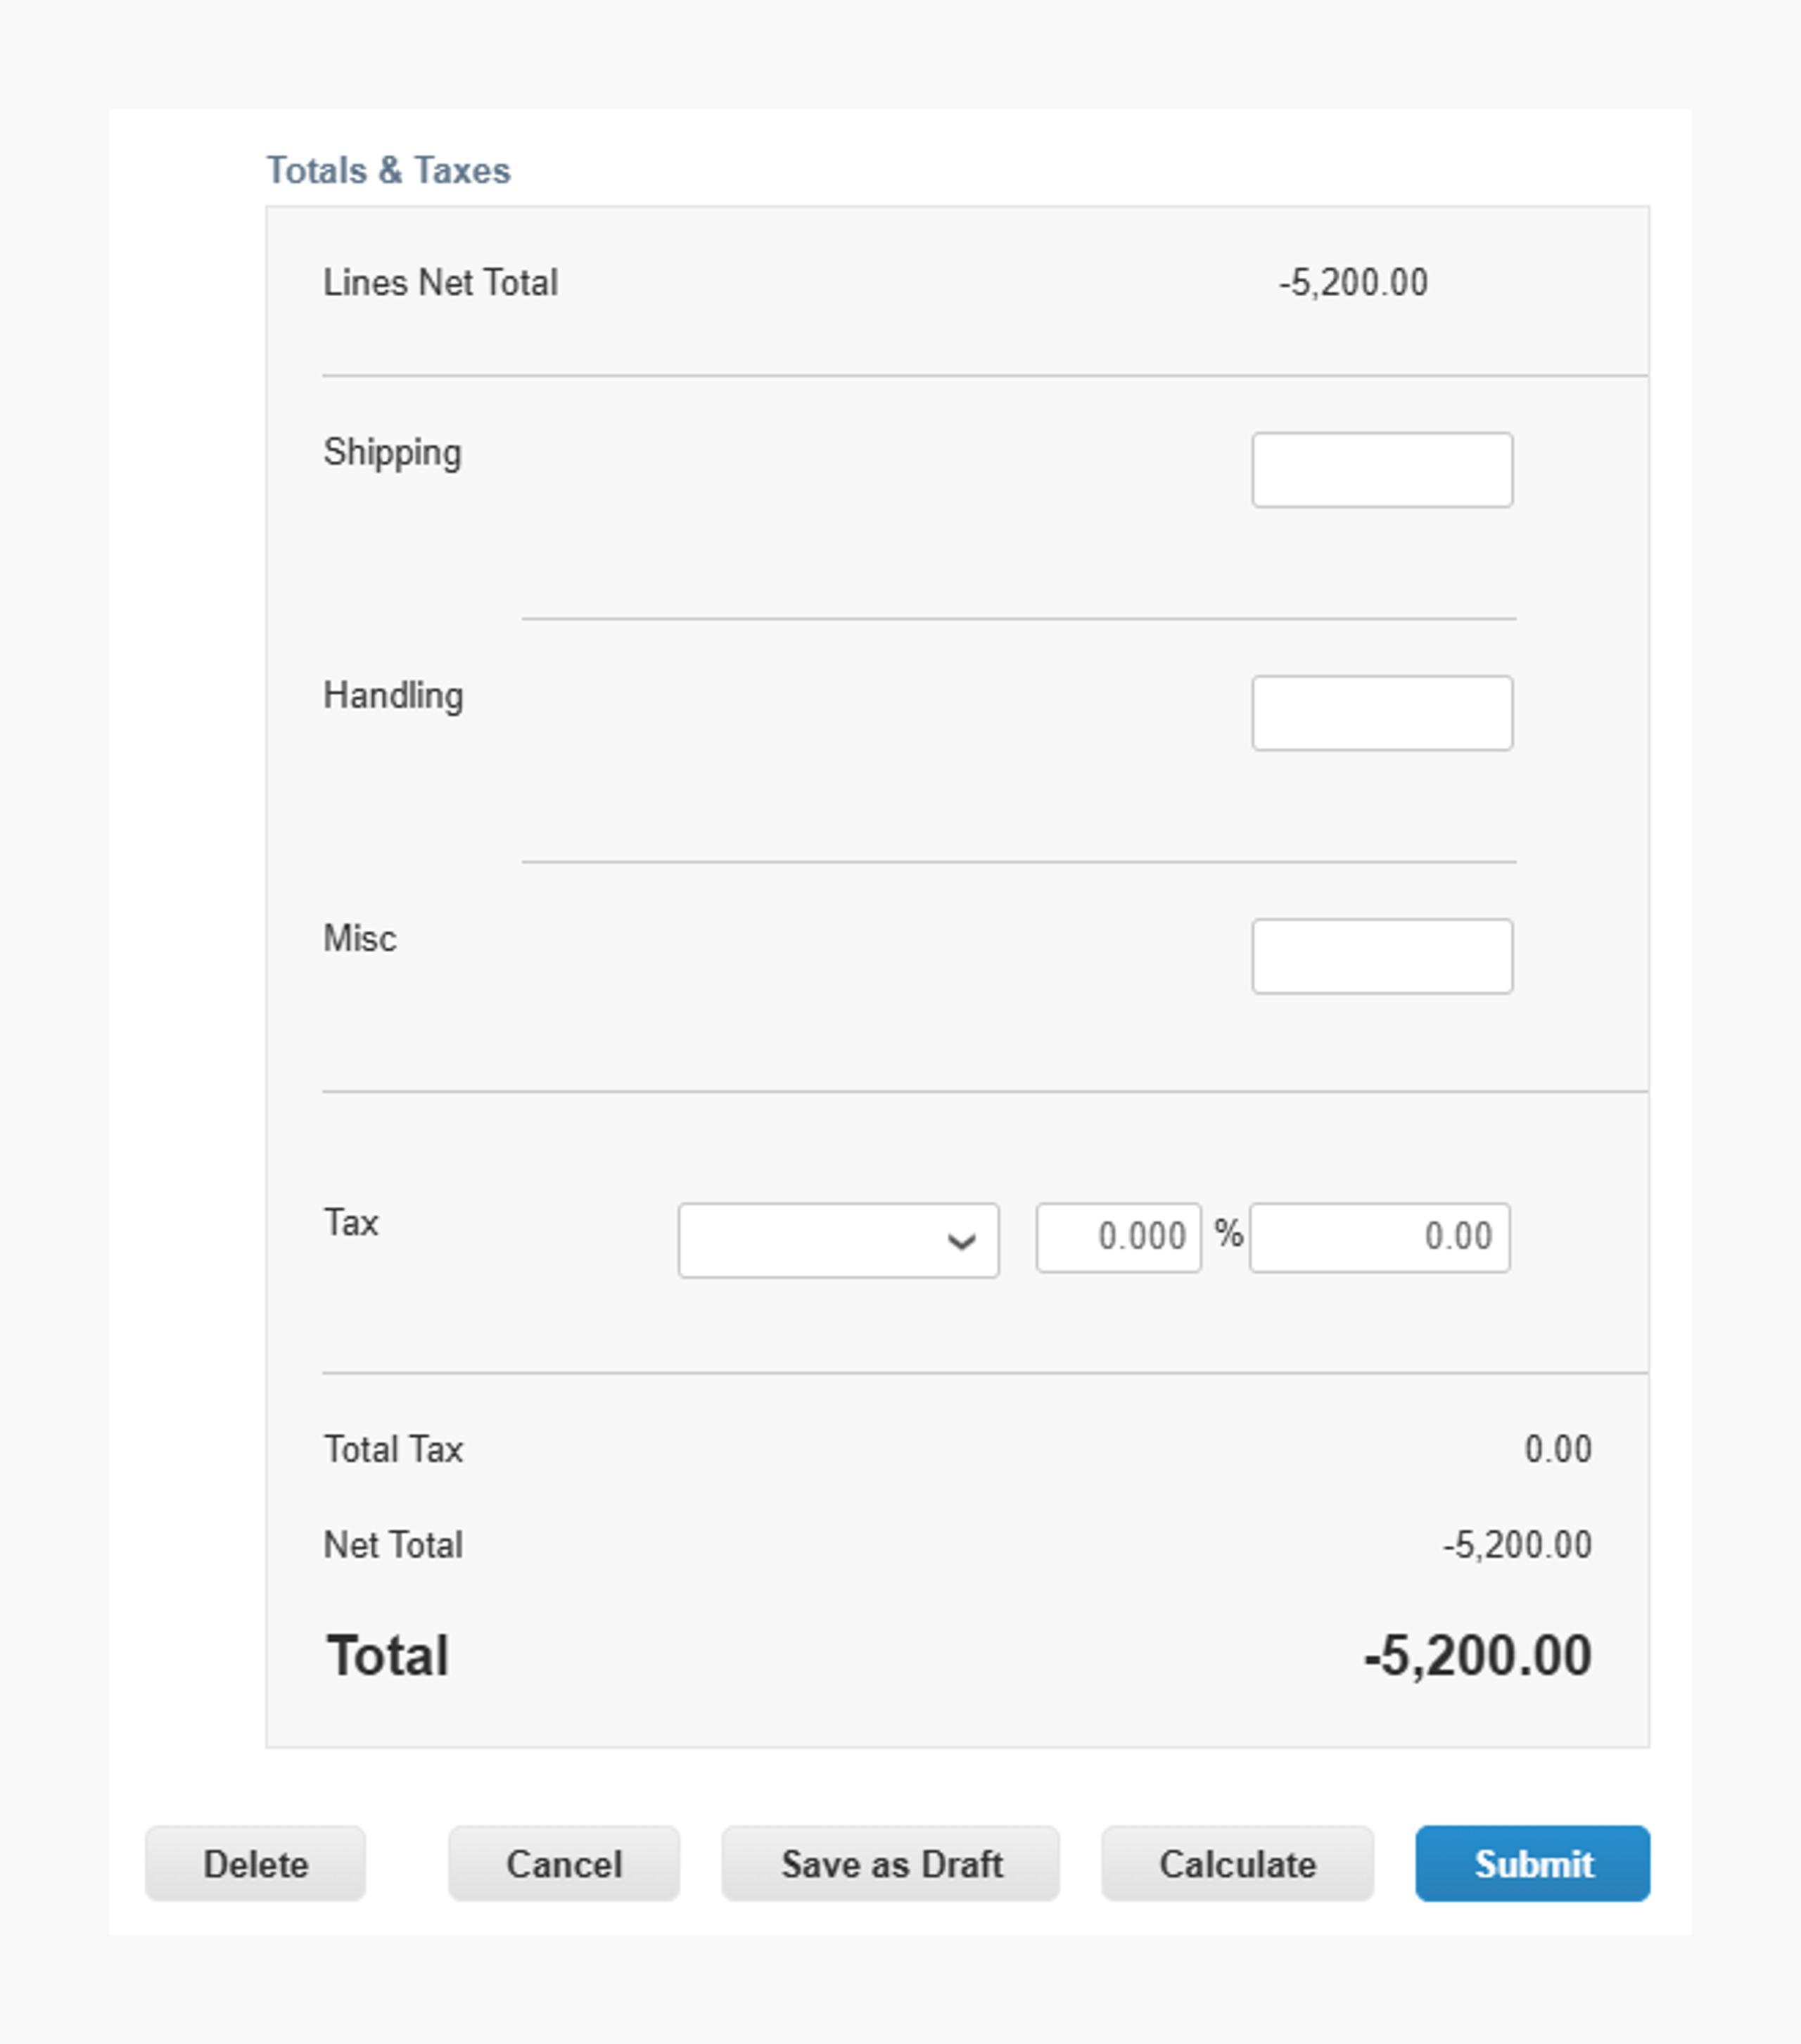
Credit notes MUST be negative. For QTY lines, the QTY must be negative.
Step 4
Total
Enter values for shipping, handling, and miscellaneous.
Click Calculate then Submit.
AP Mailbox Requirements
Note
Unless otherwise instructed, all invoices must be entered via CSP. Only use the mailbox if specifically requested.
Invoicing via Mailbox
Send to the respective SentinelOne regional accounts payable email with:
PO# visible on document
Unique Invoice# & Date
Currency
Line descriptions matching PO
Regional AP Mailboxes
North America, General AP support: ap@sentinelone.com
EMEA, LATAM: ap.emea@sentinelone.com
Israel: ap.il@sentinelone.com
Payment Schedule & Support
Processing Schedule
- Payment Due Date: Calculated from Invoice Date + Net Terms.
- Payment Cycle: Generally Mondays or Tuesdays, depending on supplier region