
In previous posts, we’ve explored how analysts can use radare2 (aka r2) for macOS malware triage, work around anti-analysis tricks, decrypt encrypted strings, and generate function signatures and YARA rules. Like most reversing tools, radare2 can be customized and extended to increase the analyst’s productivity and make analysis and triage much faster.
In this fifth post in the series, we look at some effective ways to power up r2, providing practical examples to get you started on the path to making radare2 even more productive for macOS malware analysis. We’ll cover automation and customization via aliases, macros and functions. Along the way, we’ll also explore how we can effectively implement binary and function diffing with radare2.
Power Up Your .radare2rc Config File With Aliases & Macros
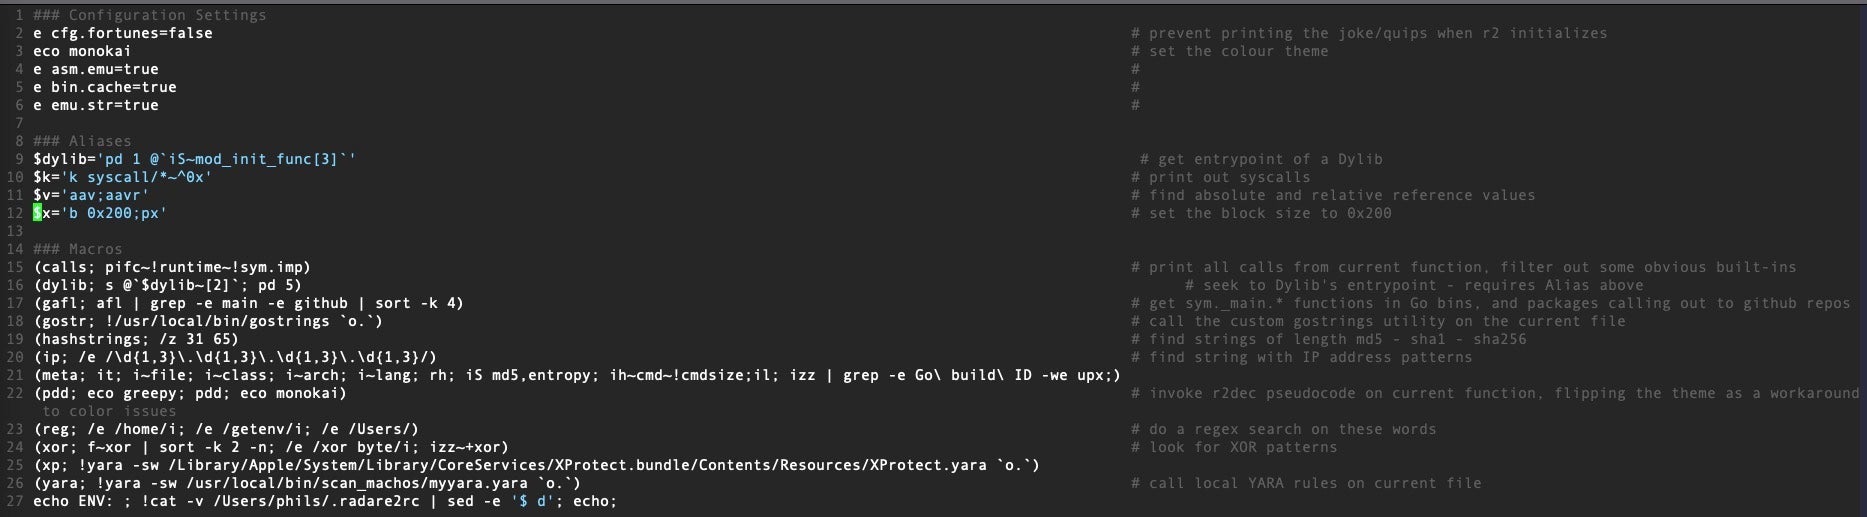
Just as most shells have a “read command” config file (e.g., .bashrc, .zshrc), so r2 has a ~/.radare2rc file in which you can define environment variables, aliases and macros. This file doesn’t exist by default so you need to create it when you make your first customizations.
It’s often said that one of the obstacles to adopting r2 is the steep learning curve, a large part of which is getting muscle-memory familiar with r2’s cryptic commands. One very fast way to flatten that curve is to define macros and aliases for new commands as you learn them – naming any hard-to-remember native commands with your own labels.
Aliases and macros are also useful for chaining oft-used commands together. If you find yourself always running the same commands as your work through your initial triage of a sample, you can save yourself some time and typing by combining those commands into one or more aliases or macros.

We will look at some useful examples below, but first let’s understand the syntax for aliases and macros.
An alias is defined with a name prefixed by a $ sign, an = operator, and a value in single quotes. Values can be one or more commands, separated by a semi-colon. For example, if you struggle to remember r2’s rather cryptic command names, you could replace them with more memorable command names of your own. Create a file at ~/.radare2rc, add the following line and then save the file.
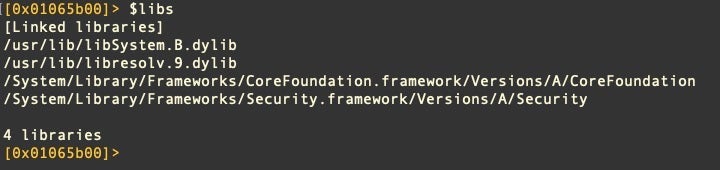
$libs=’il’
Start a new r2 session. Now, typing $libs at the r2 prompt will run the il command. You can still use il directly as well – as the name suggests, aliases are just alternative names, not replacements, for existing commands.
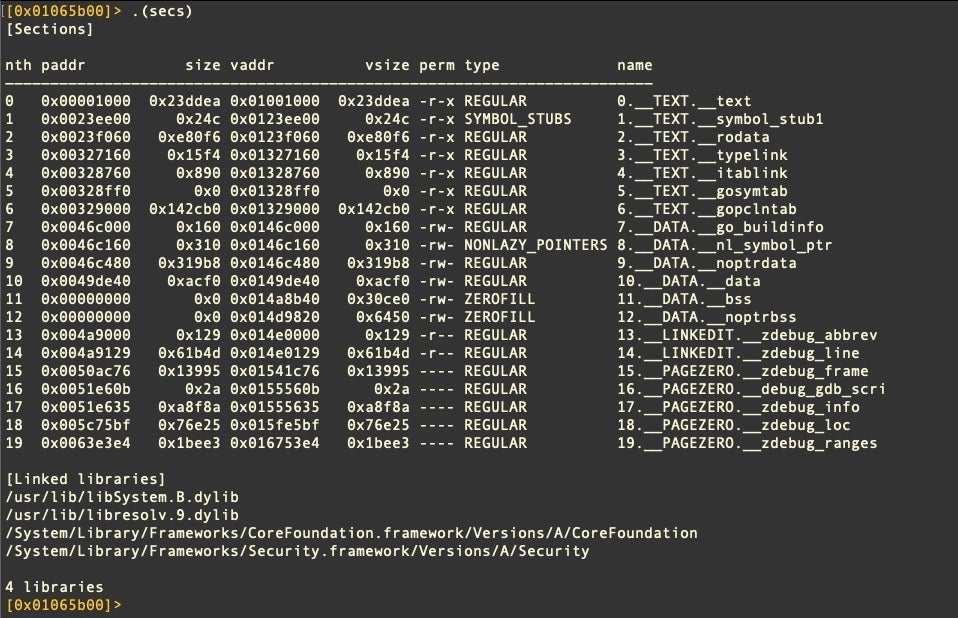
From the Official Radare2 book, we learn that macros are written inside parentheses with each command separated by a semi-colon. The first item in the list is the macro name. By way of example, rather than having a $libs alias, why not print out sections and linked libraries at the same time? This example would do just that:
(secs; iS; il)
Macros are called with the syntax .(macro) like so:
It’s easy to see how you can build on this idea. I use a macro called .(meta) to give me all the basic info about a file’s structure as soon as I’ve loaded it into radare2.
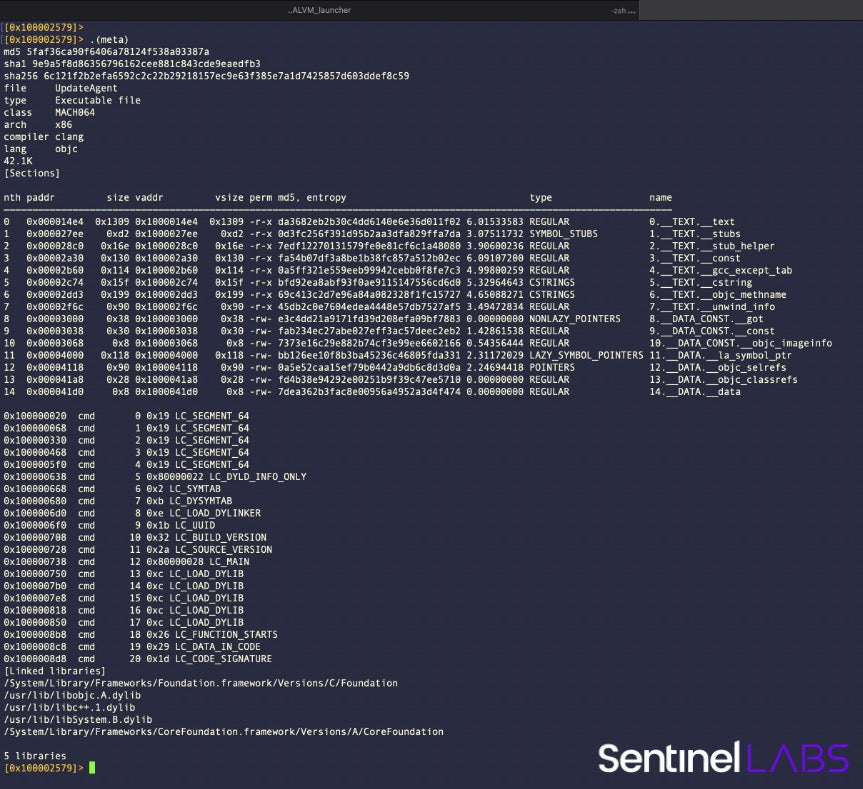
This macro provides the file hashes in various algos, the compiled language, file size, sections, section entropy and the load commands. If the file under analysis is UPX packed, it will also indicate that, and if the source code is Go it displays the Go Build ID string. The macro is defined as follows, feel free to adopt or adapt it for your needs:
(meta; it; i~file; i~class; i~arch; i~lang; rh; iS md5,entropy; ih~cmd~!cmdsize; il; izz | grep -e Go\ build\ ID -we upx;)
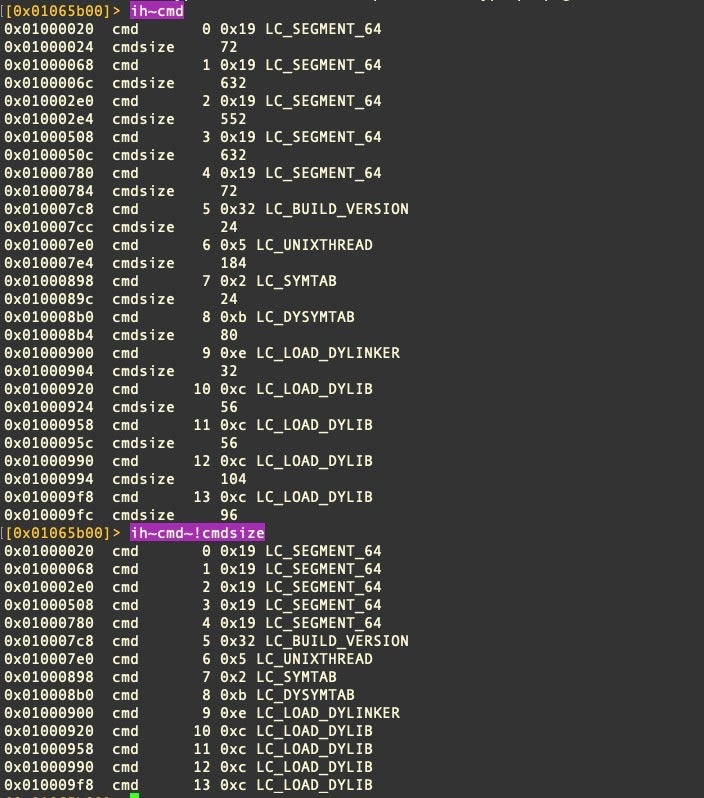
Within the .(meta) macro, notice the command sequence ih~cmd~!cmdsize. This warrants a little explanation. Readers of our previous posts on r2 and macOS malware may recall that the tilde is r2’s internal grep function. The tilde followed by an exclamation mark ~!<expression> filters out the given expression, equivalent to grep -v. You can see the difference in the following image.
Moreover, note that the .(meta) macro calls out to the system grep utility as well. The ability to utilize any command line utility on the system from within r2 is one of its major advantages over other reversing platforms.
Passing Arguments to radare2 Macros
Many of the things you can do with macros you could also do with Aliases, and vice versa; it’s largely a matter of personal preference. However, note that macros have one neat superpower – you can pass arguments to them.
Here’s a good example: r2 has a command for diffing or comparing code within a sample, either as hex or disassembly (cc and ccd). For some reason (I’m sure there’s a perfectly good one), this function counterintuitively displays the output from the first address given to the right of the output from the second address given. We can ‘correct’ this with a macro that takes the addresses as arguments but swaps their order when it passes them to cc.
(diffs x y; cc $1 @ $0)
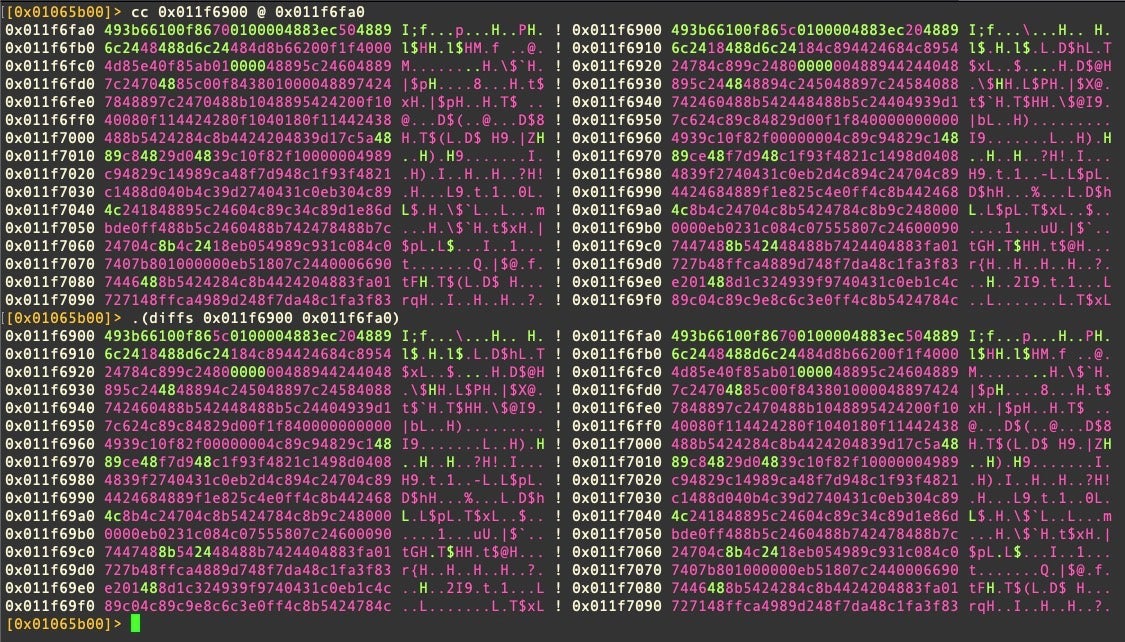
Incidentally, the cc command (or our reimplementation of it in a macro) can be very useful for finding common code within samples when writing YARA or other hunting rules, a topic we’ll discuss a bit further below.
Finding IP Address Patterns and Other Useful Artifacts
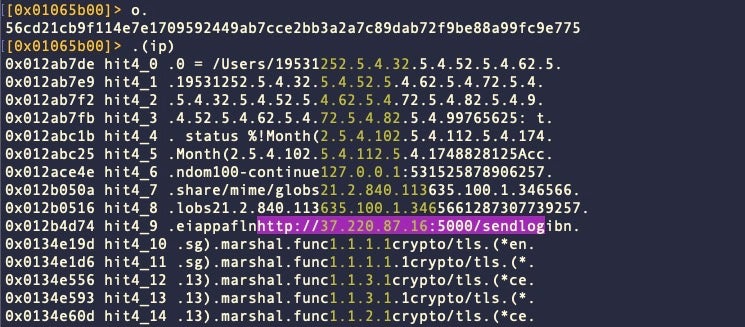
To find IP address patterns and other useful artifacts in a binary, you can create macros with search regexes.
Here’s a few examples to get your started.
Find IP Address Patterns:
(ip; /e /\d{1,3}\.\d{1,3}\.\d{1,3}\.\d{1,3}/)
Find Interesting Strings
Search for places where an executable gathers user and local environment information.
(reg; /e /home/i; /e /getenv/i; /e /Users/)
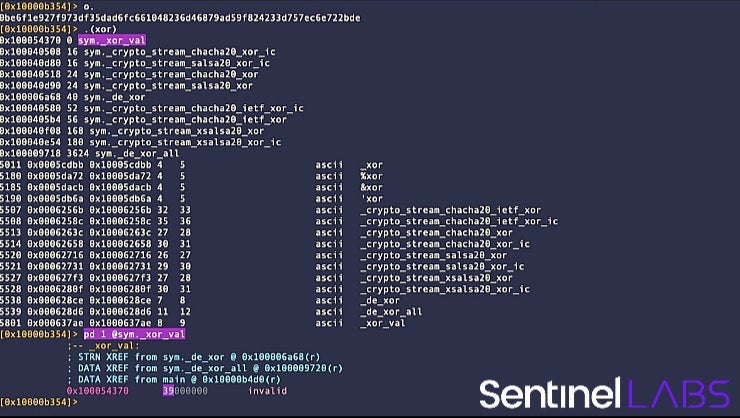
You can automate different searches for XOR instructions with the following r2 macro:
(xor ; f~xor | sort -k 2 -n; /e /xor byte/i; izz~+xor)
Testing a File Against Local YARA Rules
For the following two macros, you will need YARA installed locally on the host. This can be done with MacPorts, Homebrew or by installing from Github and following the instructions here.
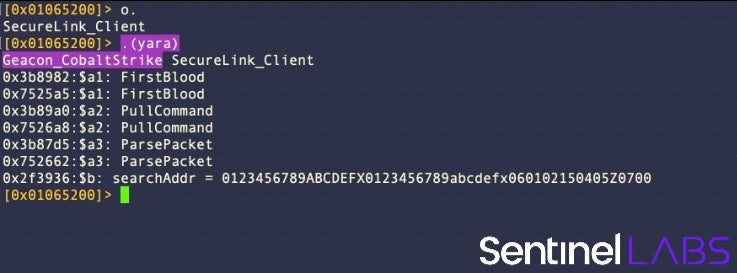
With YARA installed, it is easy to call it from within r2 to see if a rule you’ve created for a sample will fire. This is a great way to develop and test rules on the fly as you triage new samples.
On my analysis machines, I have my rules stored in a subdirectory of /usr/local/bin, so my macro looks like this:
(yara; !yara -s /usr/local/bin/scan_machos/myyara.yara `o.`)
As yara is an external command, it is prefixed by an exclamation point !. This is how to tell the r2 shell that we want to call an external command line utility, a very useful feature that allows you to bring in all the power of the command line utilities at your disposal directly into r2. The -s option allows us to see which strings hit (and how many times). See man yara for more options. The `o.` command at the end of the macro is an r2 command that returns the file name of the currently loaded binary.
Since Apple’s own built-in malware blocking tool XProtect also uses YARA rules, you can create a macro to see whether Apple has a rule for your sample. To create an .(xp) macro to check files against Apple’s XProtect database signatures file (remember: YARA must be installed first), use the following macro:
(xp; !yara -w /Library/Apple/System/Library/CoreServices/XProtect.bundle/Contents/Resources/XProtect.yara `o.`)
Don’t be surprised, however, if you don’t get many matches: XProtect’s YARA signature database is thin at best.
Print Your Customizations when radare2 Starts Up
By now, you might be starting to collect quite a list of macros and aliases. How to remember them all? There’s a couple of built-in ways, and we’ll also look at one last .radare2rc customization to help us out with this, too.
From within, r2 you can see all defined aliases and macros by typing $* and (*, respectively.
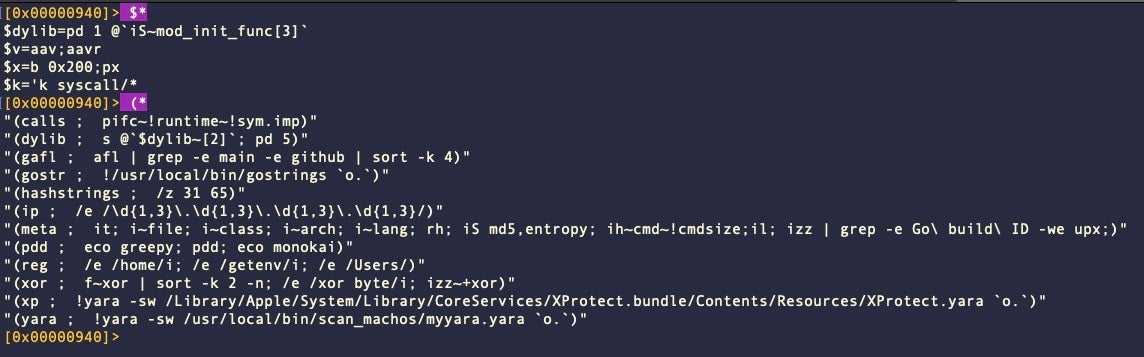
We can also have r2 print our entire config file when it starts up by adding a further customization. At the end of the .radare2rc file, try something like this:
echo ENV: ; !cat -v /Users//.radare2rc | sed -e '$ d'; echo;
The sed command after the pipe prevents the last line of the file from being printed – an optional customization you can ignore if you wish. You could also just add the $* and (* commands above to the config file instead, but I like to see the whole file as a reminder of the entire environment.
These examples should be enough to get you started creating useful aliases and macros to help speed along your own analysis.
How to Diff Binaries and Binary Functions with radare2
Aliases and macros are useful shortcuts – the command line equivalent to GUI apps’ hotkeys and key chords – but there are other, more powerful ways we can customize radare2 and drive it with custom functions and scripts.
As an example, let’s add the following function to our shell config file (e.g., ~/.zshrc or ~/.bashrc):
rfunc() {
  radiff2 -AC -t 100 $1 $2 2> /dev/null | egrep --color "\bUNMATCH\b|$"
}
This leverages a radare2 tool called radiff2. This tool (among a bunch of others) is installed as part of the radare2 suite. With the function added to our shell config, we’ll start a new Terminal session and call the function directly from the command line rather than from within r2.
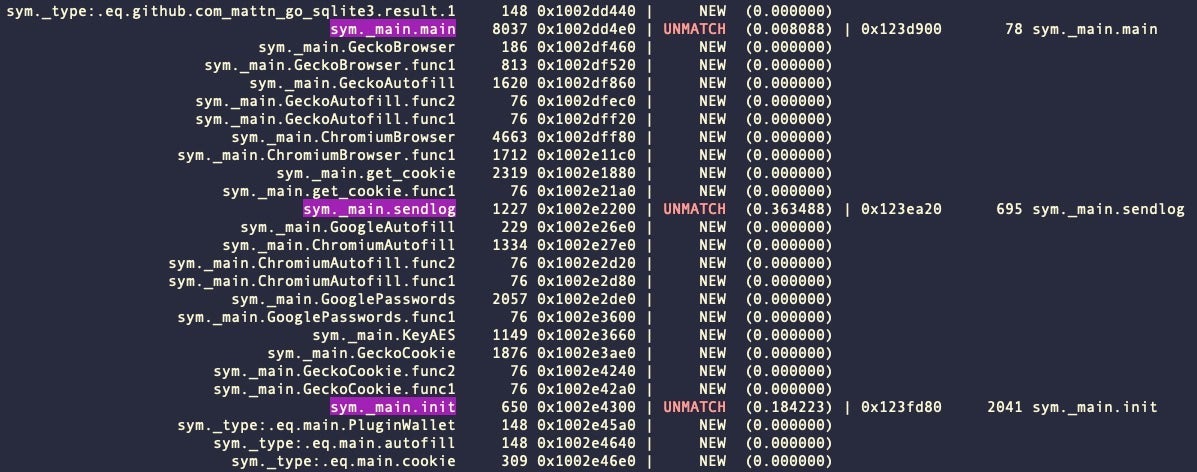
$ rfunc file1 file2
The rfunc() function tells us which functions match, which do not, and which are new between any two given binaries. Here’s part of the output from two very different variants of Atomic Stealer:
To get a graphical output of how two functions differ, let’s begin by using radiff2 directly. This utility has many options and we’ll only explore a few here, but it is well worth digging into deeper.
You can compare two functions or offset addresses in two binaries with the following syntax:
$ radiff2 -g offset1,offset2 file1 file2
Or, in case both binaries use the same function name, e.g., sym._main.sendlog in our example above, you can simply provide the function name instead of the addresses:
$ radiff2 -g <function_name> file1, file2
In this example, I’ll compare the main function of two samples of Genieo adware.

As shown in the image above, the files are quite different sizes.
$ radiff2 -g main a1219451eacd57f5ca0165681262478d4b4f829a7f7732f75884d06c2287ef6a 80573de5d79f580c32b43c82b59fbf445b91d6e106b3a4f2f67f2a84f4944433

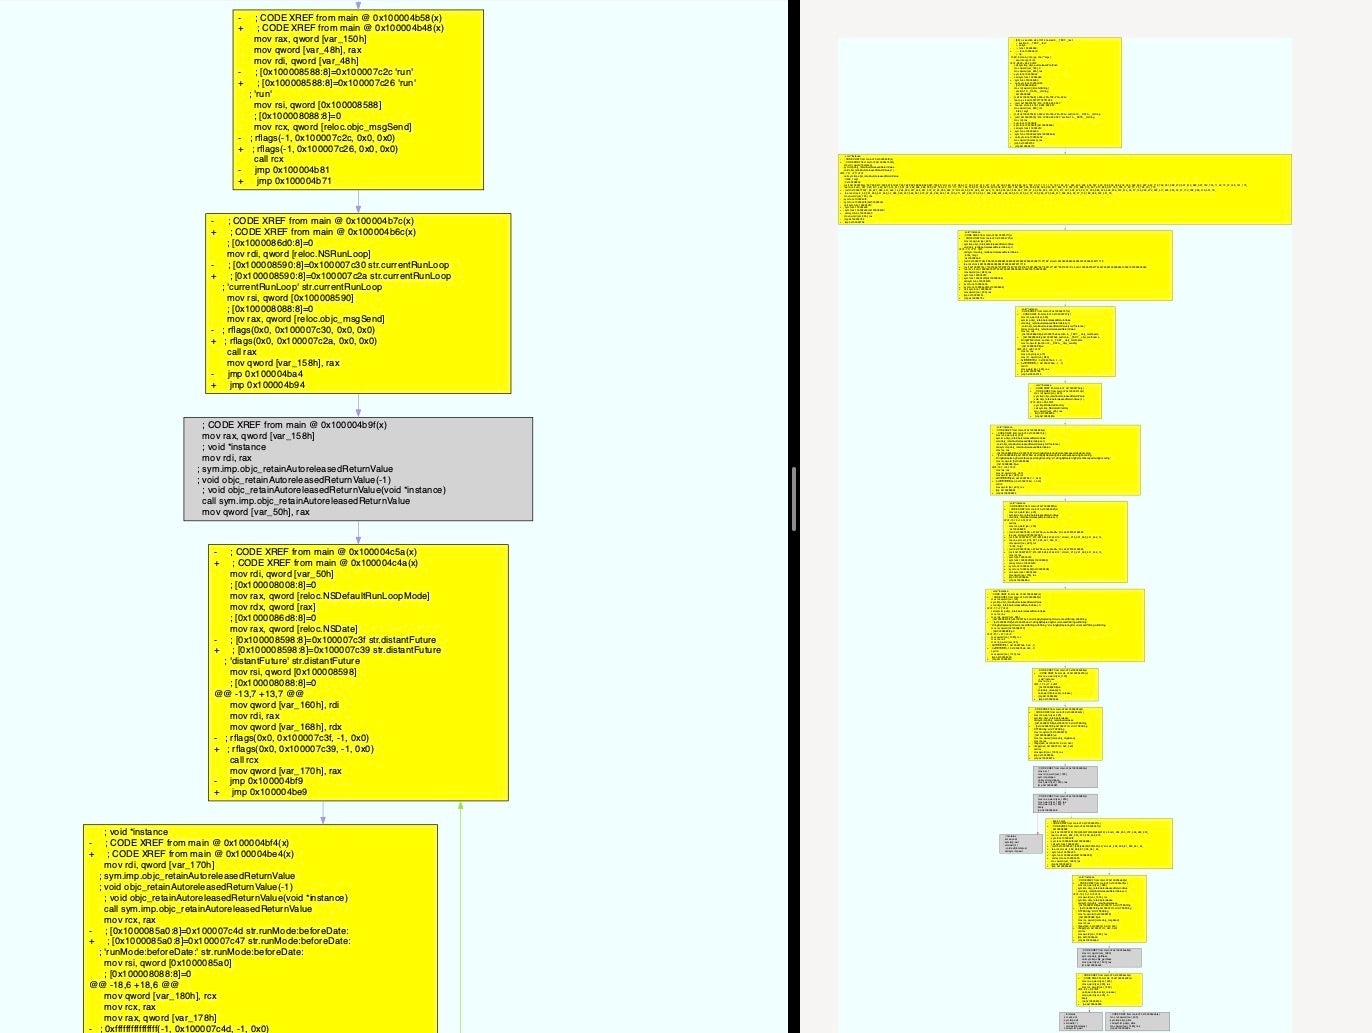
However, the output shows us that the main functions are structured identically and differ only in terms of offset addresses and certain hard coded values. This kind of information is extremely helpful for creating effective signatures for a malware family.
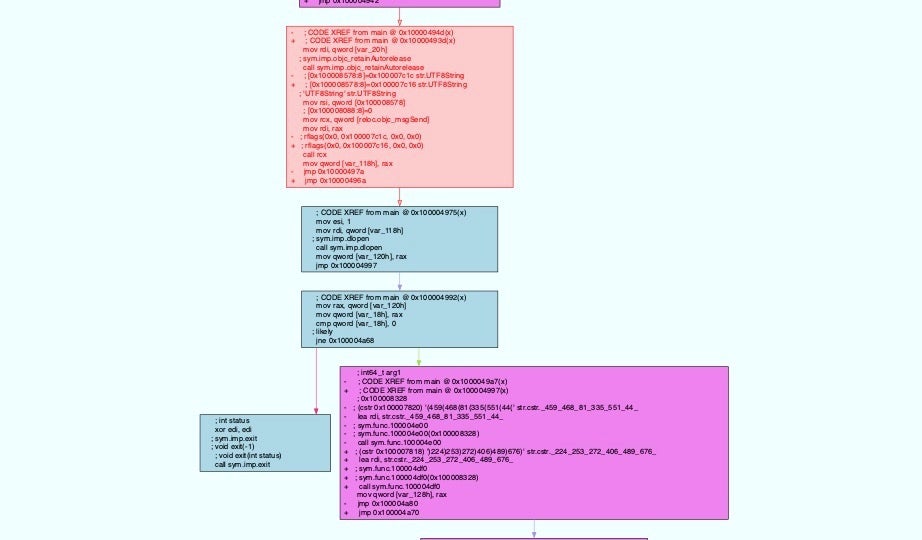
As radiff2 outputs to the Terminal, display can sometimes be tricky. It’s possible to leverage Graphviz and the dot and xdot utilities to produce more readable graphs. Though a deep dive into Graphviz takes us beyond the scope of this post, try installing xdot from brew install xdot and playing around with options such as these:
$ radiff2 -md -g <function_name> file1 file2 | xdot -
As xdot is Python based, I’ve found it can sometimes be temperamental when it comes to escaping strings passed from radiff2 and occassionally spits out “unknown op code” errors. When this happens, one of a few ways you can sidestep xdot and Python is as follows:
$ radiff2 -md -g <function_name> file1 file2 > main.dot
$ dot -Tpng main.dot -o main.png
$ open main.png
These can produce graphical diffs such as the following:
Of course, once you hit on one or more graph workflows that work for you, you can then add them as functions to your shell config file for maximum convenience. Here’s an example:
rdiff () {
	if [ "$#" -eq 4 ]
	then
		radiff2 -A -md -g -t 100 $1,$2 $3 $4 2> /dev/null | tail -n +28 | sed 's/fillcolor="lightgray"/fillcolor="lightblue"/g' | sed 's/fillcolor="yellow",color="black"/fillcolor="#F4C2C2",color="lightgray"/g' | sed 's/"Courier"/"Poppins"/g' | sed 's/color="black"/color="lightgray"/g' | xdot -
	elif [ "$#" -eq 3 ]
	then
		radiff2 -A -md -g -t 100 $1 $2 $3 2> /dev/null | tail -n +28 | sed 's/fillcolor="lightgray"/fillcolor="lightblue"/g' | sed 's/fillcolor="yellow",color="black"/fillcolor="#F4C2C2",color="lightgray"/g' | sed 's/"Courier"/"Poppins"/g' | sed 's/color="black"/color="lightgray"/g' | xdot -
	else
		echo "Wrong number of arguments supplied."
	fi
}
This function allows you to specify either three args (a function name, and two filepaths) or four (two offsets, two filepaths) – beware there’s minimal error checking. Two other things of note: via the -A option, radiff2 passes the files to r2 for analysis. This can improve radiff2‘s diffing output. However, recall that our earlier customization has r2 print out our config file when it runs. We don’t want this output passed to xdot (or dot) or it will cause errors. In my case, my .radare2rc file is 27 lines long, so I use tail -n +28 to start printing from the 28th line. That number will need to be adjusted for the length of your own .radare2rc config file, and you’ll need to remember to adjust the function if you later edit the config file such that it changes length either way. Secondly, note the series of sed commands. These are a quick and dirty way to alter the default colors of the output, so adjust or remove to your liking.
Conclusion
In this post we’ve seen how we can power up radare2 by means of aliases, macros and functions. We’ve learned how these shortcuts and automations can allow us to make r2 easier and more productive to use.
That’s not all there is to powering up radare2, however, as we have yet to explore driving radare2 with scripts via r2pipe to do deeper analysis, decrypt strings and other advanced functions. We cover that in the next post, and if you didn’t already, check out our earlier posts on radare2 as well!