
In Part 1 and Part 2, we looked at collecting device, file and system data and how to retrieve data on user activity and behavior. In this final part of the series, we’re going to look for evidence of system manipulation that could leave a device or a user vulnerable to further exploitation. Some of that evidence may already have been collected from our earlier work, while other pieces of information will require some extra digging. Let’s go!
Usurping the Sudoers File
One of the first places I want to look for system manipulation is in the /etc/sudoers file. This file can be used to allow users to run processes with elevated privileges without being challenged for a password. To check whether the sudoers file has been modified, we will use the visudo command rather than opening the file directly in vi or another editor. Using visudo is safer as it prevents the file being saved in an invalid format.
$ sudo visudo
Modifications to the sudoers file will typically be seen at the end of the file. In part, that’s because the easiest way for a process to write to it is by simply appending to it, but also the commands in the file take precedence in reverse order, with the later commands overriding earlier ones. For that reason, it’s important for attackers that their commands override any others that may target the same users, groups or hosts. In this example, we can see that a malicious process has added a line to allow the user ‘sentinel’ – or more importantly any process running as that user – to run the command at the path shown on any host (ALL) without authenticating.

Cuckoos in the PATH
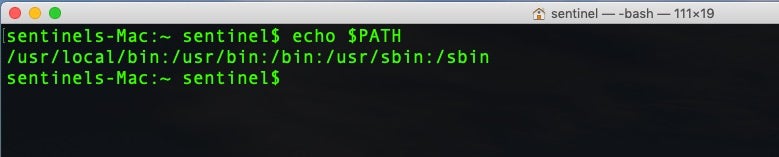
The $PATH environment variable lists the paths where the shell will search for programs to execute that correspond to a given command name. We can see the user’s path list with
$ echo $PATH
In this example, the user’s path contains the following locations:
We can use a short Bash script to iterate over the paths, and list their contents, sorted by date modified in descending order.
#! /bin/bash

while IFS=: read -d: -r path; do
    cd $path
    echo $path
    ls -altR
done <<< "${PATH:+"${PATH}:"}"
From the results, we can quickly see which files were modified most recently. Pay particular attention to what is at the top of the path, as /usr/local/bin is in the above example. This location will be searched first when a command is issued on the command line, ahead of system paths. A “cuckoo” script named, say, sudo or any other commonly used system utility, inserted at the top of the path would get called before – in other words, instead of – the real utility. A malicious actor could write a fake sudo script which first called the actor’s own routines before passing on the user’s intended actions to the real sudo utility. Done properly, this would be completely transparent to the user, and of course the attacker would have gained elevated privileges along the way.
Bash, Zsh and Other Shells
In a similar way, an attacker could modify one of several files that determine things like shell aliases. An alias in say the .bashrc file could replace every call to sudo with a call to an attacker’s script. To search for this possibility, be sure to check the contents of the following for such manipulations:
~/.bash_profile        # if it exists, read once when you log in to the shell
~/.bash_login          # if it exists, read once if .bash_profile doesn't exist
~/.profile             # if it exists, read once if the two above don't exist
/etc/profile           # only read if none of the above exist

~/.bashrc              # if it exists, read every time you start a new shell
~/.bash_logout         # if it exists, read when the login shell exits
And look for the same for other shell environments the user might have like .zshrc for Zsh.
Etc, Hosts and Friends
It’s also worth running a time-sorted ls on the etc folder.
$ cd /etc; ls -altR
On this compromised system, it’s very clear what’s been modified recently.

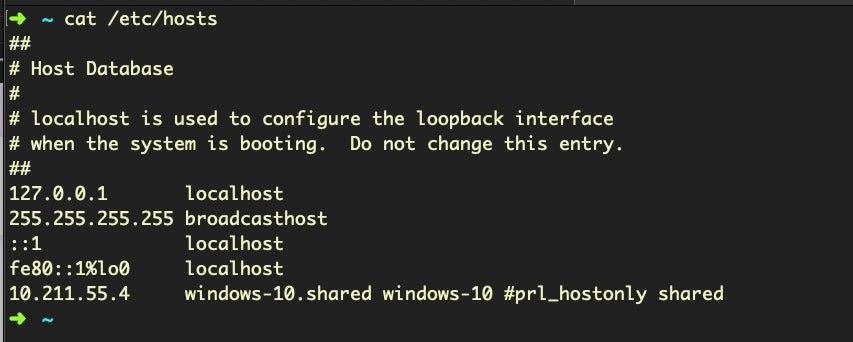
The hosts file is a leftover from the past and the way computers used to resolve domain names to IP addresses, a primitive form of DNS. These days the only use of the hosts file is to loopback certain domain names to the localhost, 127.0.0.1, which effectively prevents the system from reaching out to these domains. The hosts file is often manipulated by malware to stop the system checking in with certain remote services, such as Apple or other software vendors. A healthy hosts file will typically have very few entries, like so:
Networking and Sharing Prefs
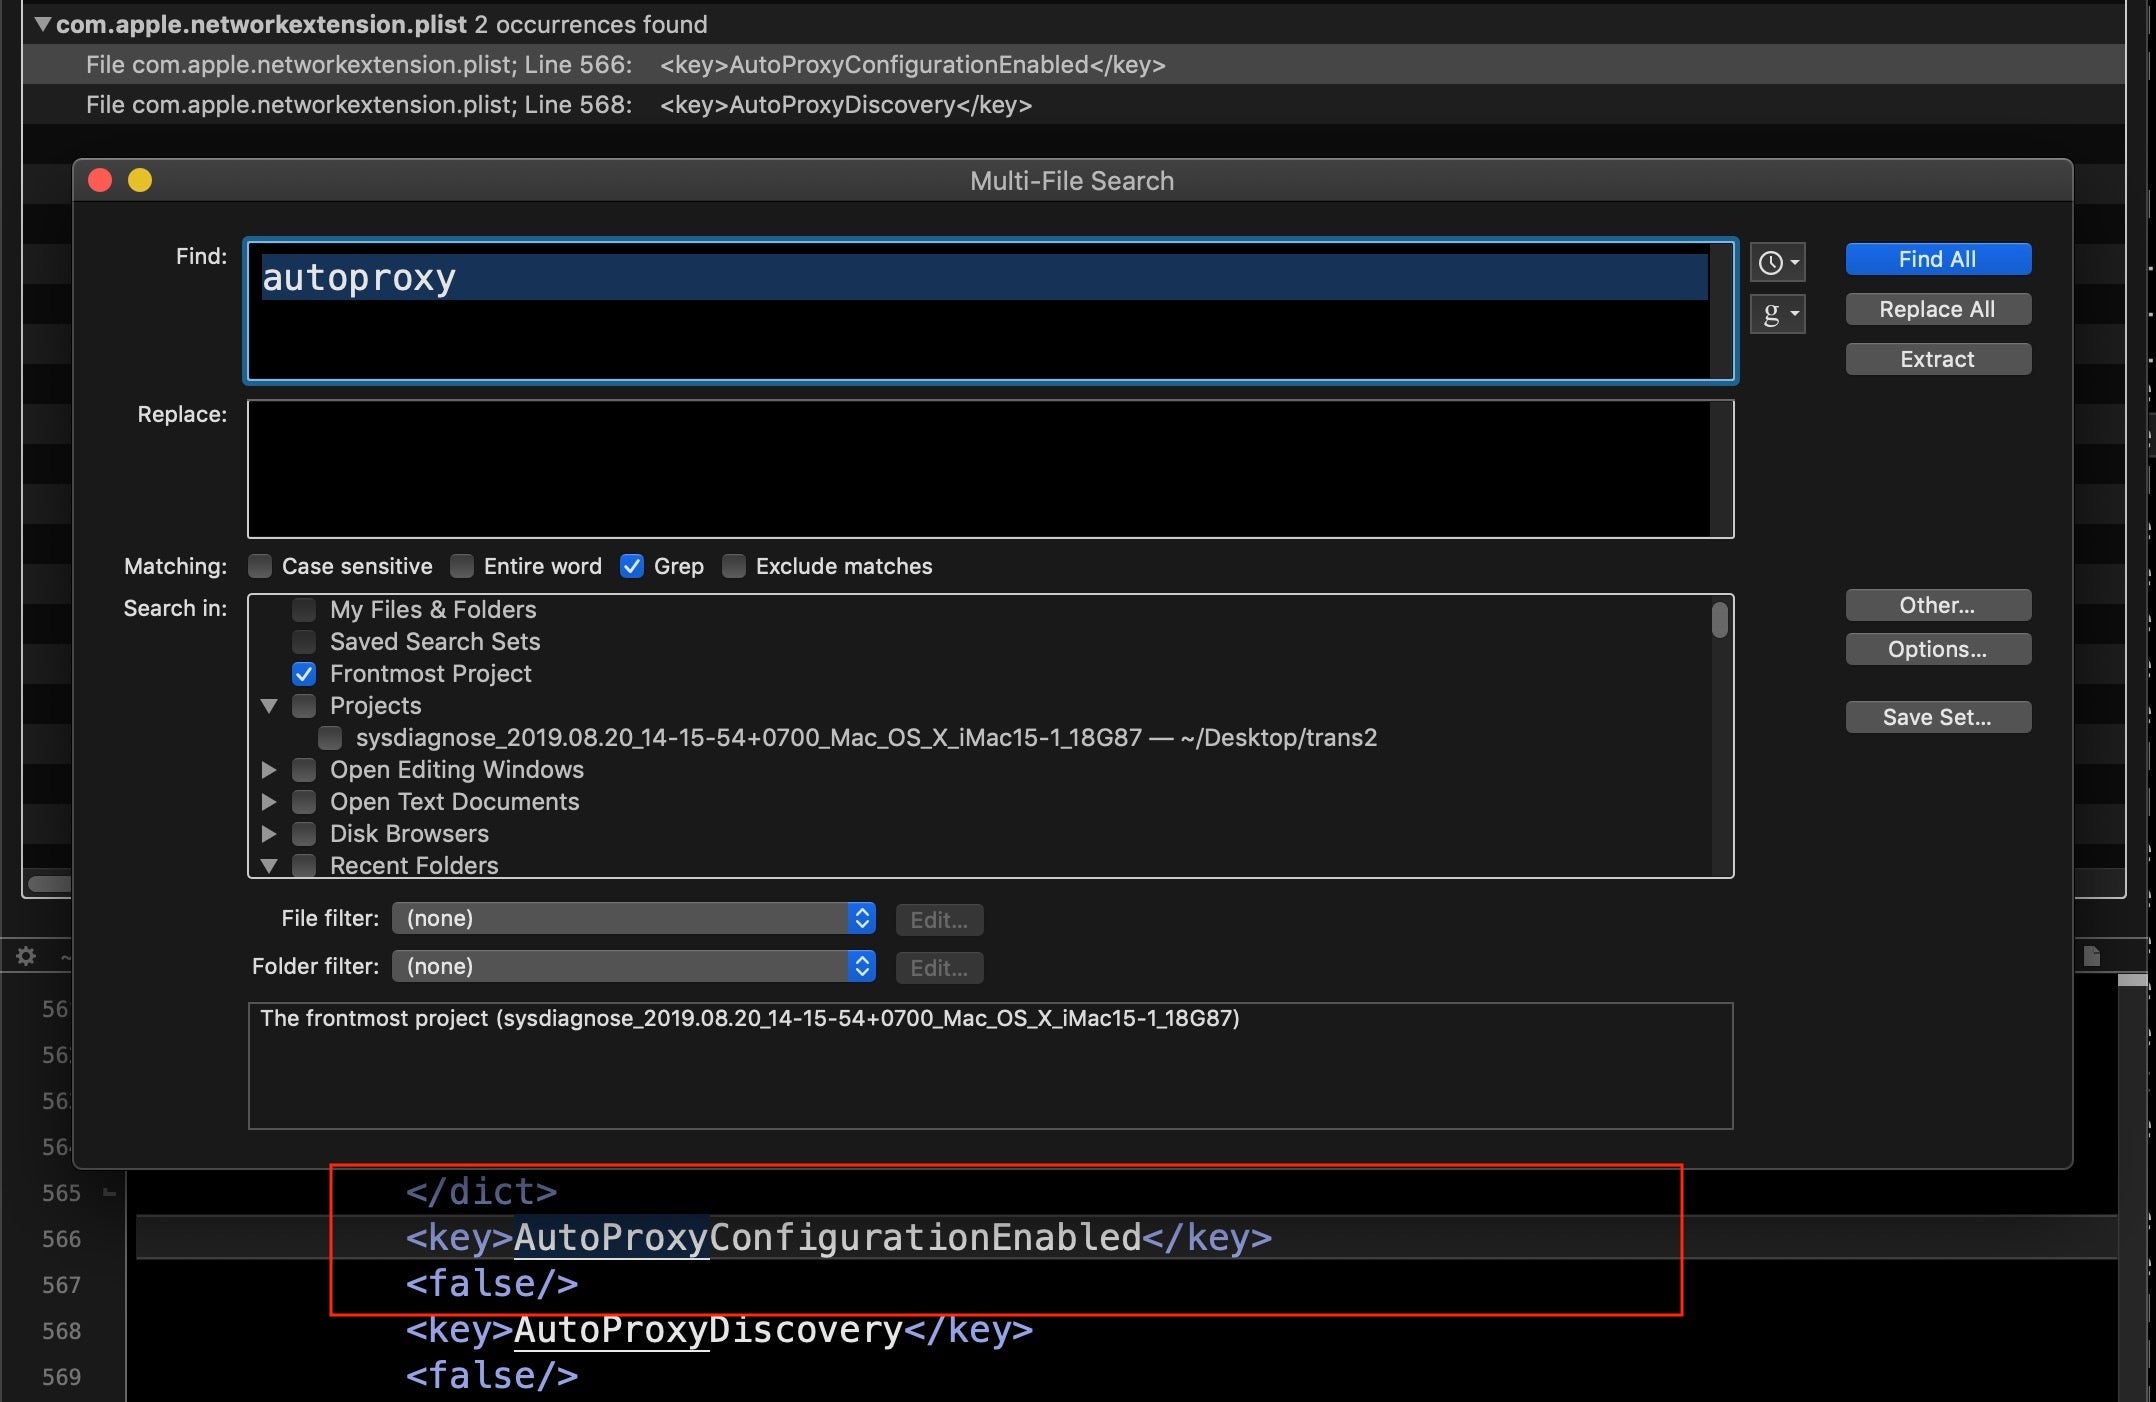
While we’re discussing network communications, let’s check on several other areas that can be manipulated. In System Preferences’ Network pane, click Advanced… and look at the Proxies tab. Some malware will use an autoproxy to redirect user’s traffic in order to achieve a man-in-the-middle attack. We can also pull this information from the data we collected from sysdiagnose by searching on “autoproxy”. Here we see the good news that no autoproxy is set.
We can utilise the networksetup utility here to output similar information to what you can see in the System Preferences UI regarding each network service.
#! /bin/bash

n=$(networksetup -listallnetworkservices | grep -v asterisk)
for nt in $n; do
    printf "n$ntn--------n";
    networksetup -getinfo $nt;
done
We can also find this information in the sysdiagnose report in the output of SystemProfiler’s SPNetworkLocationDataType.spx file.
Finding Local and Remote Logins
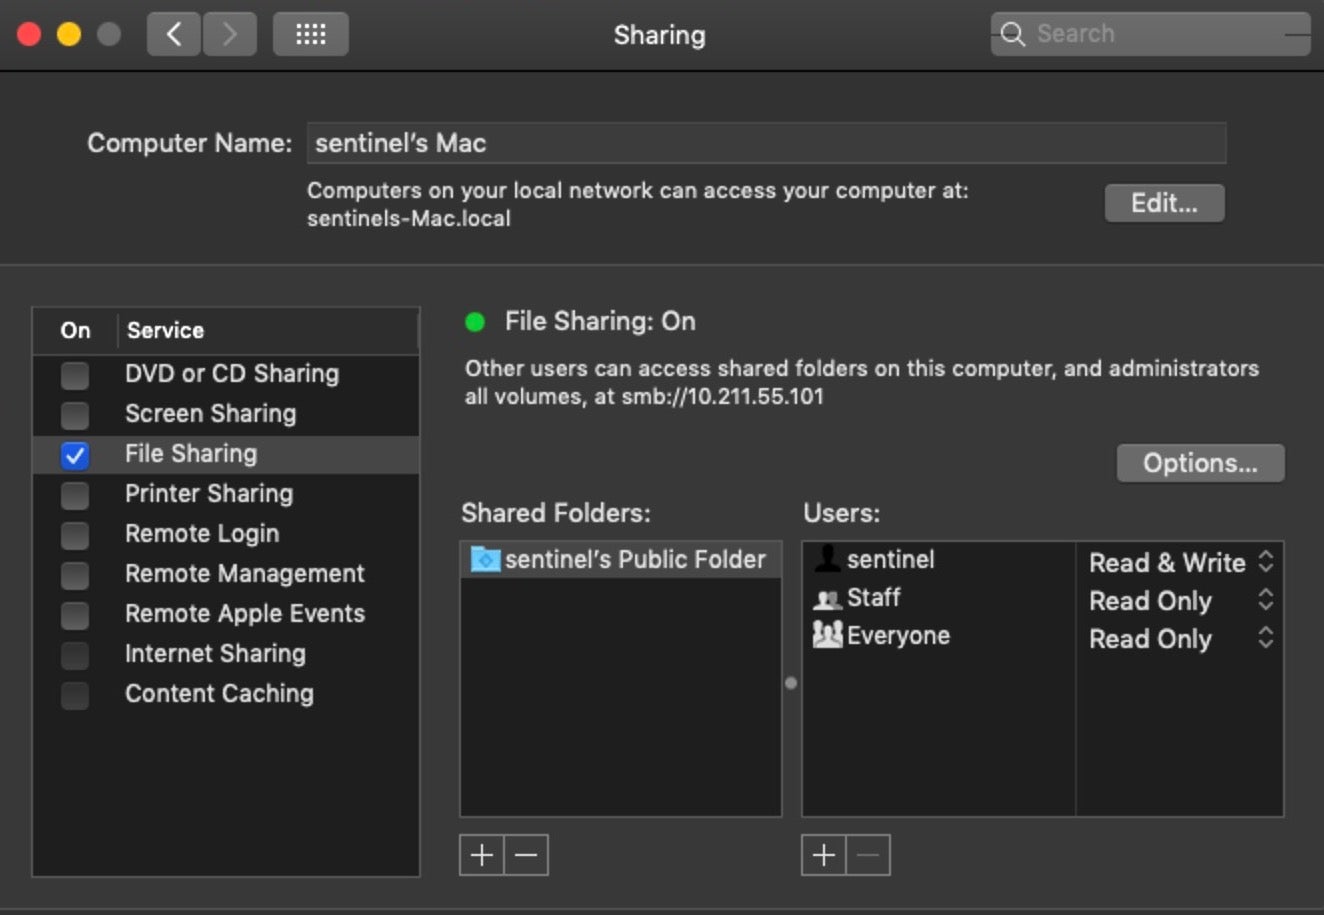
Let’s start with the obvious. Does the device have any of its sharing preferences enabled? In the User Interface, these are listed in the Sharing Pane:
As explained in Malware Hunting on macOS | A Practical Guide, we can get the same information from netstat by grepping for particular ports associated with sharing services. For convenience, we can run a one-liner on the command line or via script that will succinctly output the Sharing preferences:
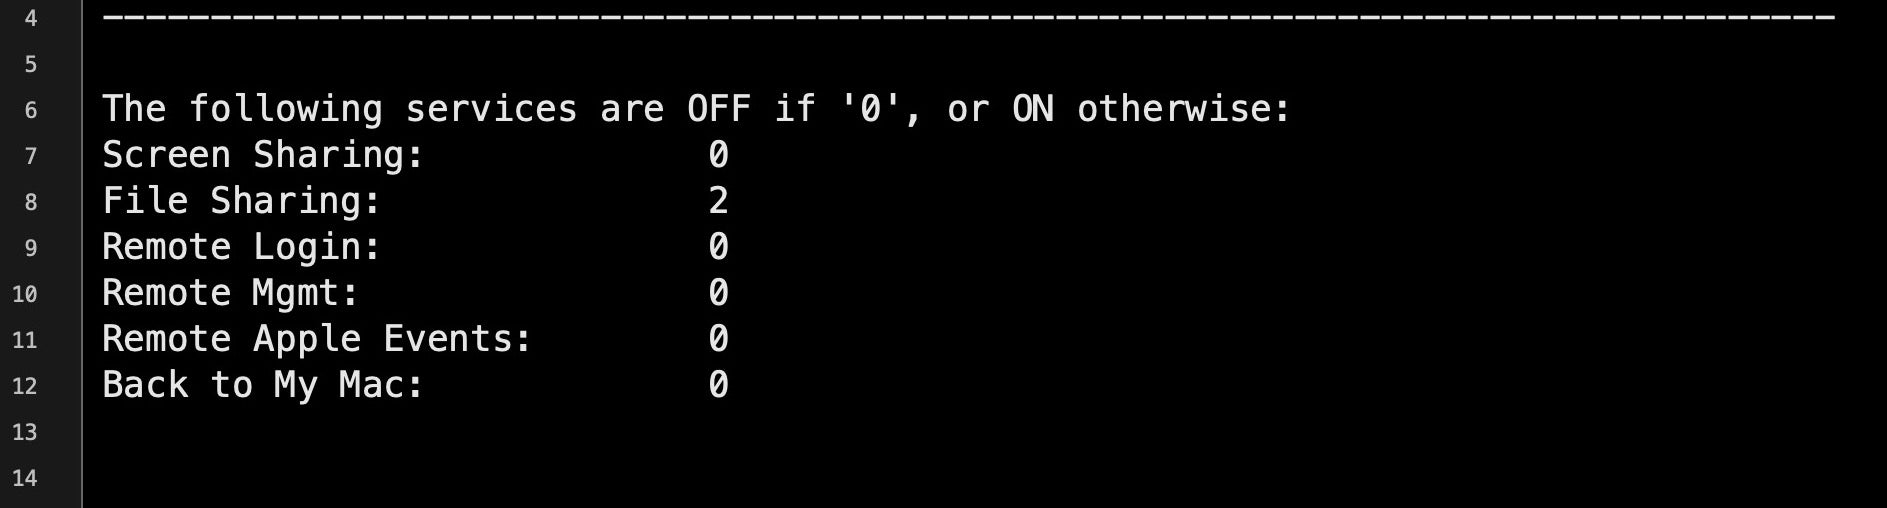
$ rmMgmt=`netstat -na | grep LISTEN | grep tcp46 | grep "*.3283" | wc -l`; scrShrng=`netstat -na | grep LISTEN | egrep 'tcp4|tcp6' | grep "*.5900" | wc -l`; flShrng=`netstat -na | grep LISTEN | egrep 'tcp4|tcp6' | egrep "*.88|*.445|*.548" | wc -l`;rLgn=`netstat -na | grep LISTEN | egrep 'tcp4|tcp6' | grep "*.22" | wc -l`; rAE=`netstat -na | grep LISTEN | egrep 'tcp4|tcp6' | grep "*.3031" | wc -l`; bmM=`netstat -na | grep LISTEN | egrep 'tcp4|tcp6' | grep "*.4488" | wc -l`;printf "nThe following services are OFF if '0', or ON otherwise:nScreen Sharing: %snFile Sharing: %snRemote Login: %snRemote Mgmt: %snRemote Apple Events: %snBack to My Mac: %snn" "$scrShrng" "$flShrng" "$rLgn" "$rmMgmt" "$rAE" "$bmM";
This lengthy pipeline of commands should return something like this.
In the sysdiagnose/network-info folder, the netstat.txt file will also list, among other things, active internet connections. Alternatively, you can collect much of the same relevant information with the following commands:
Active Internet connections (including servers):$ netstat -A -a -l -n -v
Routing tables:$ netstat -n -r -a -l
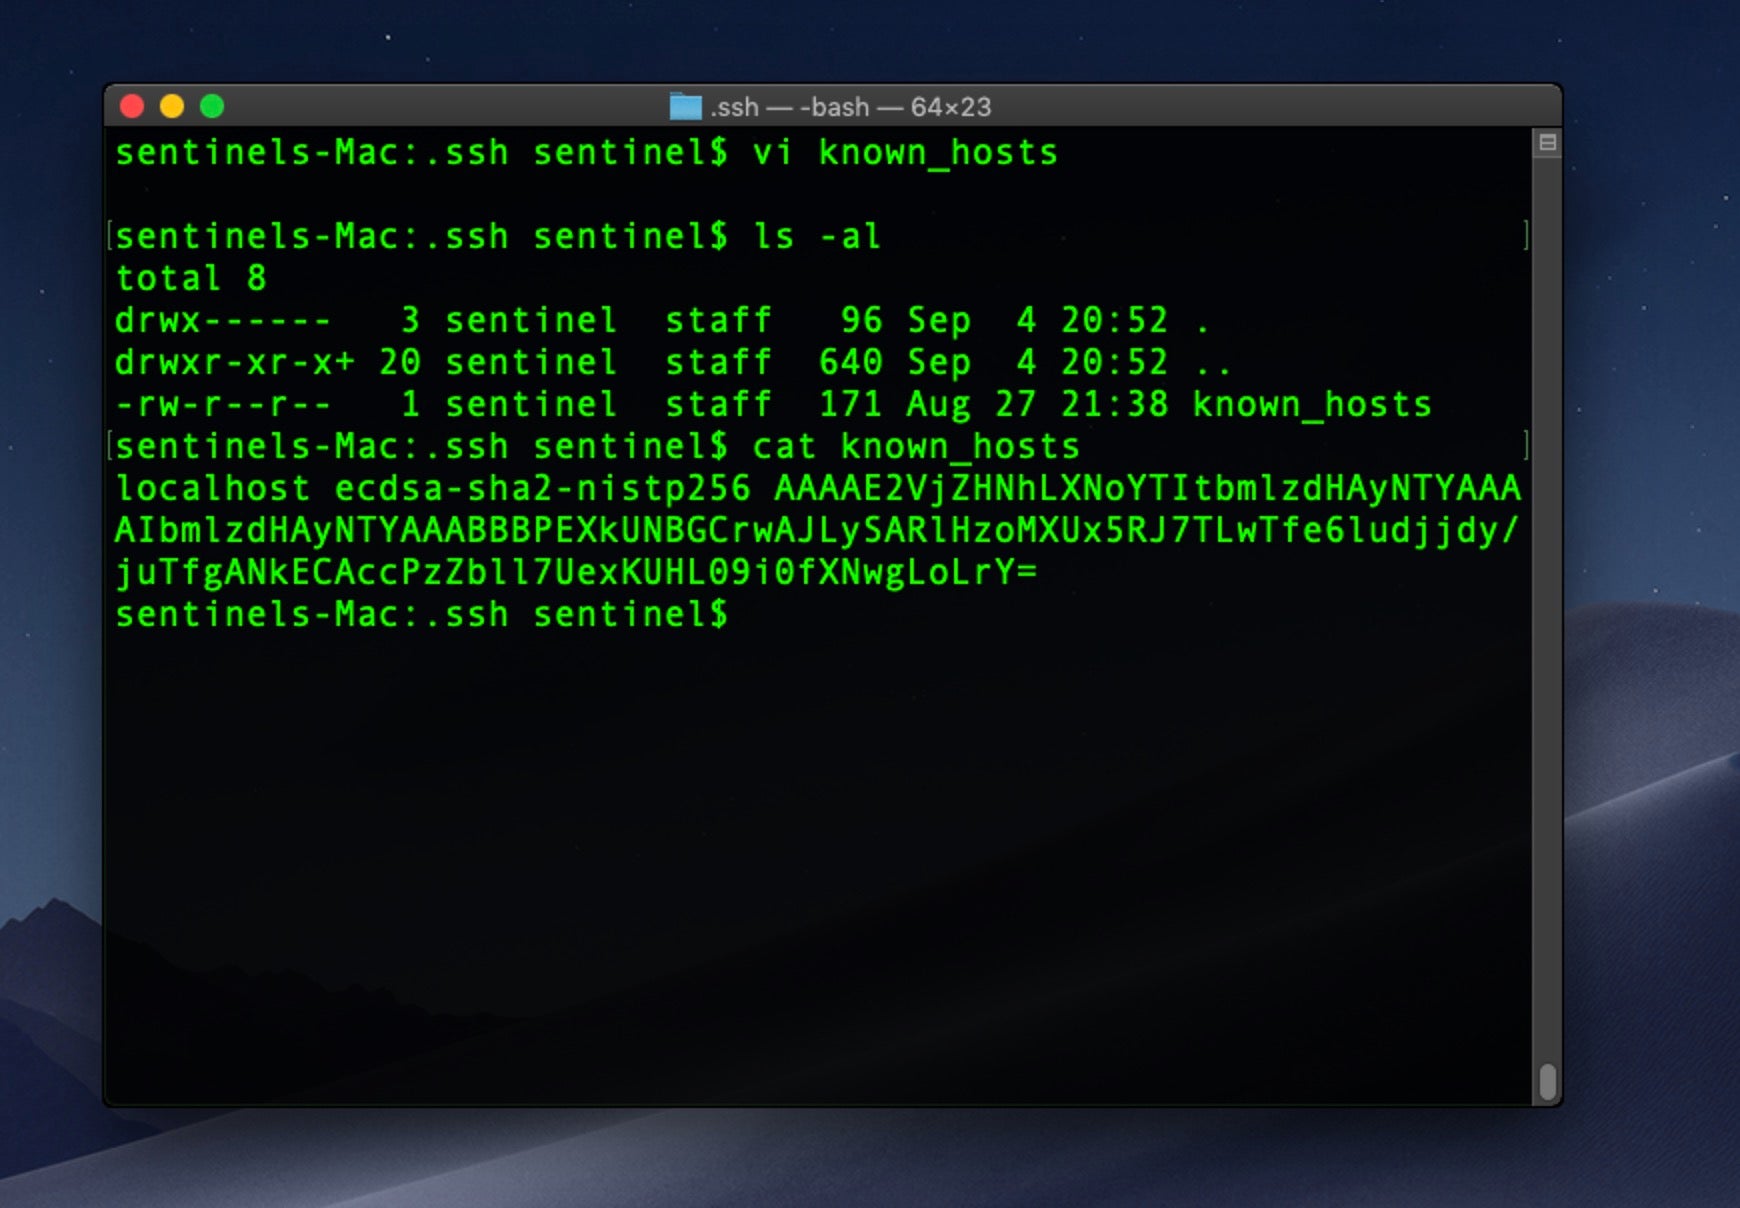
Also, check the user’s home folder for the invisible .ssh directory and the addition of any attacker public keys. Here, an unwanted process has secretly written a known_hosts file into the ssh folder so that the process can ensure it’s connecting to its own C2 server before exfiltrating user data or downloading further components.
Either on the system itself or from the sysdiagnose folder, look for the existence of the kcpassword file. This file only exists if the system has Auto login set up, which allows a user to login to the Mac without providing a user name or password. Although it’s unlikely a remote attacker would chose to set this up, a local one might (such as a co-worker), if they had hopes of physical access in the future. Perhaps more importantly, the file contains the user’s actual login password in encoded but not encrypted form. It’s a simple thing to decode it, but it does require having already achieved elevated privileges to do so.
The /usr/sbin/sysadminctl utility has a few useful options for checking on Guest account and other settings. This one-liner will output some useful status information:
$ state=("automaticTime" "afpGuestAccess" "filesystem" "guestAccount" "smbGuestAccess"); for i in "${state[@]}"; do sysadminctl -"${i}" status; done;

Achieving Persistence Through Application Bundles
We have already covered macOS persistence techniques, and I encourage you to refer to that for an in-depth treatment. However, it’s worth mentioning here one of the upshots of Apple’s recent change to requiring developers to use Application bundles for things like kexts and login items, which is that it can now be much harder to track these down. In the past, all 3rd party extensions would have been in /Library/Extensions and all login items could be tracked through the loginitems.plist file. Recent changes mean these can now be anywhere that an application can be, and that is pretty much everywhere!
In the first post in this series, we looked at an example of using LSRegister to hunt for unusual or unwanted applications. We can also leverage the Spotlight backend to search for the location of apps once we have a target bundle identifier to hand. For example:
$ mdfind "kMDItemCFBundleIdentifier == 'com.cnaa4c4d'"

Be careful with the syntax: the whole search statement is encapsulated in double quotes and the value to search for is within single quotes. More information about using mdfind can be found in the utility’s man page. A list of possible predicate search terms can be printed out with
$ mdimport -X
Manipulating Users Through Their Browsers
For the vast majority of attacks, the gateway to compromise comes through interaction with the user, so it’s important to check on applications that are used for communications. Have these applications’ default settings been manipulated to make further exploitation and compromise easier for the attacker?
We already took a look at this in general in Part 2, but specifically some of the items we would want to look at are the addition of browser extensions, default home page and search criteria, security settings, additional or privileged users and password use. We should also check the default download location and iterate over that folder for recent activity.
I’ve explained here how we can examine recent downloads that have been tagged with Apple’s LSQuarantine bit, but this bit is easily removed and the records in the LSQuarantine file are not all that reliable. A full listing of the user’s browser history is better scraped from the relevant folders and databases belonging to each browser app. Although browser history does not tell us directly about system manipulation, by tracking the urls of malicious sites visited we can build a picture not only of where malware may have come from, but where it might be sending our user to for further compromises. We can also use any malicious URLs found in browser history as search terms across our collected data.
Although there are many browsers, I will only deal with the major ones here. It should be possible to apply the same principles in these examples to other browsers. Safari, Firefox, Chrome and Opera all have slightly different ways of storing history. Here’s a few examples.
Browser History
To retrieve Safari history (Terminal will require Full Disk Access in Mojave and later):
$ sqlite3 ~/Library/Safari/History.db "SELECT h.visit_time, i.url FROM history_visits h INNER JOIN history_items i ON h.history_item = i.id"
To retrieve a list of sites that have acquired Push Notifications permissions in Safari:
$ plutil -p ~/Library/Safari/UserNotificationPermissions.plist | grep -a3 '"Permission" => 1'
To retrieve the last session data from Safari:
$ plutil -p ~/Library/Safari/LastSession.plist | grep -iv sessionstate .
Chrome history can be gathered with the following command:
$ sqlite3 ~/Library/Application Support/Google/Chrome/Default/History "SELECT datetime(((v.visit_time/1000000)-11644473600), 'unixepoch'), u.url FROM visits v INNER JOIN urls u ON u.id = v.url;"
Similar will work for Vivaldi and other Chromium based browsers once you substitute the appropriate path to the browser’s database. For example:
$ sqlite3 ~/Library/Application Support/Vivaldi/Default/History "SELECT datetime(((v.visit_time/1000000)-11644473600), 'unixepoch'), u.url FROM visits v INNER JOIN urls u ON u.id = v.url;"
Firefox History is slightly different.
$ sqlite3 ~/Library/Application Support/Firefox/Profiles/*/places.sqlite "SELECT datetime(last_visit_date/1000000,'unixepoch'), url, title from moz_places"
Browser Extensions
I’ve previously described how the Safari Extensions format has changed recently and how this can be leveraged by bad actors. To retrieve an old-style list of Safari browser extensions:
$ plutil -p ~/Library/Safari/Extensions/Extensions.plist| grep "Bundle Directory Name" | sort --ignore-case
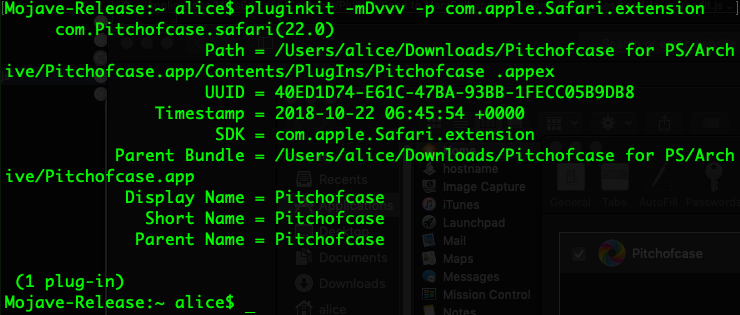
The new .appex style which require an Application bundle can be enumerated via the pluginkit utility.
$ pluginkit -mDvvv -p com.apple.Safari.extension
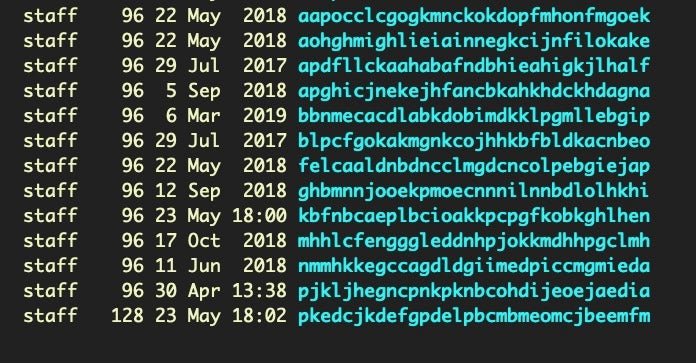
Extensions, particularly in Chrome have long been problematic and an easy way for scammers to control user’s browsing. Extensions can be enumerated in Chromium browsers from the Extensions folder:
$ ~/Library/Application Support/Google/Chrome/Default/Extensions; ls -al
Unfortunately, the randomized names and lack of human-readable identifiers is not helpful.
Suffice to say it is worth going over the contents of each directory thoroughly.
Like Safari, Firefox uses a similar, though reversed, bundleIdentifier format for Extension names, which is far more user-friendly:
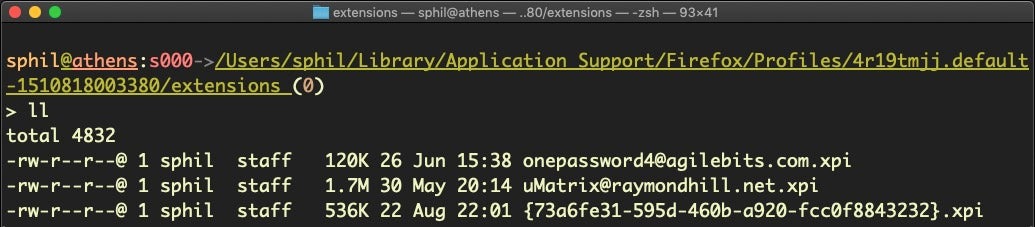
$ cd ~/Library/Application Support/Firefox/Profiles/*/extensions; ls -al
Browser Security Settings
Some adware and malware attempt to turn off the browser’s built-in anti-phishing settings, which is surprisingly easy to do. We can check this setting for various browsers with a few simple one-liners.
For Safari:
$ defaults read com.apple.Safari WarnAboutFraudulentWebsites
The reply should be 1 to indicate the setting is active.
Chrome and Chromium browsers typically use a “safebrowsing” key in the Preferences file located in the Defaults folder. You can simply grep for “safebrowsing” and look for {"enabled: true,"} in the result to indicate anti-phishing and malware protection is on.
$ grep 'safebrowsing' ~/Library/Application Support/Google/Chrome/Default/Preferences
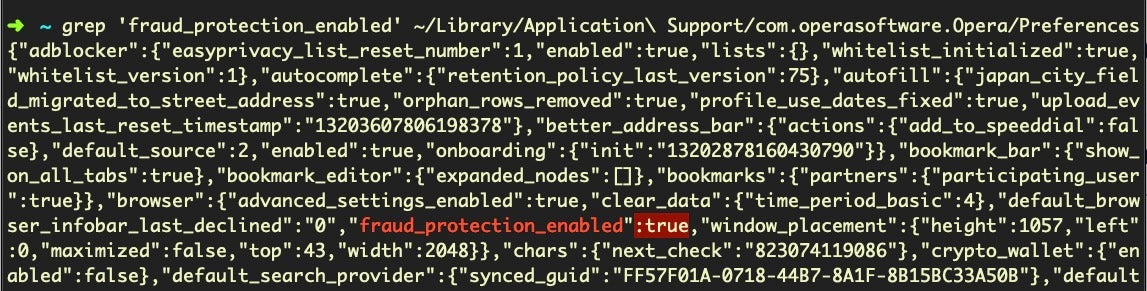
Opera is slightly different, using the key “fraud_protection_enabled” rather than ‘safebrowsing’.
$ grep 'fraud_protection_enabled' ~/Library/Application Support/com.operasoftware.Opera/Preferences
In Firefox, preferences are held in the prefs.js file. The following command
$ grep 'browser.safebrowsing' ~/Library/Application Support/Firefox/Profiles/*/prefs.js
will return “safebrowsing.malware.enabled” and “phishing.enabled” as false if the safe search settings have been disabled, as shown in the following images:

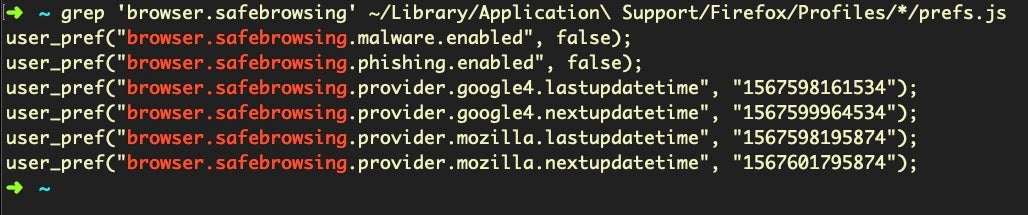
If the settings are on, those keys will not be present.
There are many other settings that can be mined from the browser’s support folders aside from history, preferences and extensions using the same techniques as above. These locations should also be searched for manipulation of user settings and preferences such as default home page and search engines.
Conclusion
And that brings us to the end of this short series on macOS Incident Response! There is much that we have not covered; the subject is as vast in its breadth as is macOS itself, but we have covered, in Posts 1, 2, and 3, the basics of where and what kind of information you can collect about the device’s activity, the users’ behaviour and the threat actor’s manipulations. For those interested in learning more, you could take a look at OS X Incident Response Scripting & Analysis by Jaron Bradley, which takes a different but useful approach from the one I’ve taken here. If you want to go beyond these kinds of overviews to digital forensics, check out the SANS course run by Sarah Edwards. Finally, of course, please follow me on Twitter if you have comments, questions or suggestions on this series and @SentinelOne to keep up with all the news about macOS security.